Availability Per Account Type
Trial
Lite
Pro
White Label
WL – Custom
Why Use Dropbox?
Knowing that there are many ways to manage videos that do not require uploading the video file to a server, EZWebPlayer provides the URL method of video management. If you already have simple access to the hosted location of your video and its URL in proper form, simply skip to Step 7.
Dropbox is a powerful file sharing application that simplifies many direct file sharing tasks, and also offers a limited level of organization to virtually any type of file, even media files. Like any other server based storage system, there are limits to what can be done for free and what requires some investment, so keep in mind that media files are always much larger than document files.
Also keep in mind that EZWebPlayer actually does many things that Drop box accomplishes, but differently. Drop Box’s strength lies in link sharing limited to other Drop Box clients while EZWebPlayer does the heavy lifting for video and audio file sharing under consistent branding, not just links. The distinction is a time saver for your video viewing audience as well as those who manage your assets. If you want your audience at the other end of the sharing link to actually watch the video or listen to the audio file upon receiving your Share, then simply use EZWebPlayer to do it all. Because EZWebPlayer does have sharing options that allow channel, video and advertisement (CtA) sharing, as well as link sharing. But, all of us at EZWebPlayer actually use Dropbox and so, we get it. Dropbox is powerful, and, like EZWebPlayer, is constantly adding new features and therefore more choices. Thus this helpful post.
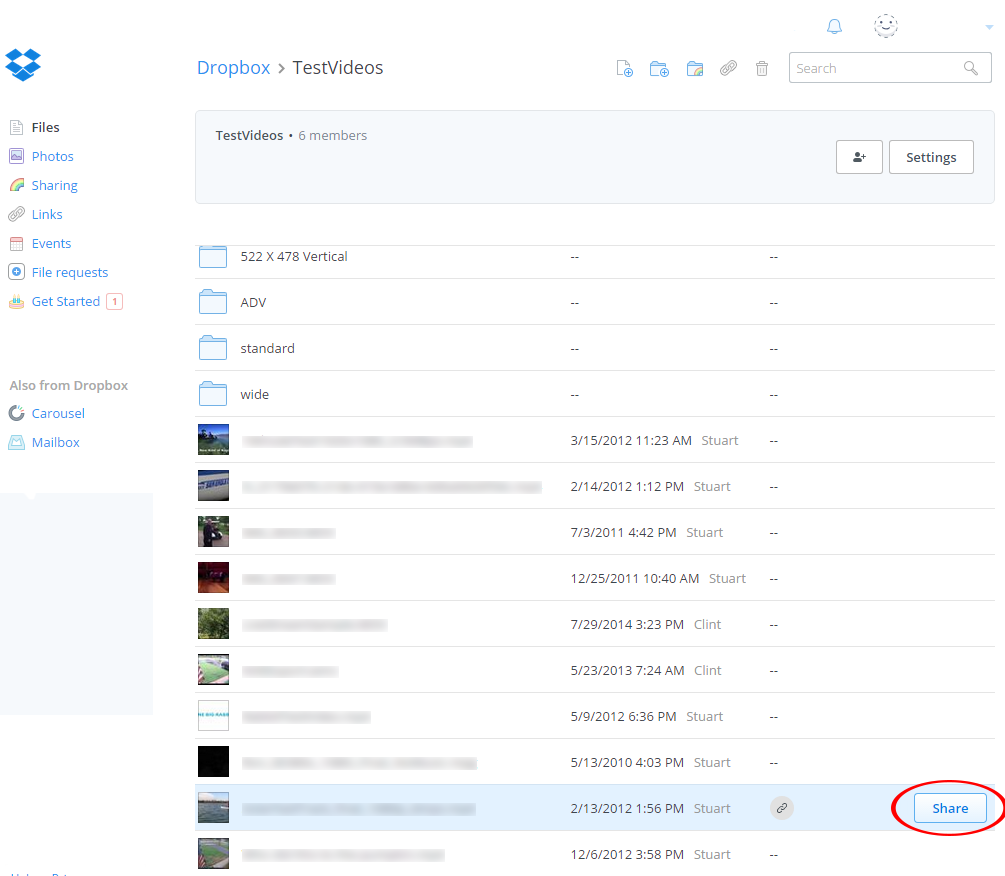
Dropbox – Grab the Video Information
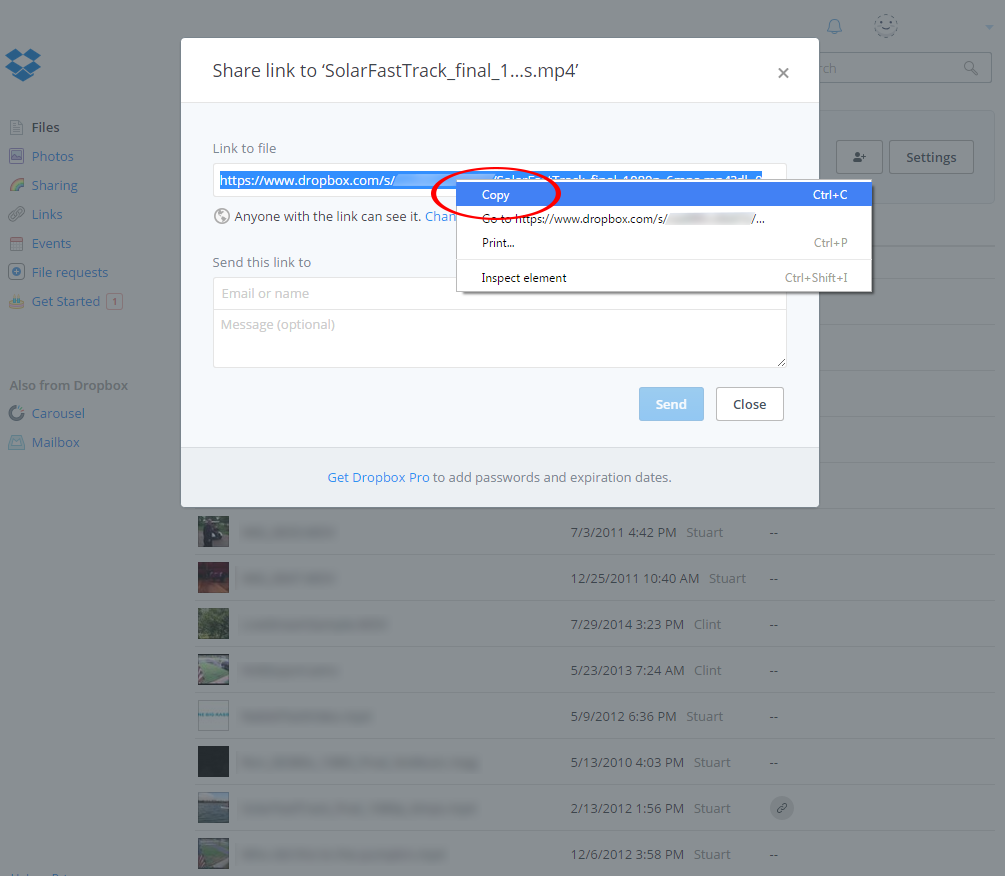
Step 1. From within your Dropbox account, locate a “.mp4” video file and click on it’s share option.
**Because this process bypasses the typical EZWebPlayer upload/transcode, the video file must use an .mp4 file format to work within the player. So, if you are experiencing issues using Dropbox with EZWebPlayer right away, you might check what file type you are attempting to upload.
Step 2. Place the mouse cursor within the “Link to file” text box and press ctrl+a to perform a “select all” action.
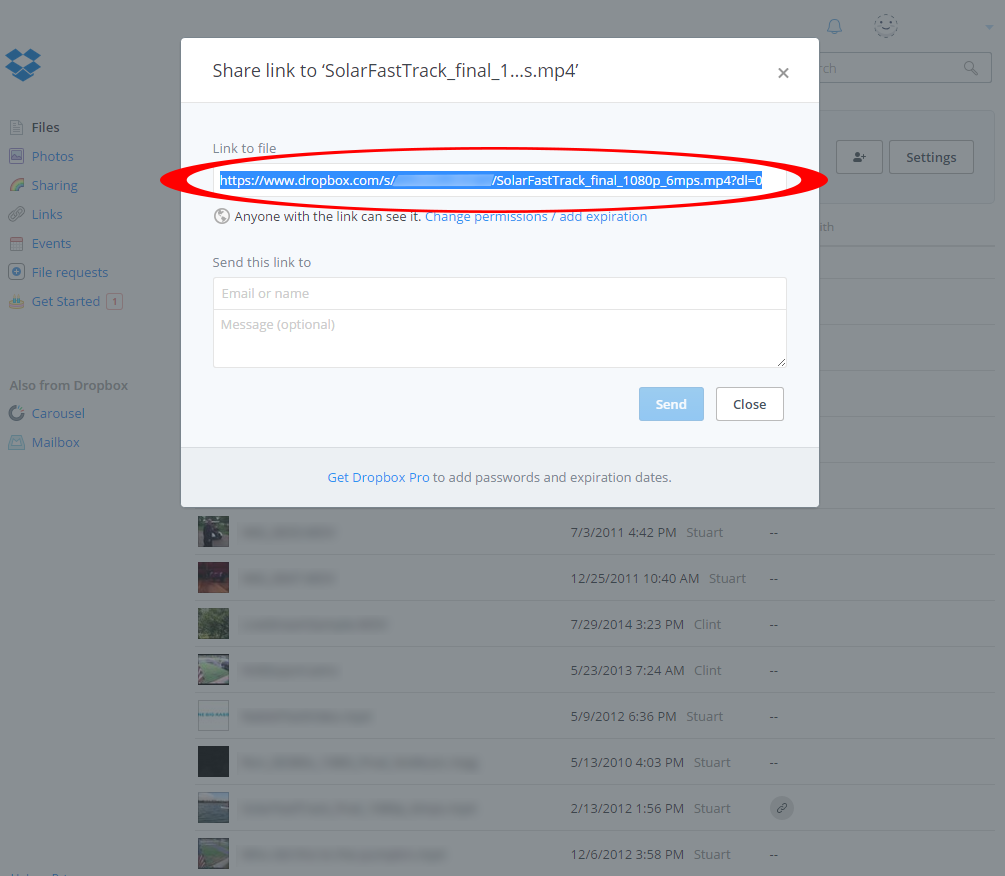
Step 3. Then using the mouse, right click on the selected text to open a pop up window. Click on the option to “copy” the selected text.
Notepad – Editing the Video’s URL
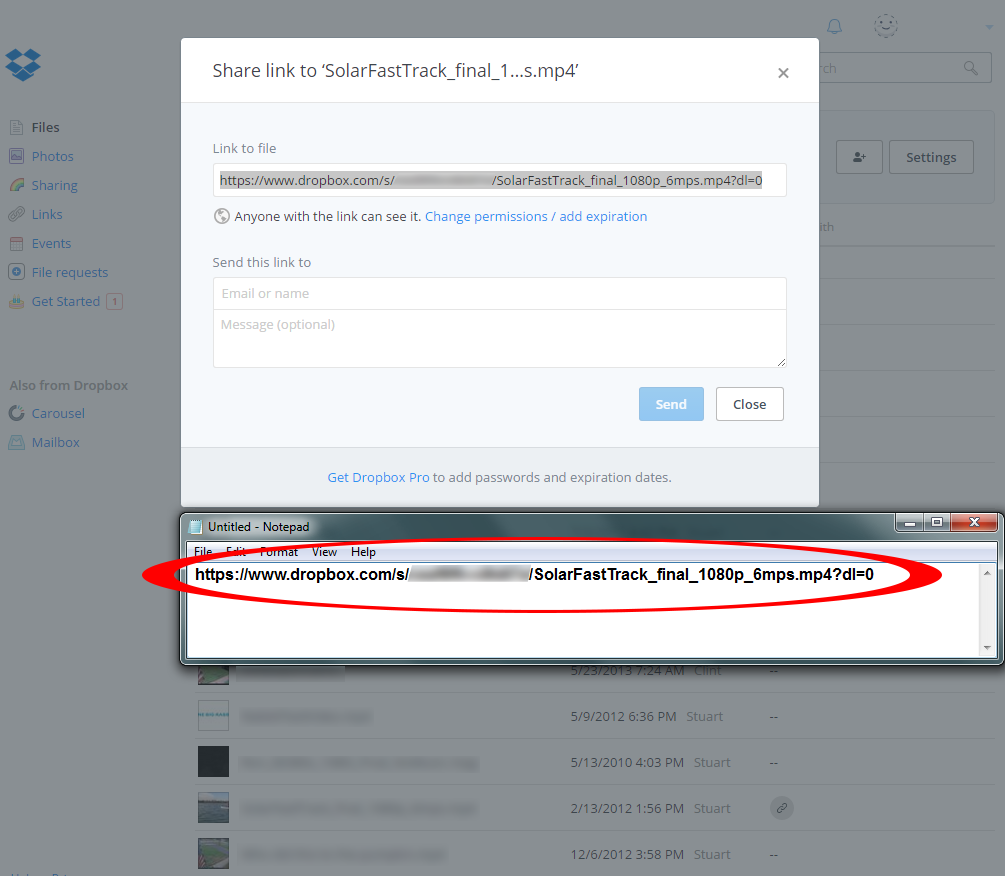
Step 4. We will now need to make 2 small modifications to the copied text. We recommend pasting the copied text into a text editor like Notepad.
Using an application that is more for word processing is not appropriate, as applications like MS Word add hidden code that can get in the way and cause errors, as well as slow down your work flow for what should be a simple task.
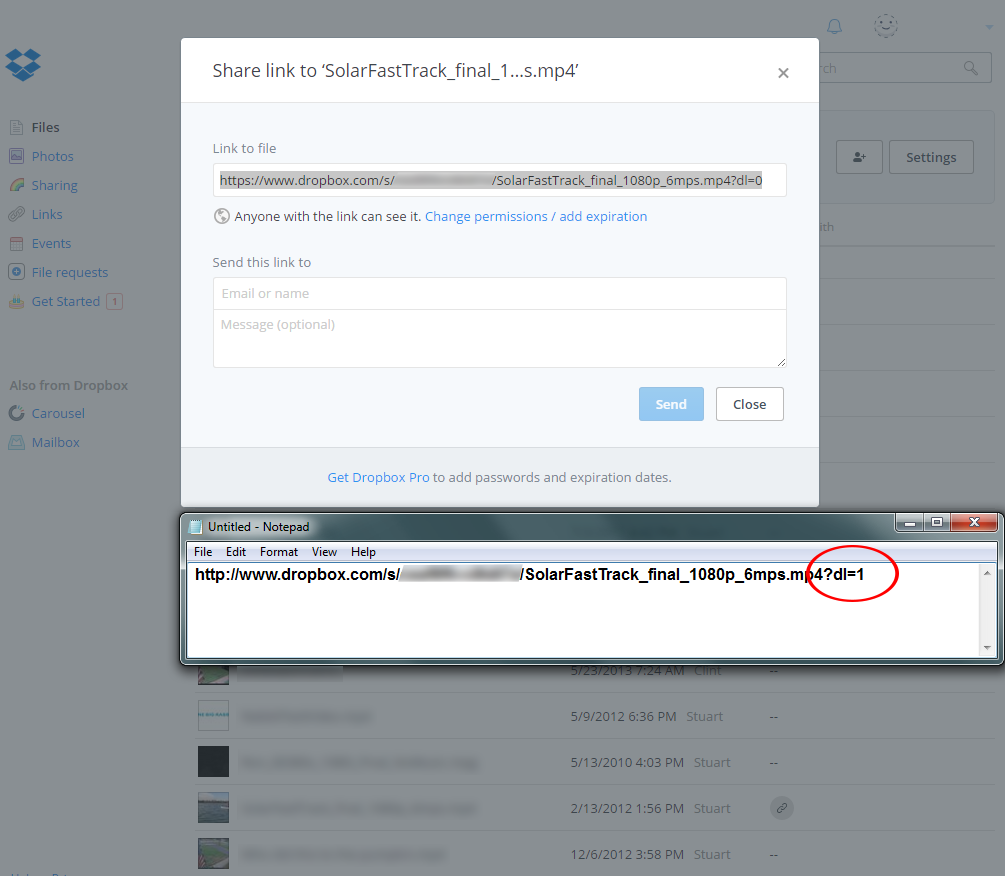
Step 5. At the end of the text change “?dl=0” to “?dl=1” (changing the 0 to a 1).
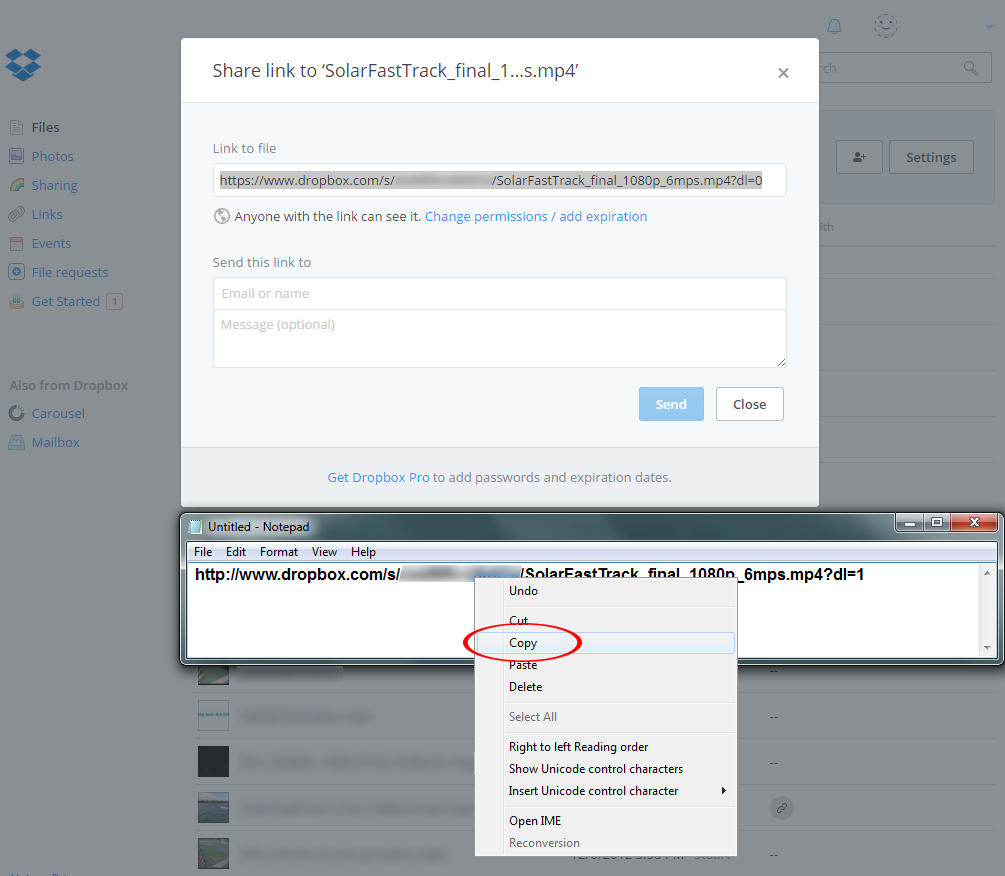
Step 6. You are now ready to place this updated URL into your EZWebPlayer account. Use the mouse to right click on the text and copy it to your clipboard (Copy/Paste function).
EZWebPlayer – Adding the Video to Your Account
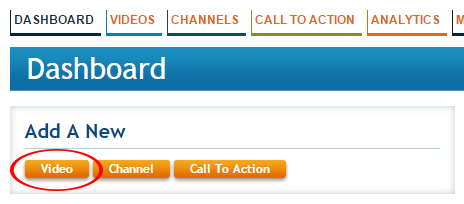
Step 7. Log into your EZWebPlayer account and from your Dashboard page, select the Add A New “Video” option.
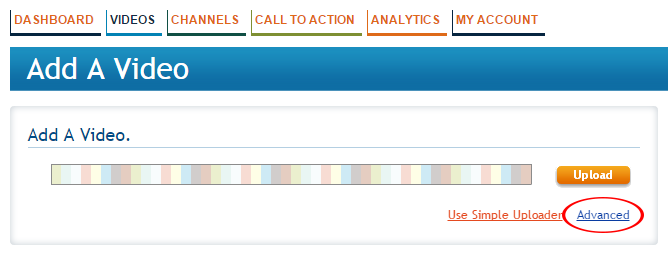
Step 8. Select the Advanced option.
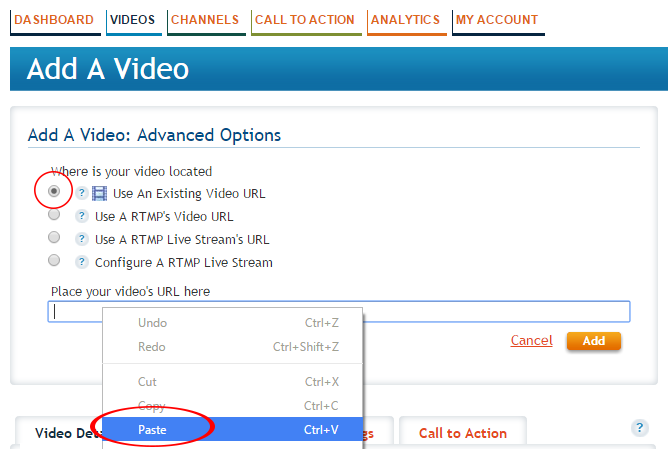
Step 9. Make sure that option 1 is selected, “Use an existing Video URL.” This should be the default selected option. And using the mouse, right click within the text input box and perform a “Paste” action.
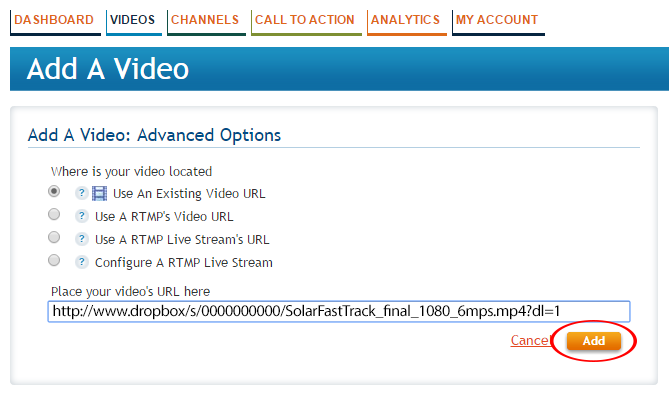
Step 10. Your updated URL to your DropBox video should now be within the text input box. Select the “Add” button.
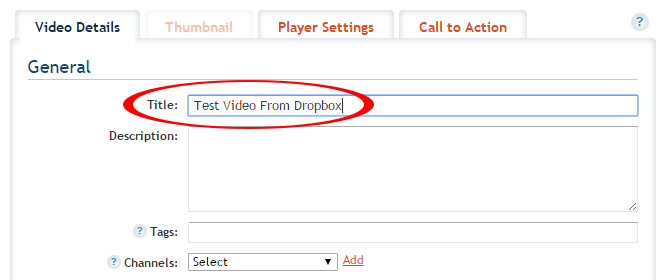
Step 11. Within the Video Details tab on the same page, give your new video a title.
Without a title, nothing will be saved. This workflow is true for all video management functions, not just for this current task.
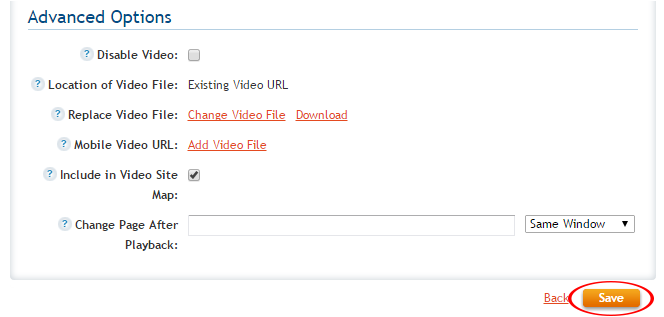
Step 12. Then scroll the page to the bottom and select the “Save” button to create this player within your account.
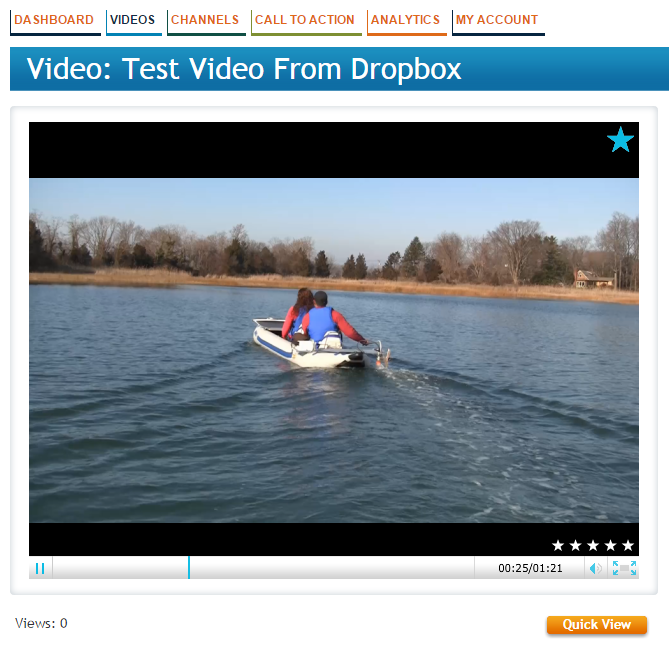
You should now be able to play your video.