Availability Per Account Type
Trial
Lite
Pro
White Label
WL – Custom
Introduction
In order to present texted subtitles for your livestreams and videos, we suggest the following work flow using common technology. The accuracy results will mostly be based on two elements unique to each production:
- Available bandwidth
- Clarity of the presented audio dialogue.
Follow the instructions below, and within a few minutes, you’ll have a deployable sub title engine that operates at the player level where it belongs.
Speechlogger is loaded with options. They did this one right. We suggest that you take the time to learn the app, not just follow our quick start instructions for just the basics.
Notes
- In this sample we have a 2 monitor setup.
- 1 monitor has XSplit
- 1 monitor has a browser page open at full screen pointing to https://speechlogger.appspot.com/en/.
- This sample was created from a Windows PC.
- The monitor resolution was set to 1920 x 1080.
Getting Started
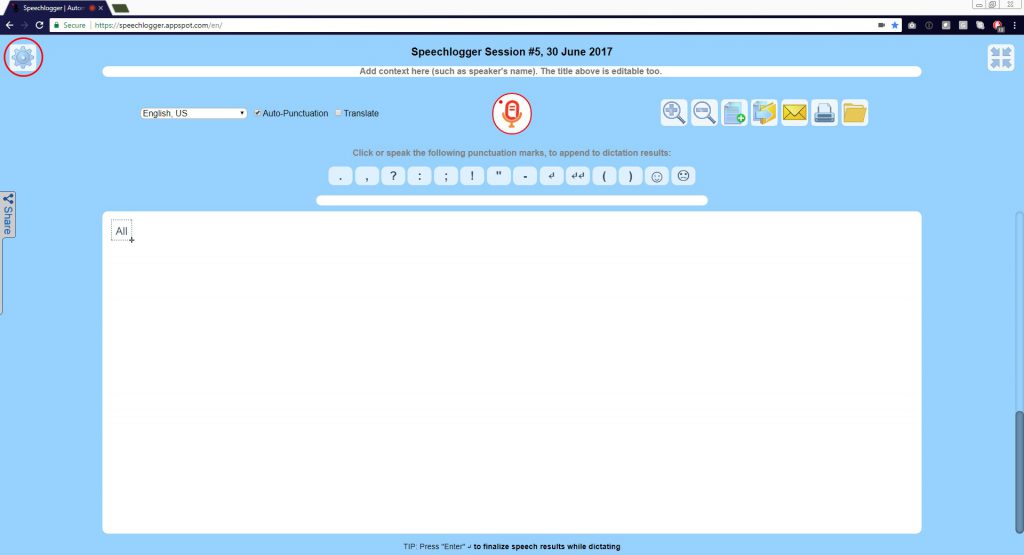
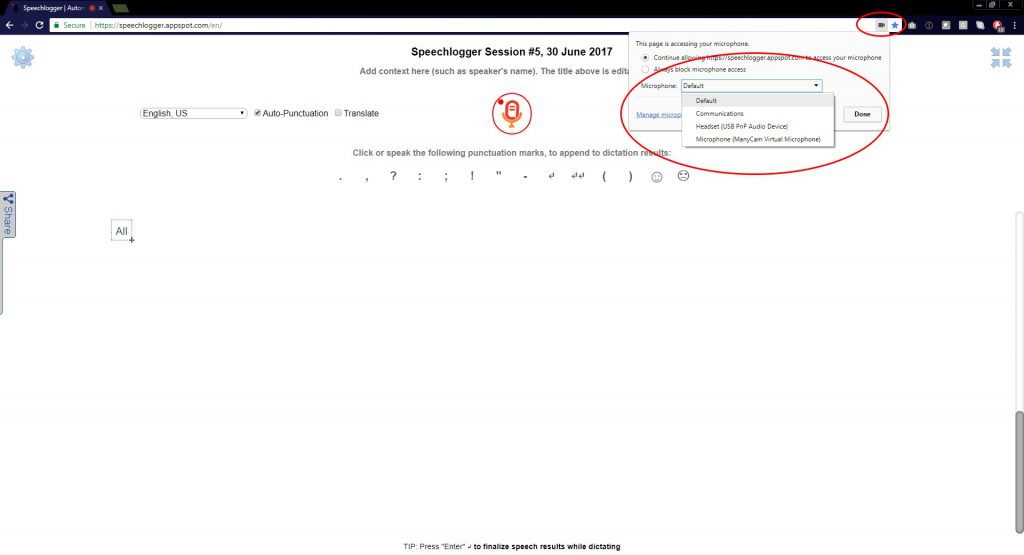
Step 1. In your browser navigate to https://speechlogger.appspot.com/en/ and press the gear icon in the top left of the page.
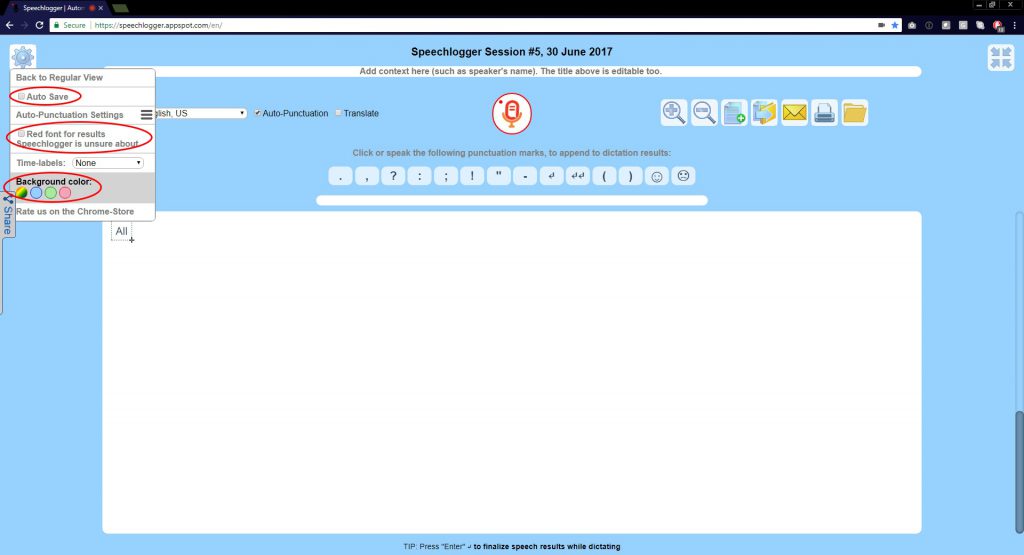
Step 2. Turn off Auto Save, Red font for results Speechlogger is unsure about. And change the background Color to white.
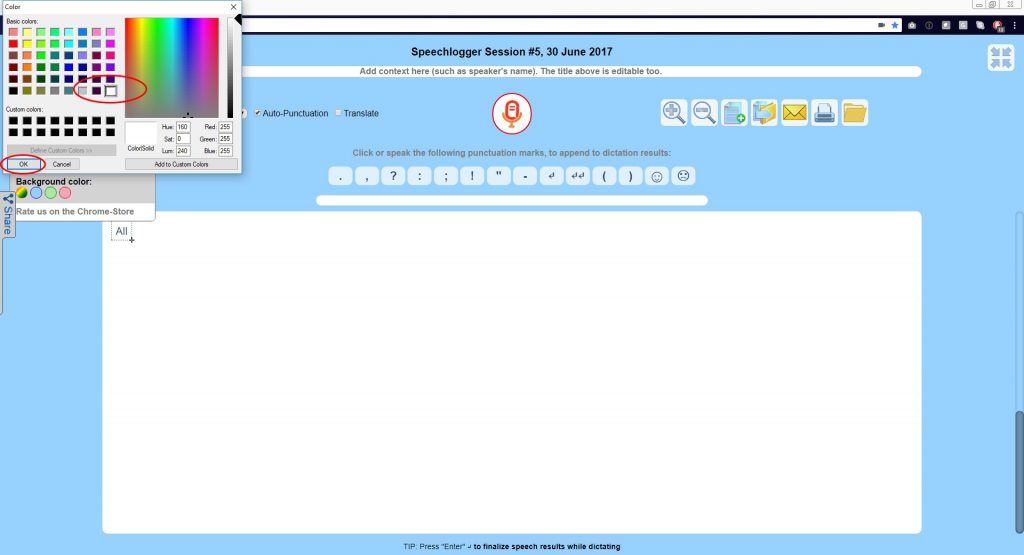
Step 3. Select the white color block and press OK.
Step 4. Now press the microphone icon in the top center of the page to allow the page to start listening. Then in your browser’s address bar should be a new media icon. Click on this to change your microphone options and select your audio device you wish to use. In this sample my headset is the default microphone.
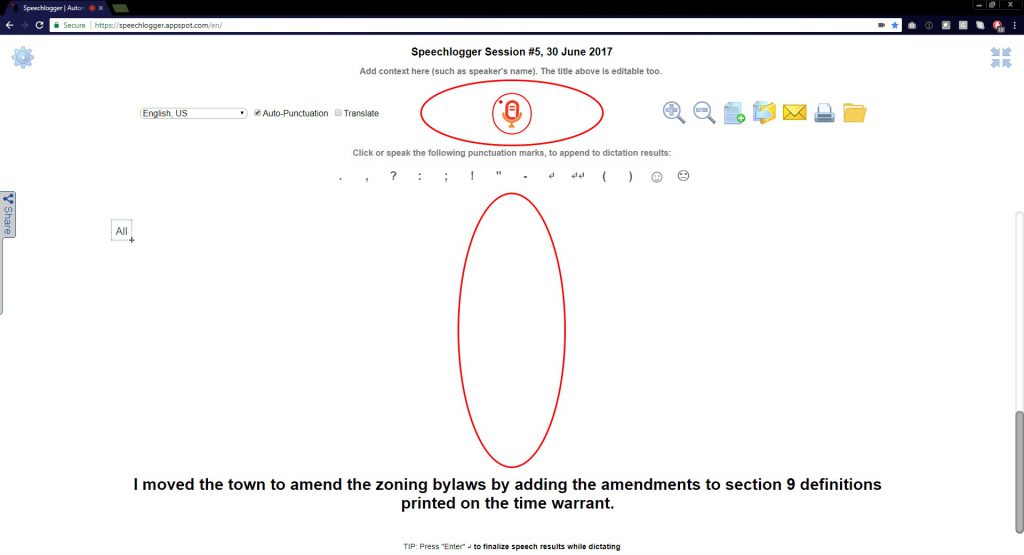
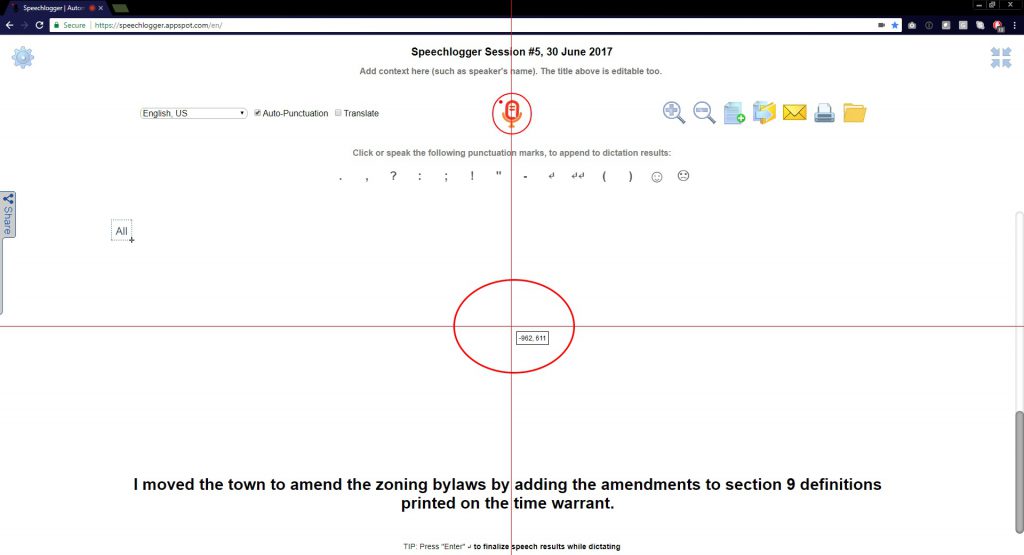
Step 5. As you speak you should start to see what you say, transcribed in speechlogger. We need to fill this up until you have words on the bottom 2 lines. In this sample I said the words “New Line” a few times then would test speak until the bottom 2 lines of the page are text.
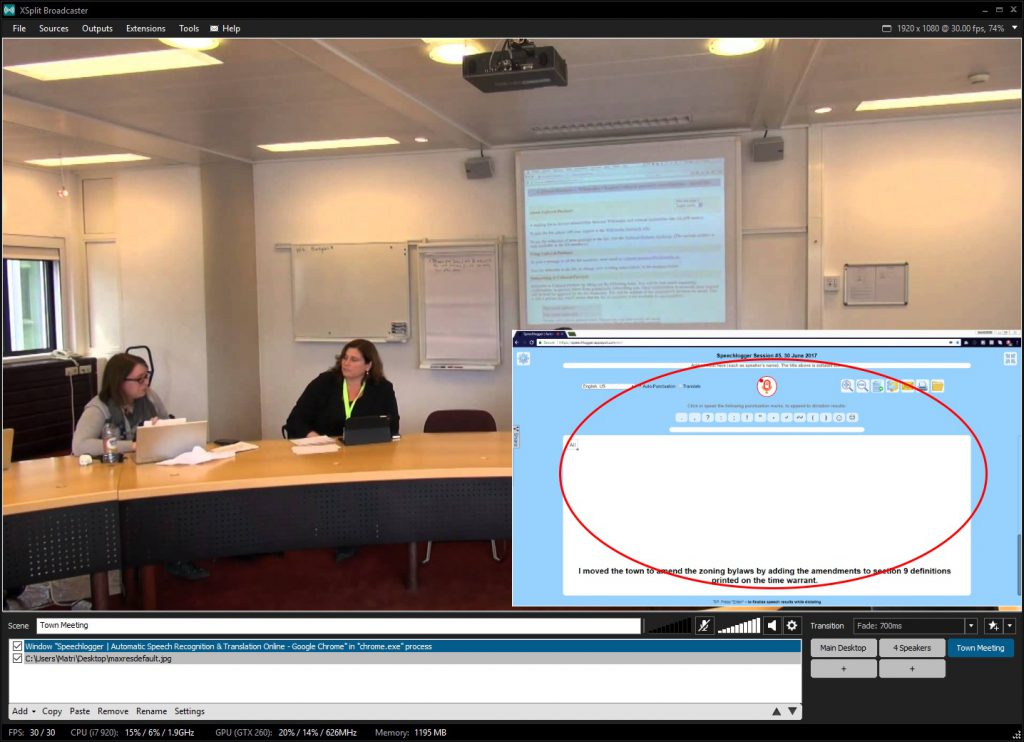
Step 6. In Xsplit, in the bottom left select the Add option.
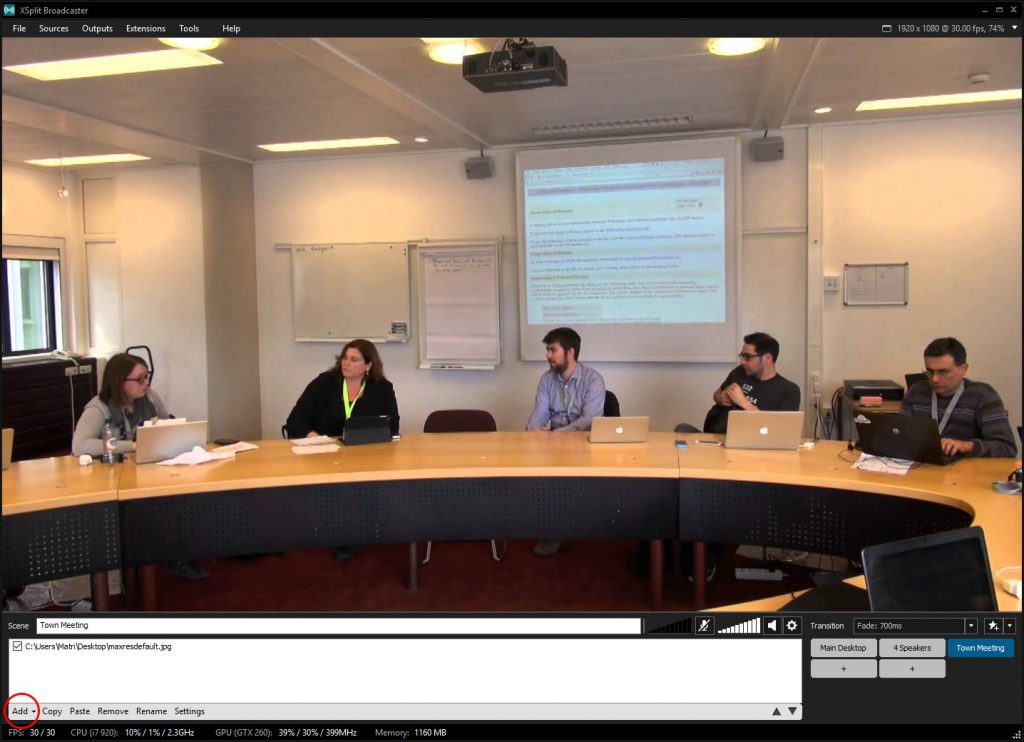
Step 7. Select Screen Capture.
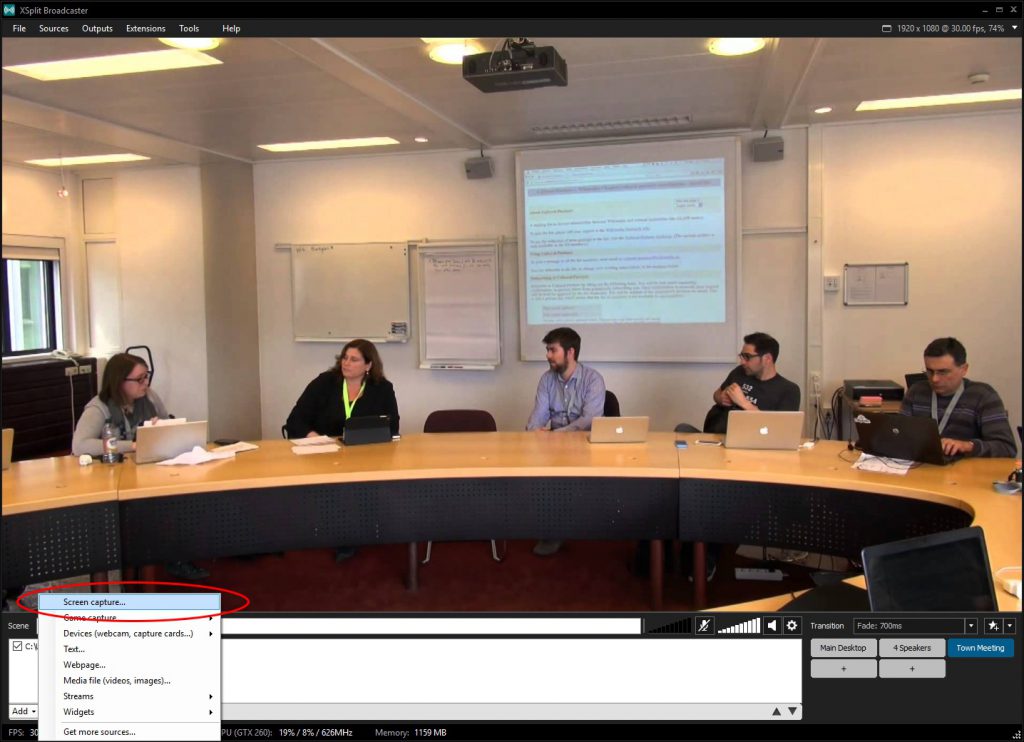
Step 8. Click once on the speechlogger page to capture the entire monitor.
Step 9. In XSplit you should now see the second monitor as a layer that you can then edit.
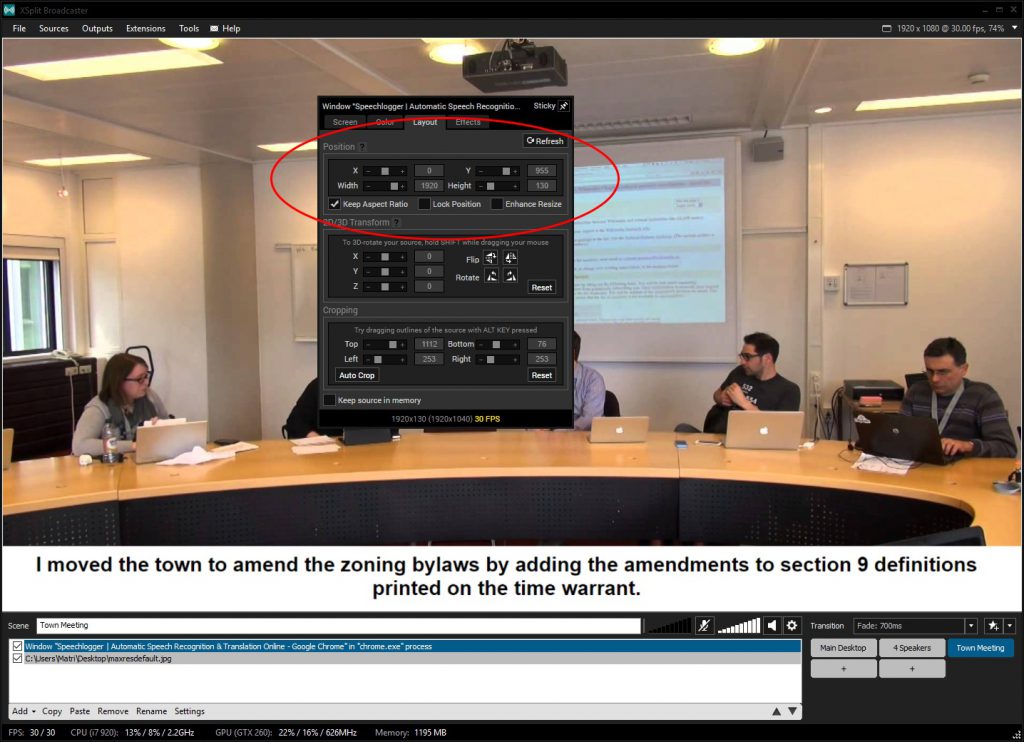
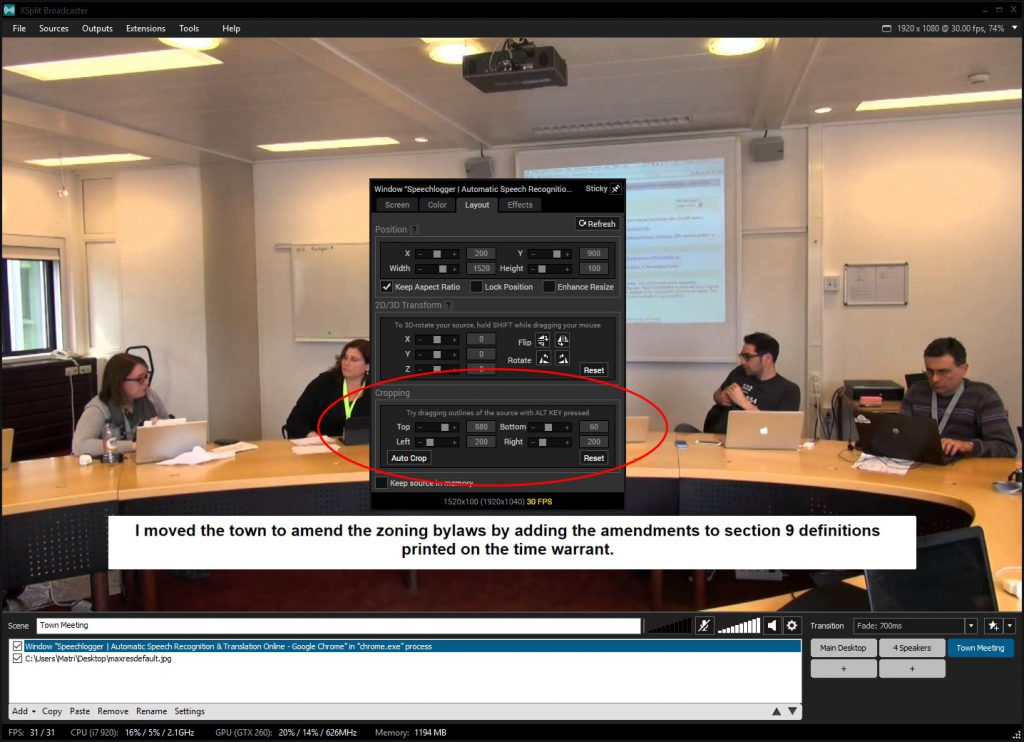
Step 10. Right click on the new layer and on the Layout tab set the Position option to.
- X: 0
- Y: 0
- Width: 1920
- Height: 1080
- Keep Aspect Ration: Selected
This will resize / position the new monitor layer.

Step 11. Now lets crop this new monitor layer. Set
- Top: 880
- Bottom: 60
- Left: 200
- Right: 200
This will crop out the bottom 2 text lines from speechlogger.
Step 12. Now that the layer is cropped lets resize / position the monitor layer.
- X: 0
- Y: 955
- Width: 1920
- Height: 130
Now as you run your livestream and speak, what you say will be transcribed into the stream.