Availability Per Account Type
Trial
Lite
Pro
White Label
WL – Custom
Why Amazon S3?
As this post leans heavily towards explaining Amazon S3 Bucket operations, some may wonder why, when there are literally hundreds of options for third party file hosting. The WHY is because EZWebPlayer has partnered with Amazon for doing the heavy file storage lifting in the background. And, since many web video users already have an Amazon S3 account, we have herein described directly managing that account to operate some standard file functions.
Of course, it must be pointed out that EZWebPlayer does all of this automatically and for no extra charge. So, literally everyone can benefit from letting EZWebPlayer do everything it was designed to do, saving you time and money. But, we truly get it if you want to handle your Amazon S3 account if you are already accustomed to the way it operates. No problem, and that’s why we help you here.
What You Will Need
*Read this before you begin. You will need
- An active EZWebPlayer account.
- An active Amazon Web Services account.
- Amazon CloudBerry Explorer (Free) to add media to your S3 Bucket.
- Pre rendered video and a possible thumbnail for your player. – Link coming soon
Creating an Amazon S3 Bucket
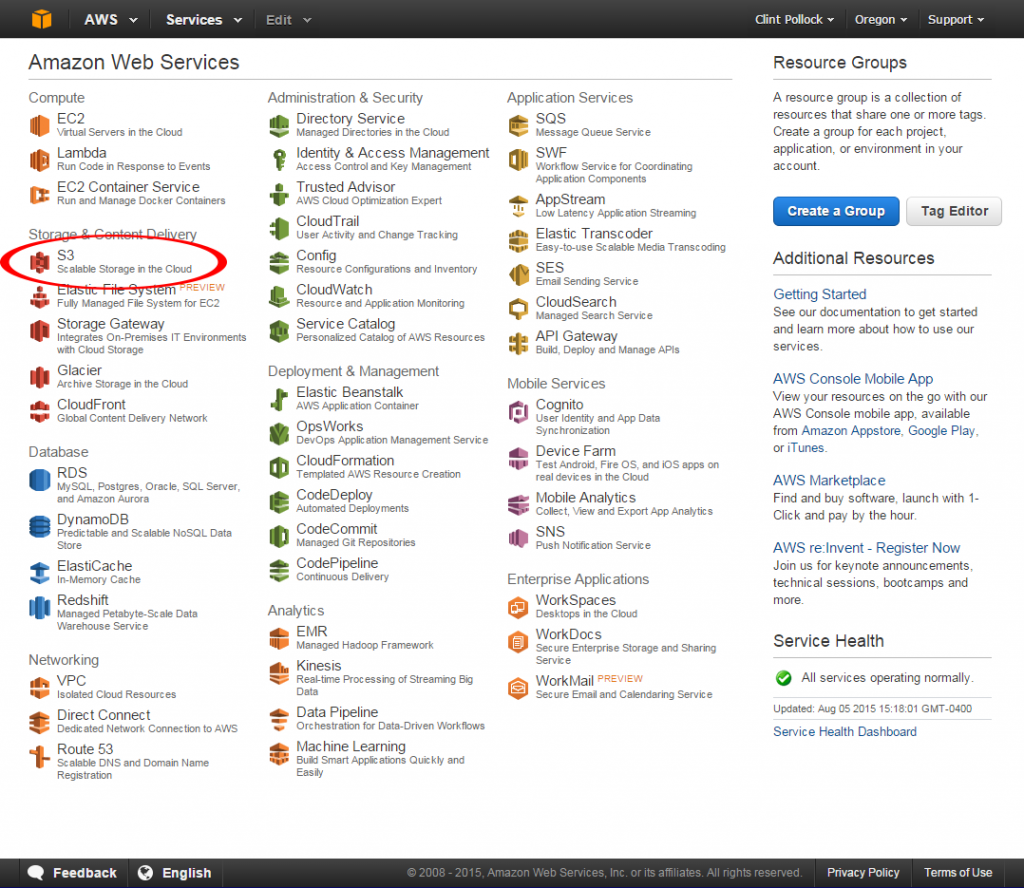
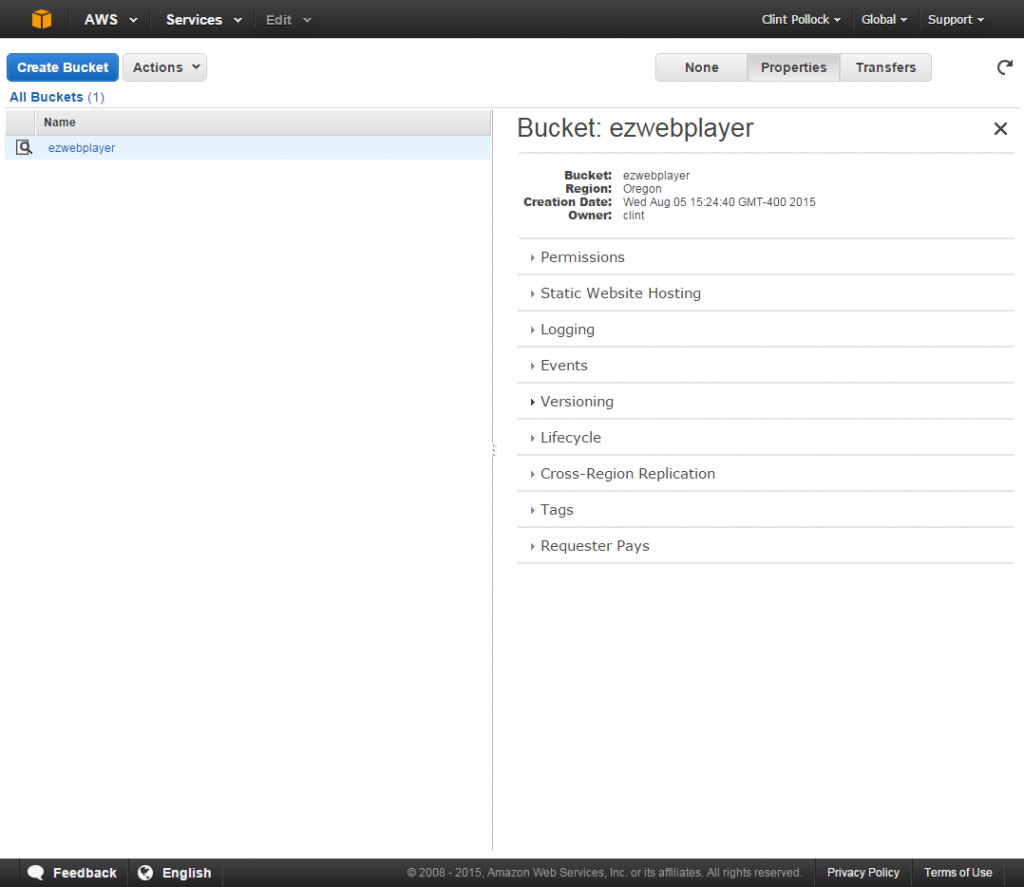
Step 1. If you already have an S3 bucket set up on your Amazon Web Service account skip to step 5, otherwise log into your Amazon Web Sevices account https://aws.amazon.com/. Navigate to your dashboard and select the S3 option.
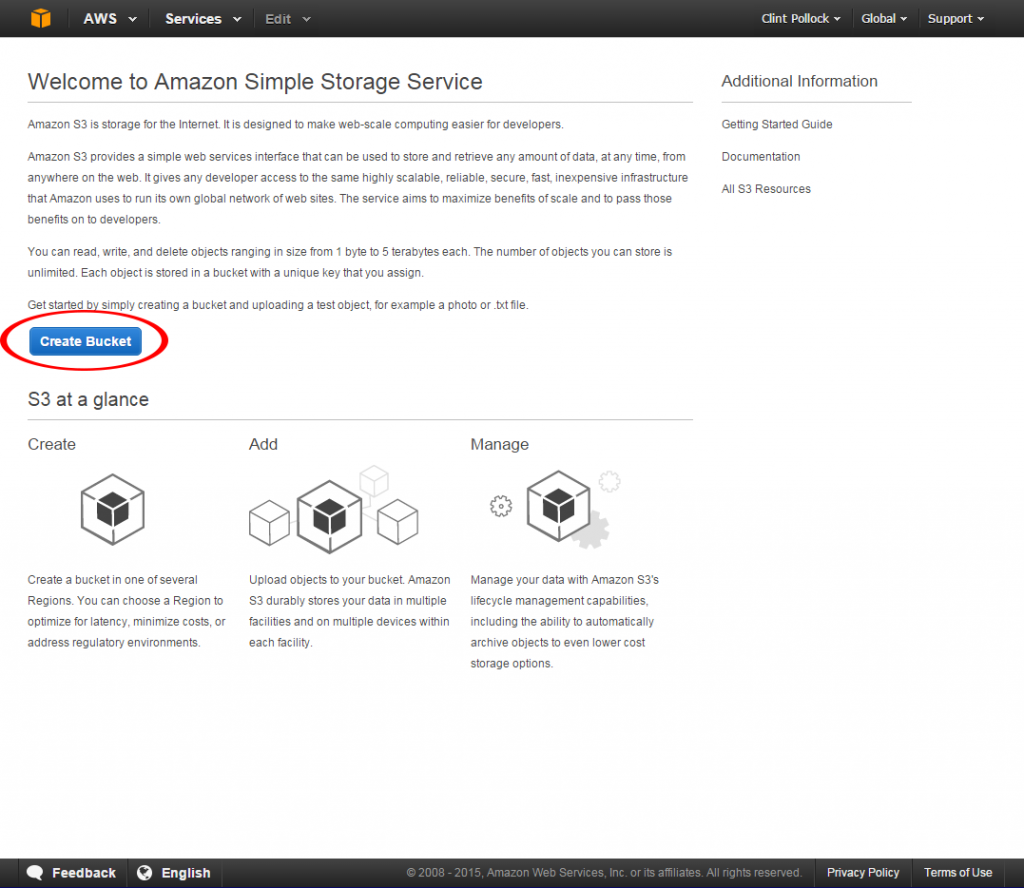
Step 2. Select to create a new S3 bucket.
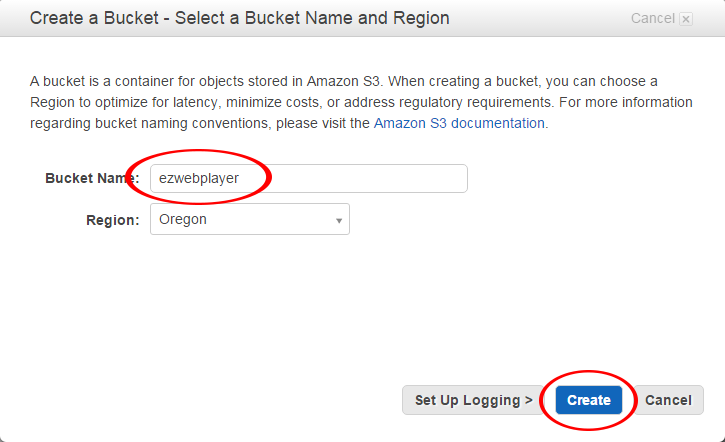
Step 3. Name your S3 bucket and set its region. Make sure to use only lowercase letters. You will not be able to use special characters like the space bar or the underscore. Click create to finish making this S3 bucket. Please make sure to use a unique bucket name.
Step 4. Now your S3 bucket is created.
Adding media to your Amazon S3 Bucket
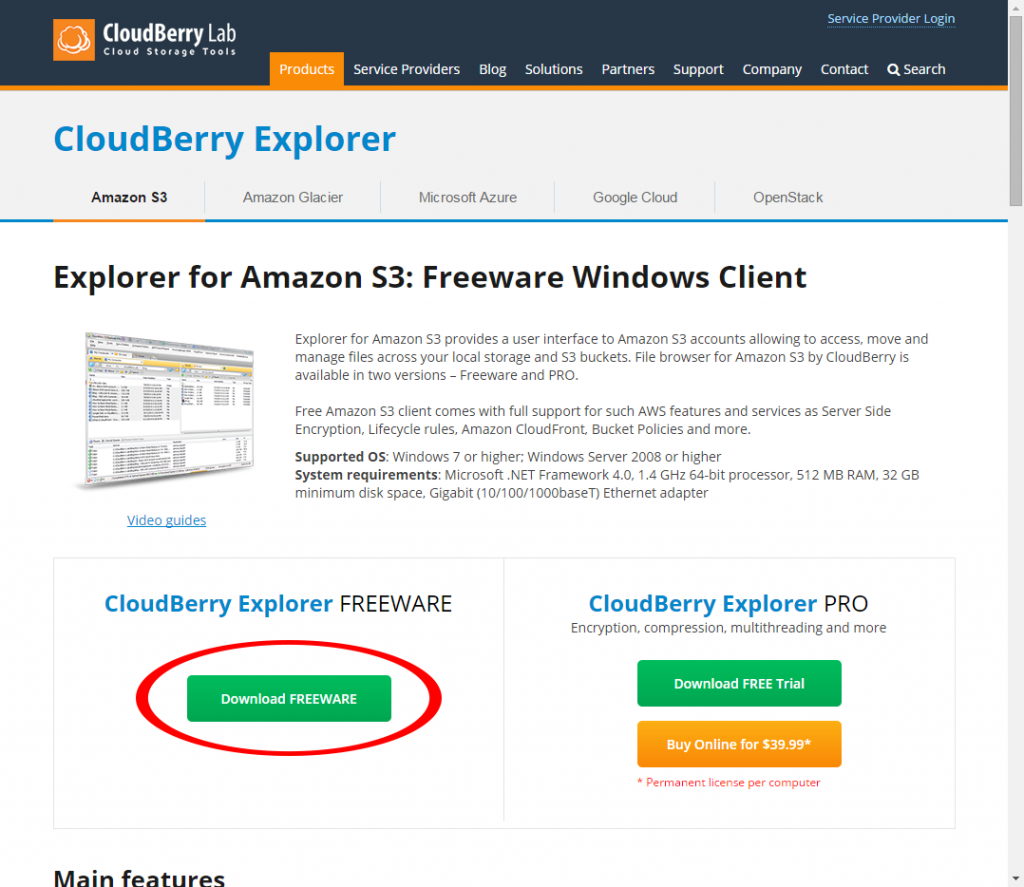
Step 5. If your S3 bucket already has media then skip to step 24. Let’s get an application that will allow you to add media to your newly created S3 bucket. Amazon provides an application called CloudBerry Explorer to do just this. http://www.cloudberrylab.com/free-amazon-s3-explorer-cloudfront-IAM.aspx Go ahead and select the free option.
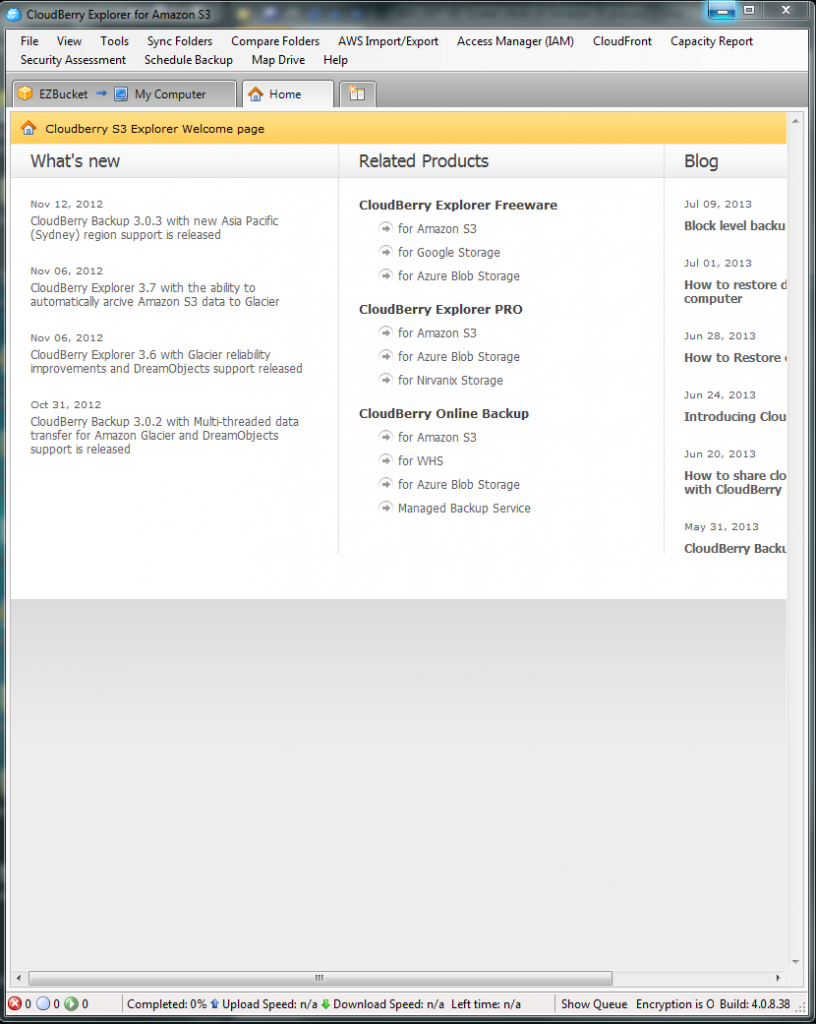
Step 6. Once downloaded and installed go ahead and open the application.
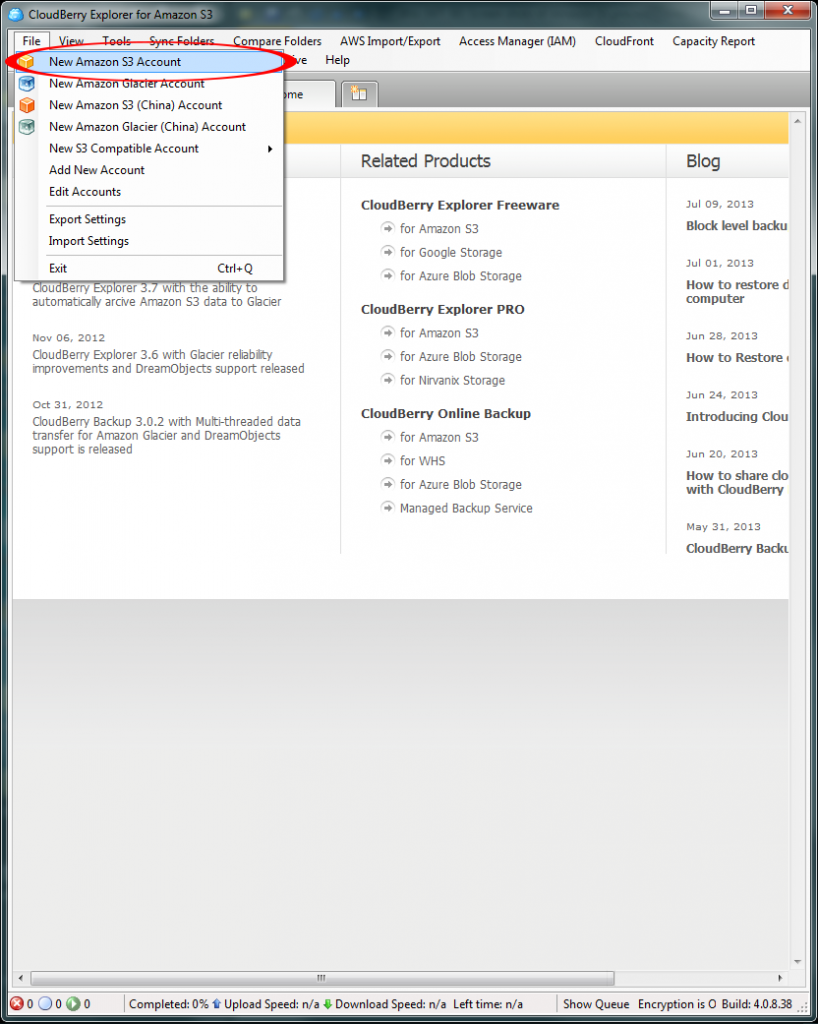
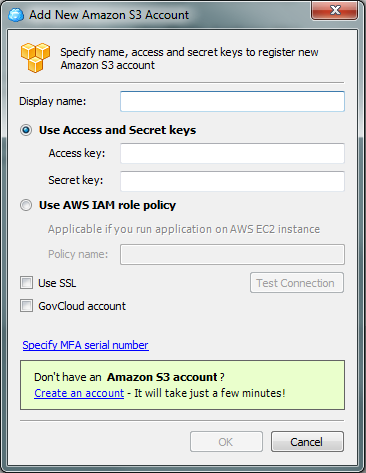
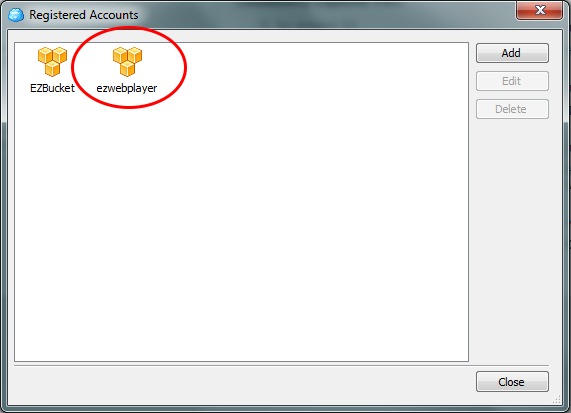
Step 7. To connect it to your S3 bucket select File/New Amazon S3 Account.
Step 8. You will need to name this connection profile, your S3 buckets Access key and its Secret key.
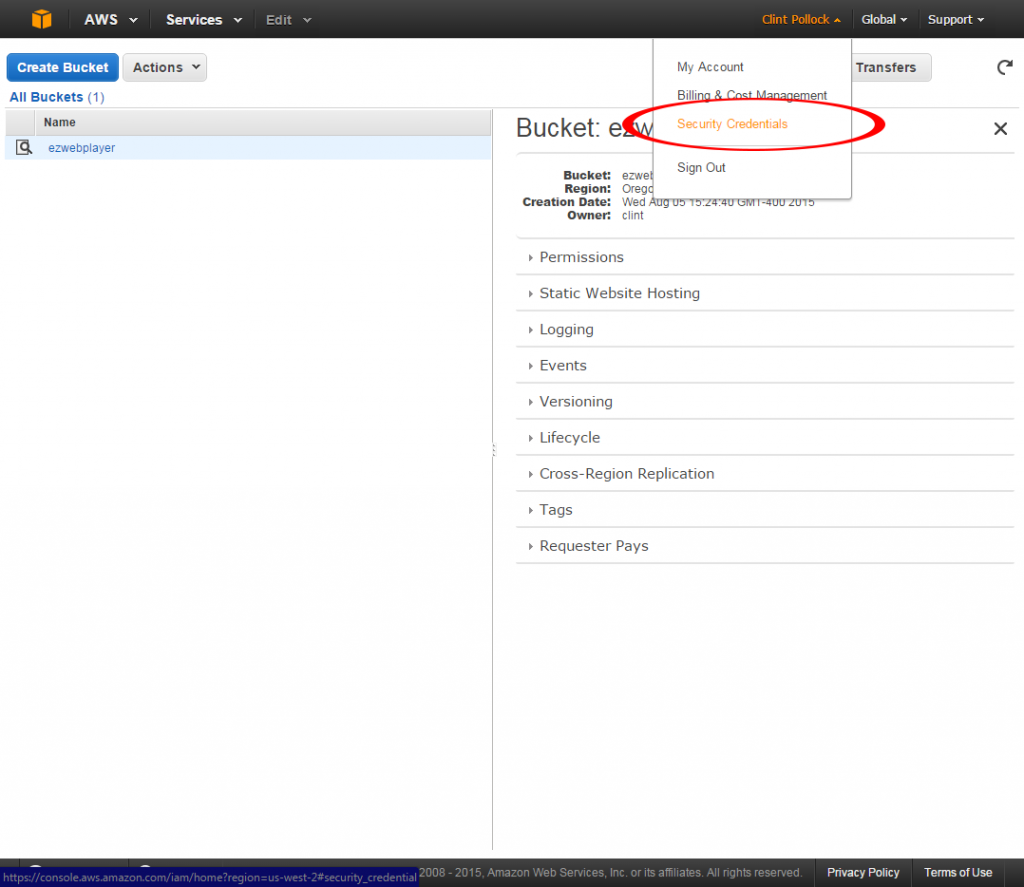
Step 9. On your Amazon Web Services account select your profile name to open the drop down window and select Security Credentials.
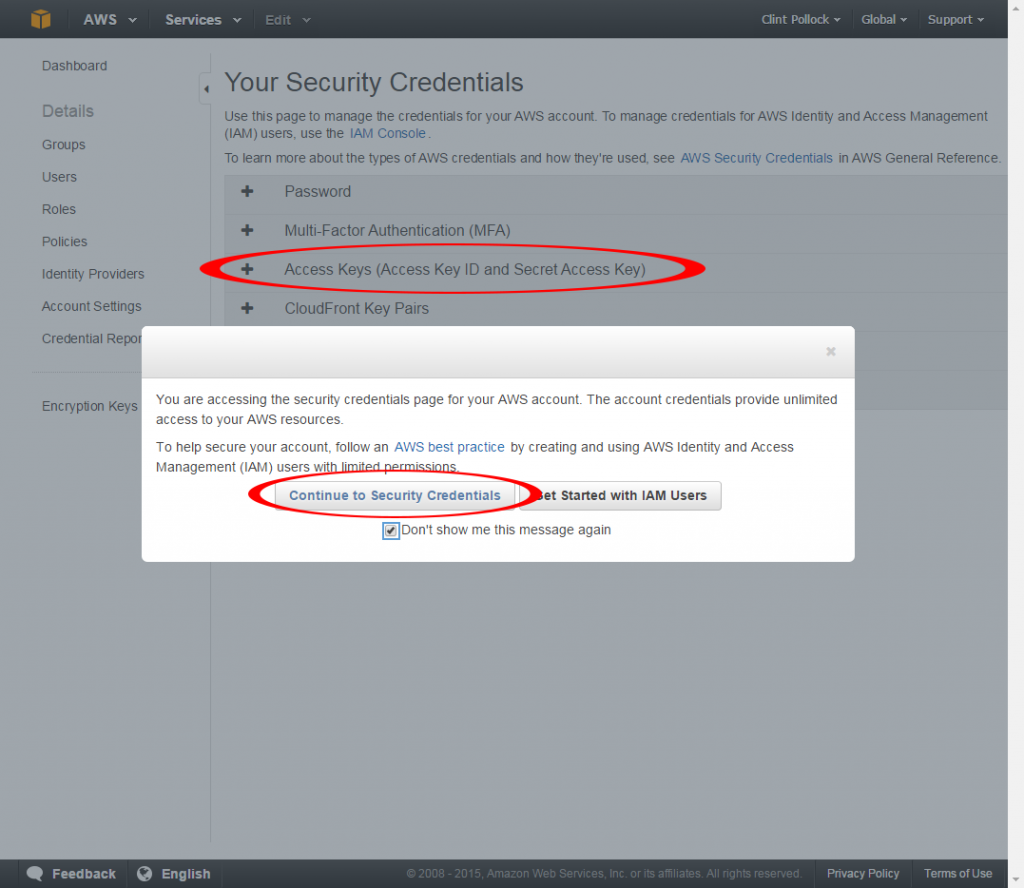
Step 10. Select Access Keys and in the pop up window select Continue to Security Credentials. If you are planning on having multiple S3 buckets you should select the Don’t show me this message again option to skip this step for the next time.
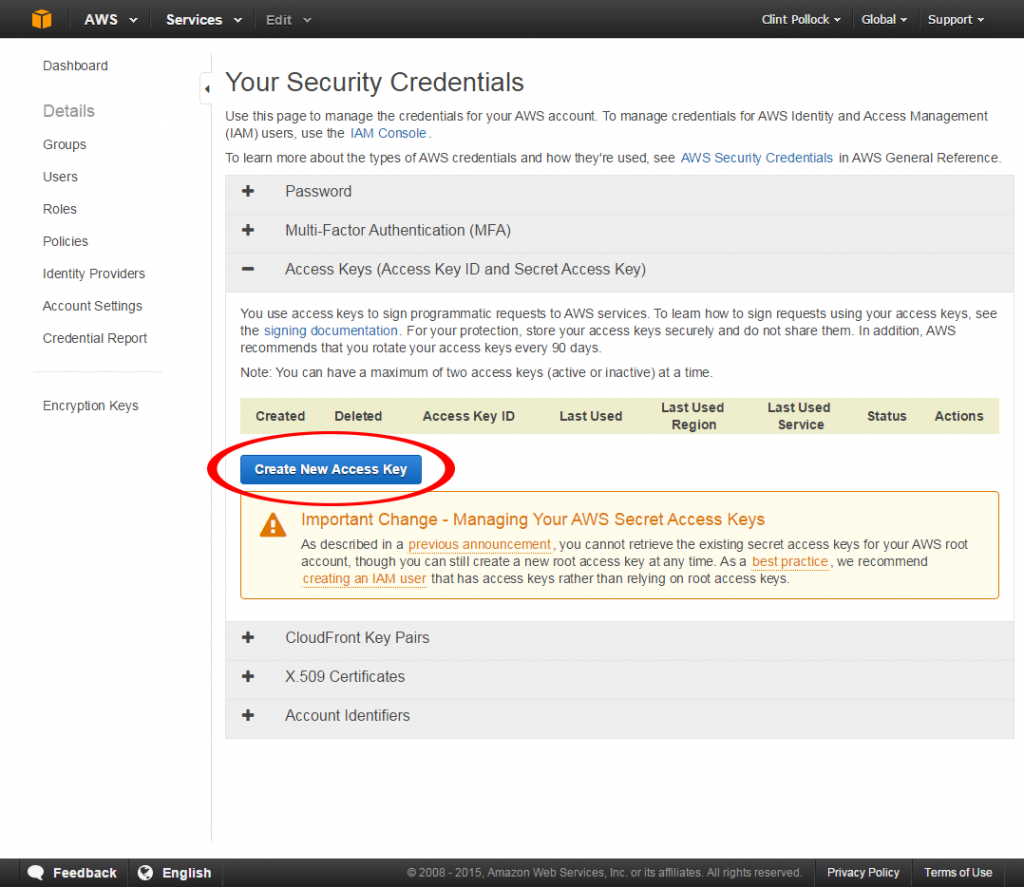
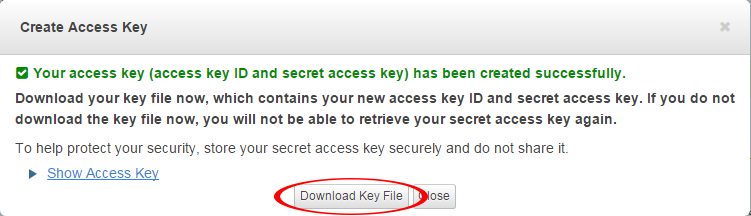
Step 11. Click the Create New Access Key option.
Step 12. At this point you should download the Key file, to make sure you have a copy of the access key and the secret key.
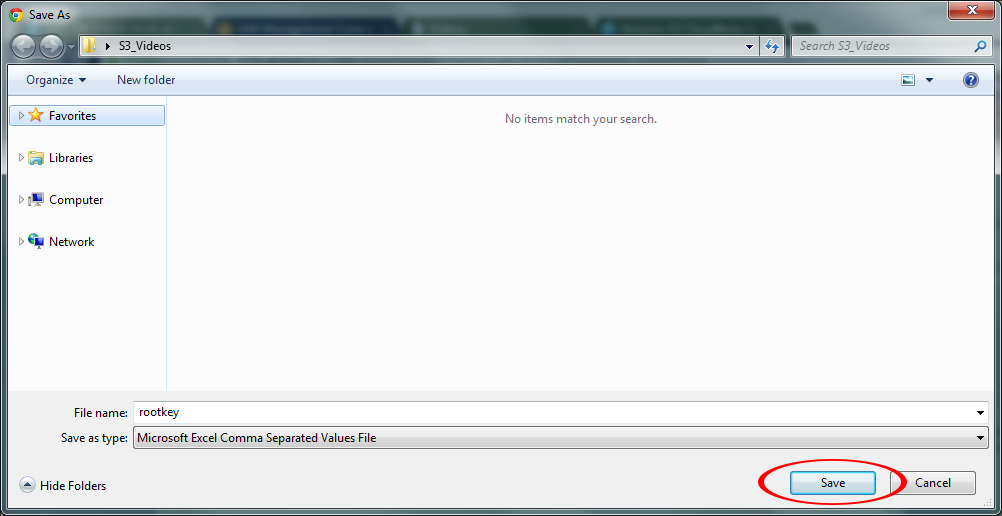
Step 13. Locate were you want to save this file and click save. In this example I saved this file with my media.
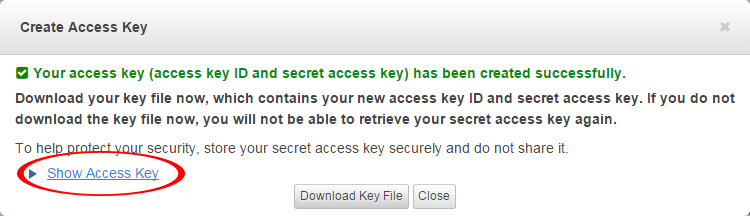
Step 14. Now select to Show Access Key.
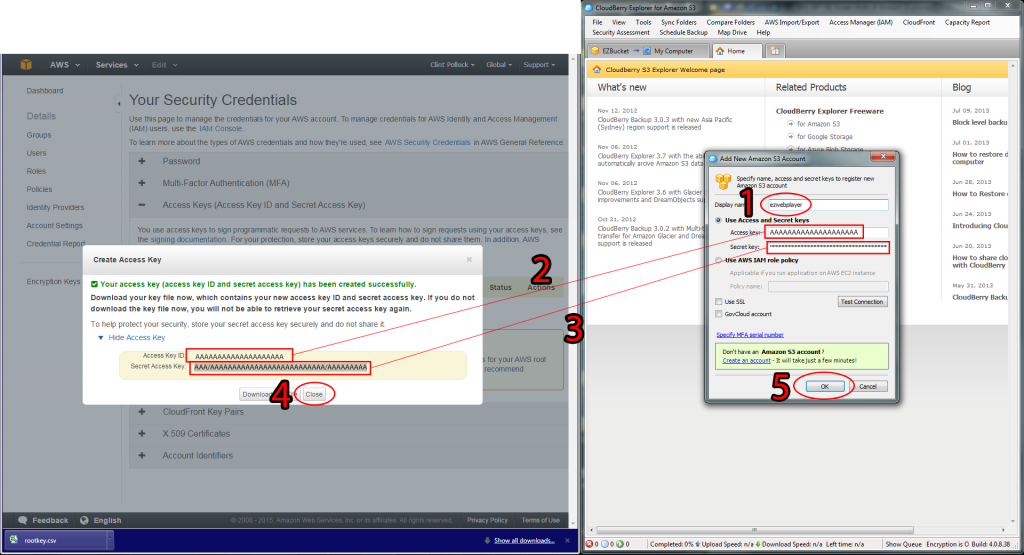
Step 15. You will want to have your browser open while you have the CloudBerry Explorer open to ease of use.
- Name your profile the name of your bucket.
- Copy over the Access Key to to Amazon CloudBerry Explorer.
- Copy over the Secret Key to to Amazon CloudBerry Explorer.
- Close the pop up window in your browser window
- and click ok in your Amazon CloudBerry Explorer window.
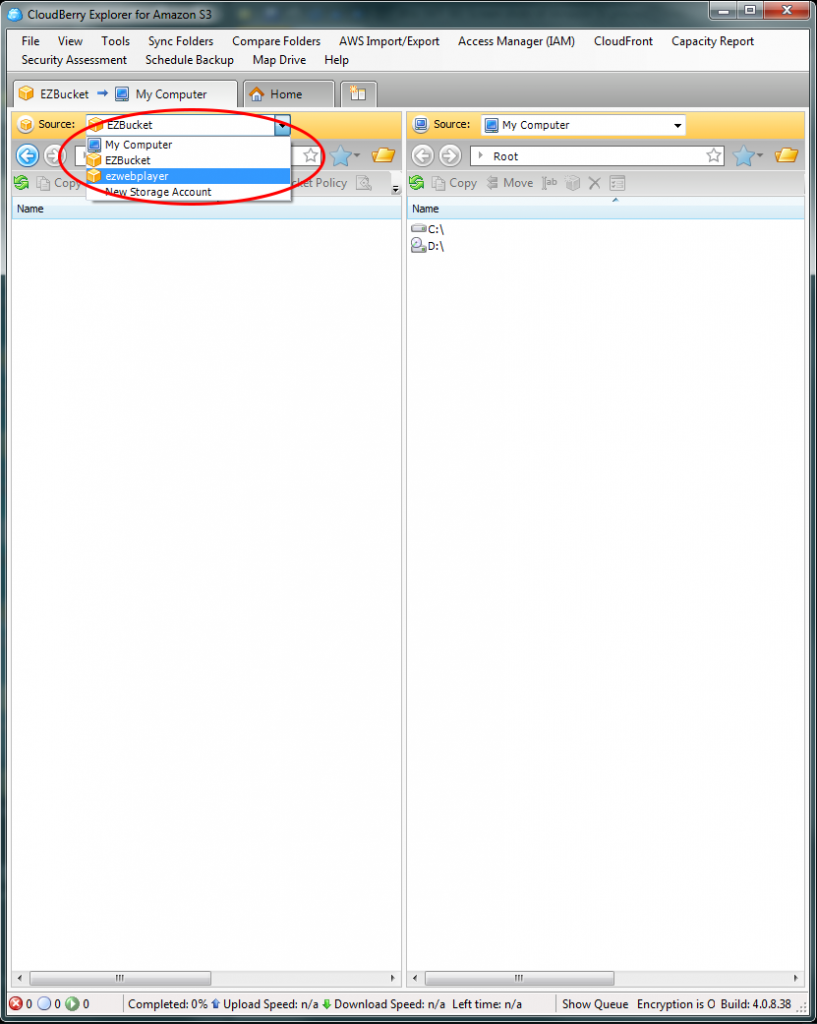
Step 16. Double click your new S3 bucket profile to open it.
Step 17. Make sure your left source location is set to the correct S3 bucket.
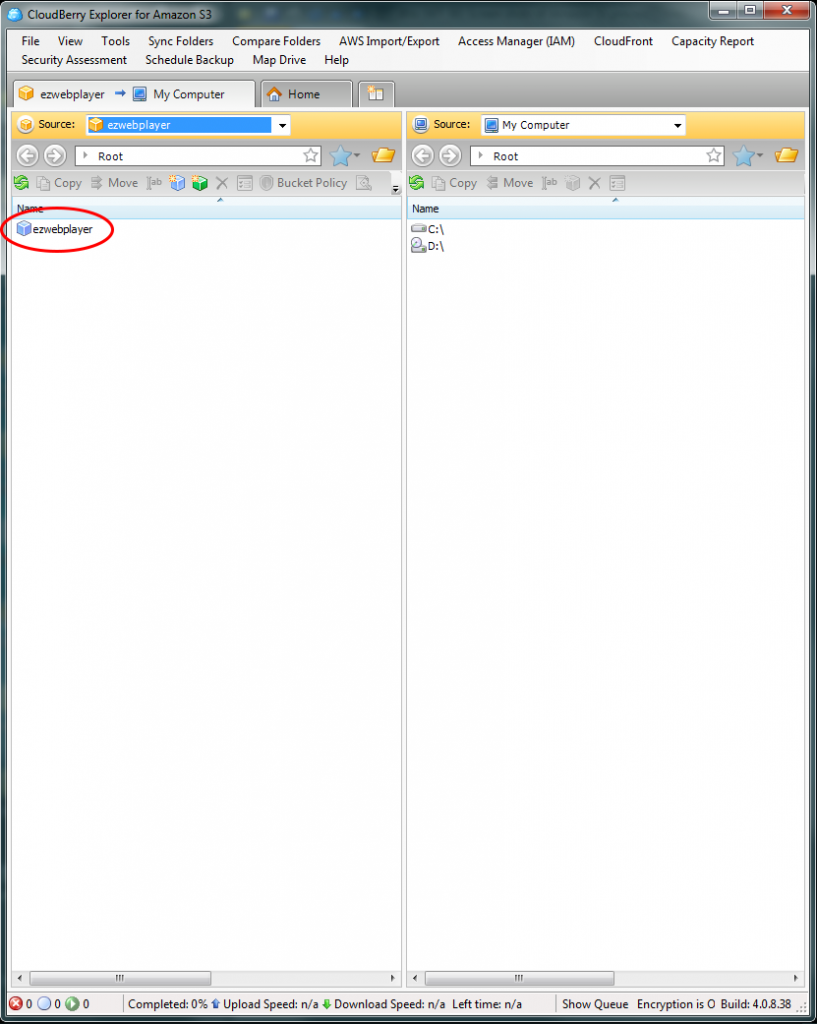
Step 18. Double click into the S3 bucket.
Step 19. Now make your right source location point to your media.
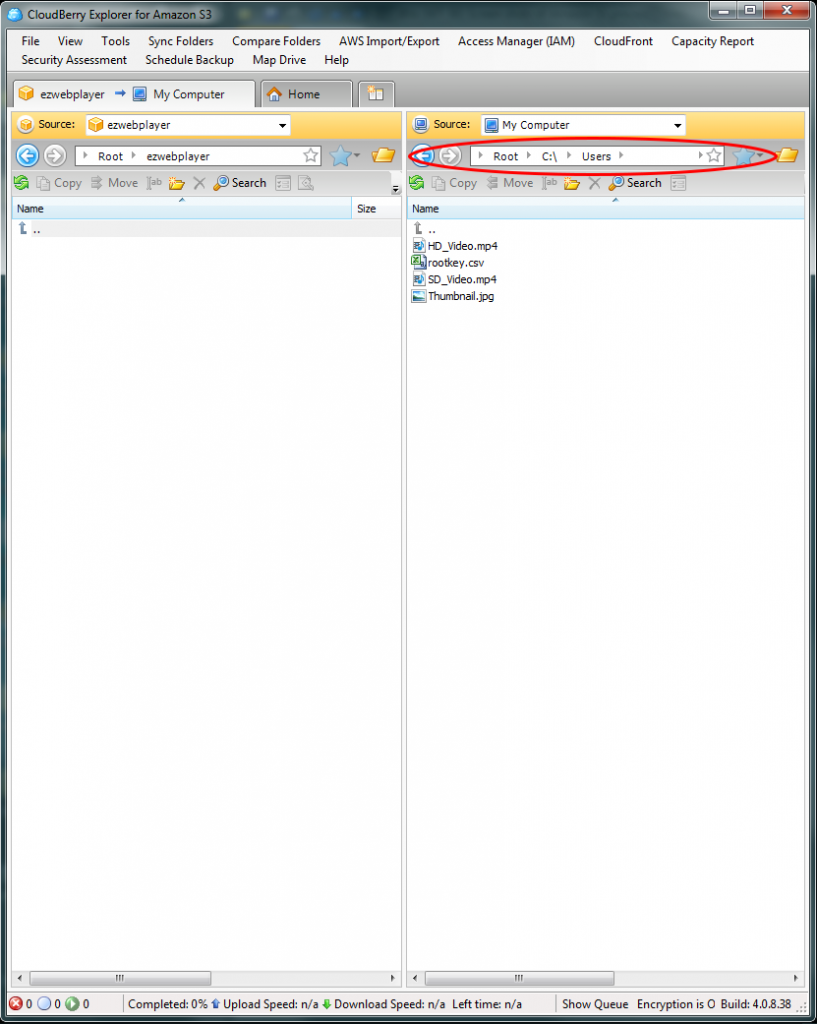
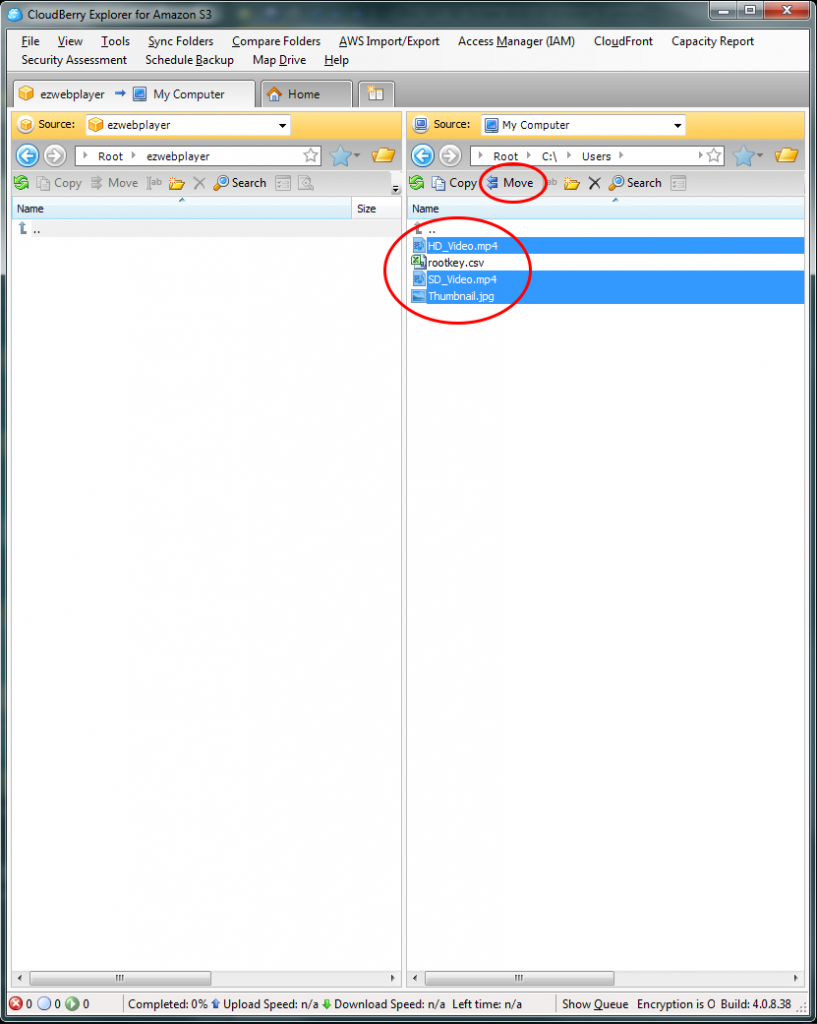
Step 20. Select the media you want to add to your S3 bucket and click the move option.
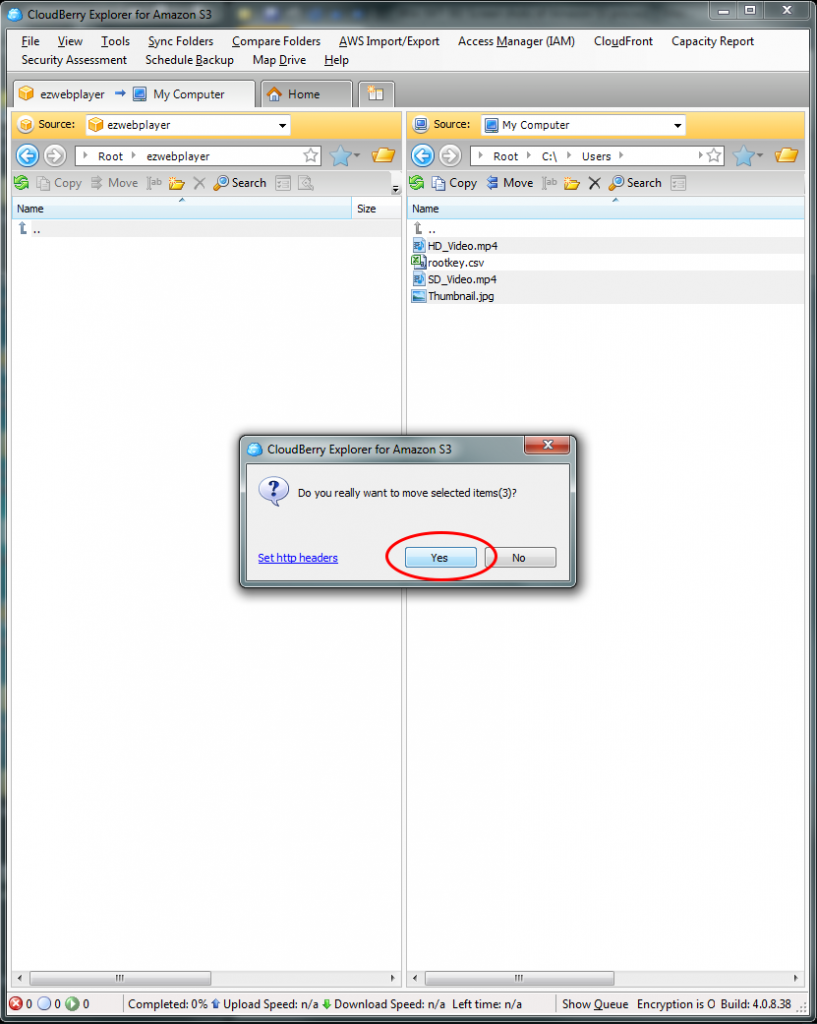
Step 21. Click yes to start the movie process.
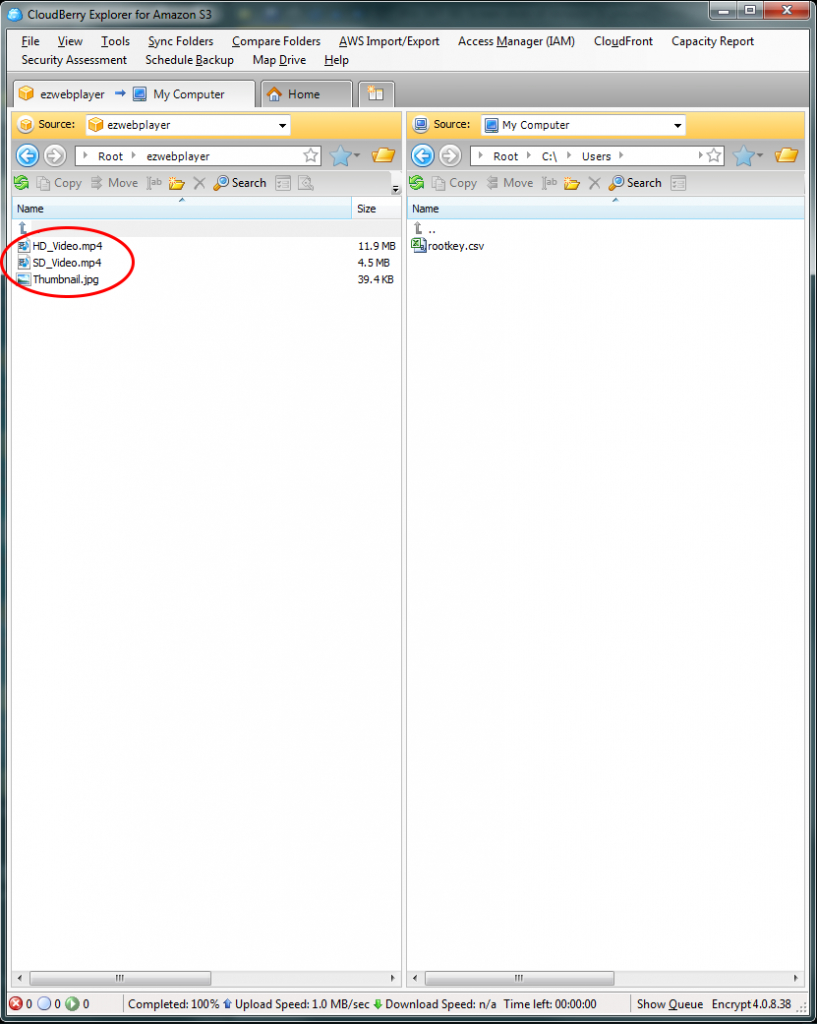
Step 22. Once finished, your selected media should now be added to your S3 bucket.
Attaching your media to your EZWebPlayer account.
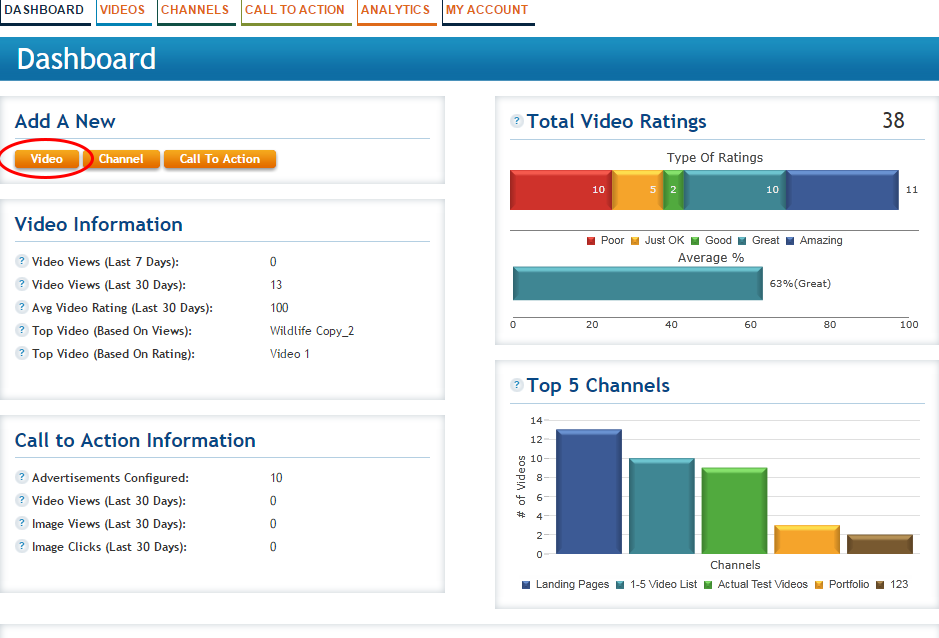
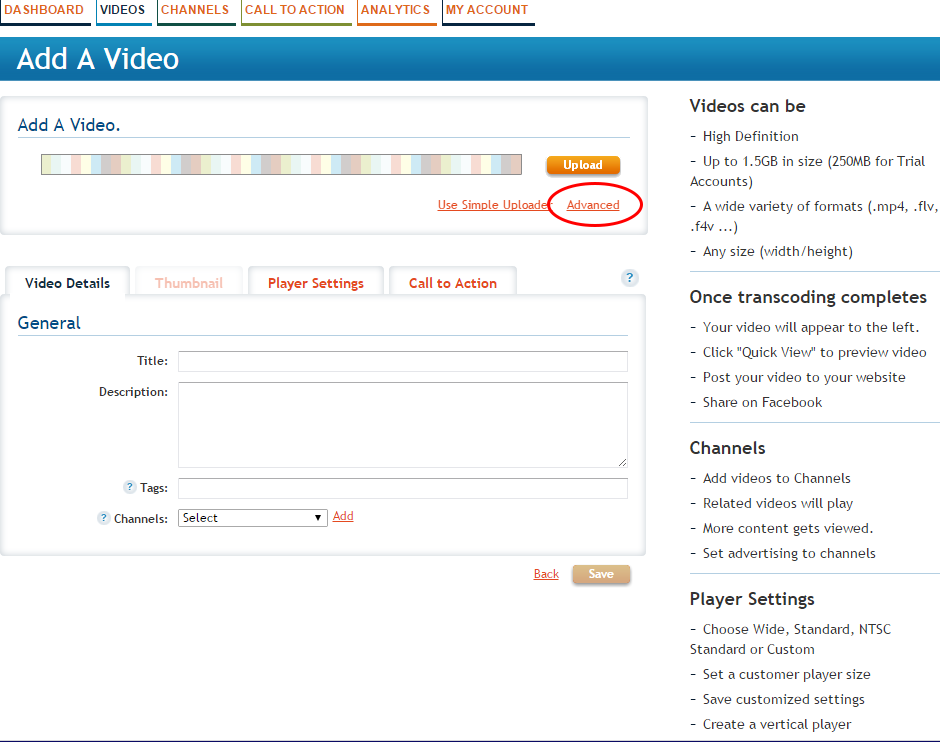
Step 23. To start attaching your media located in your Amazon S3 bucket to your EZWebPlayer account, log into your EZWebPlayer account and from the dashboard click to add a new video.
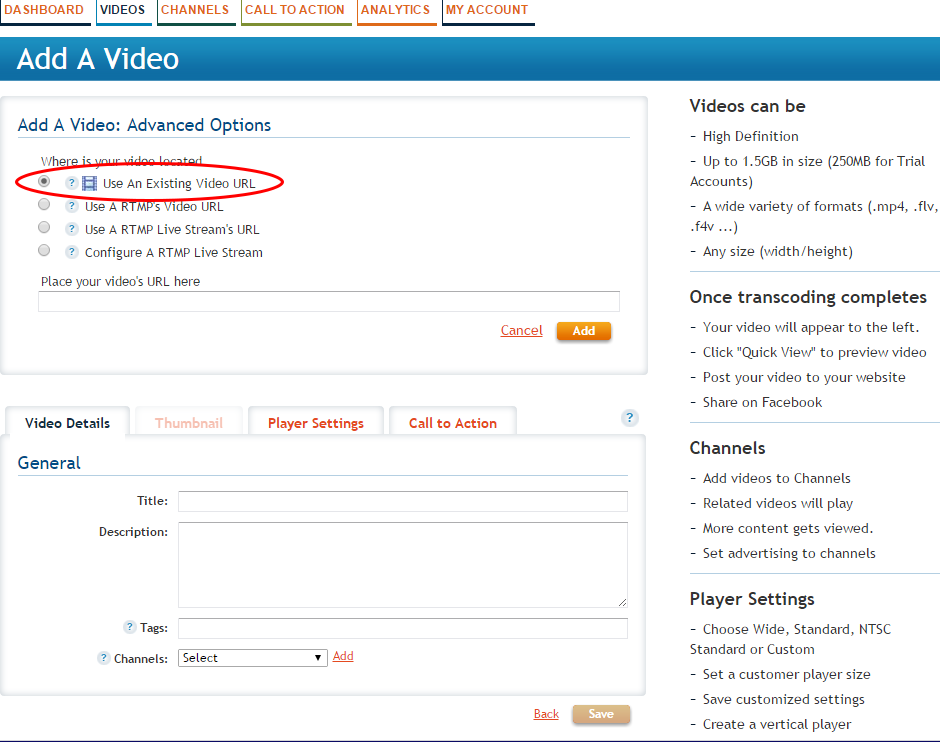
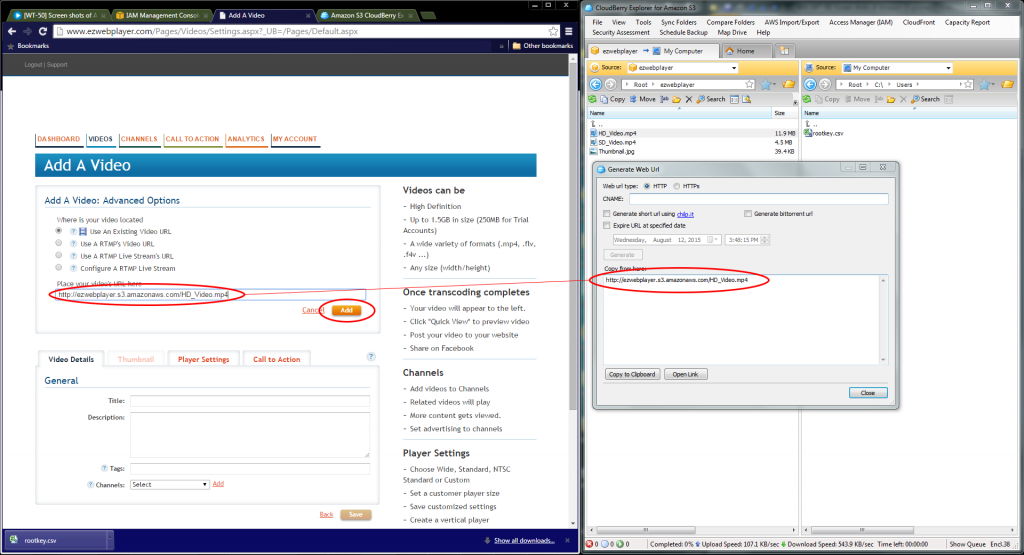
Step 24. Select the advanced option, allowing you to add a video by URL.
Step 25. Make sure option 1 is selected, “Use An Existing Video URL.” We are going to add the URL to your video into this option.
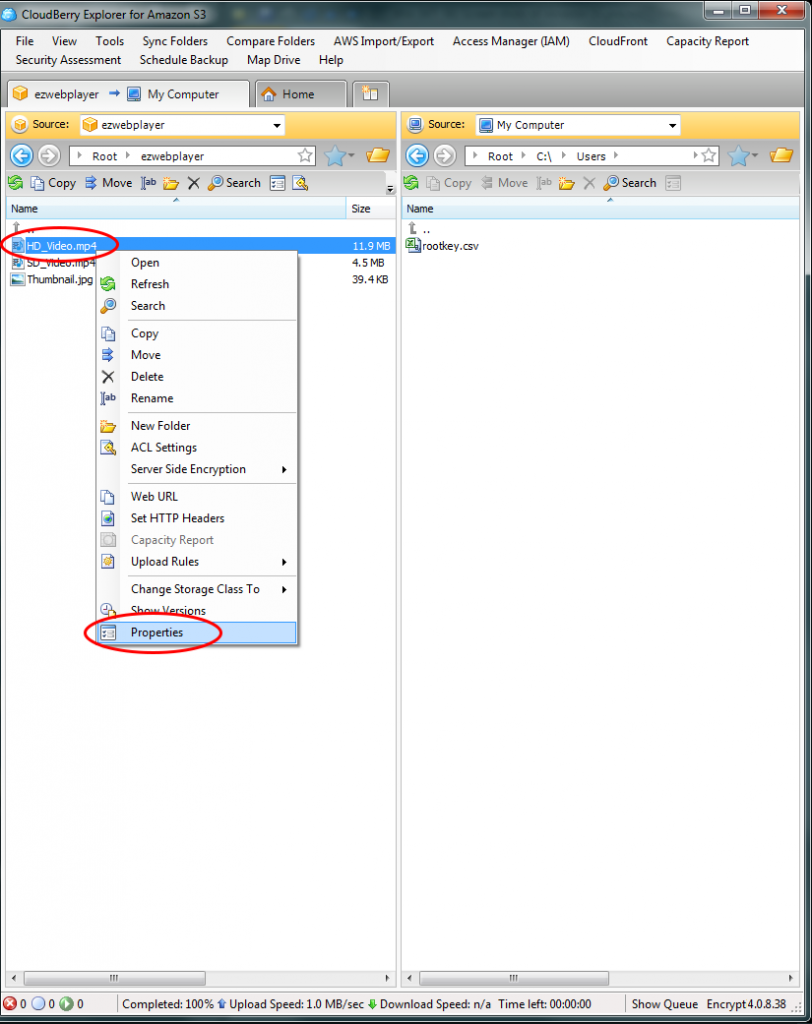
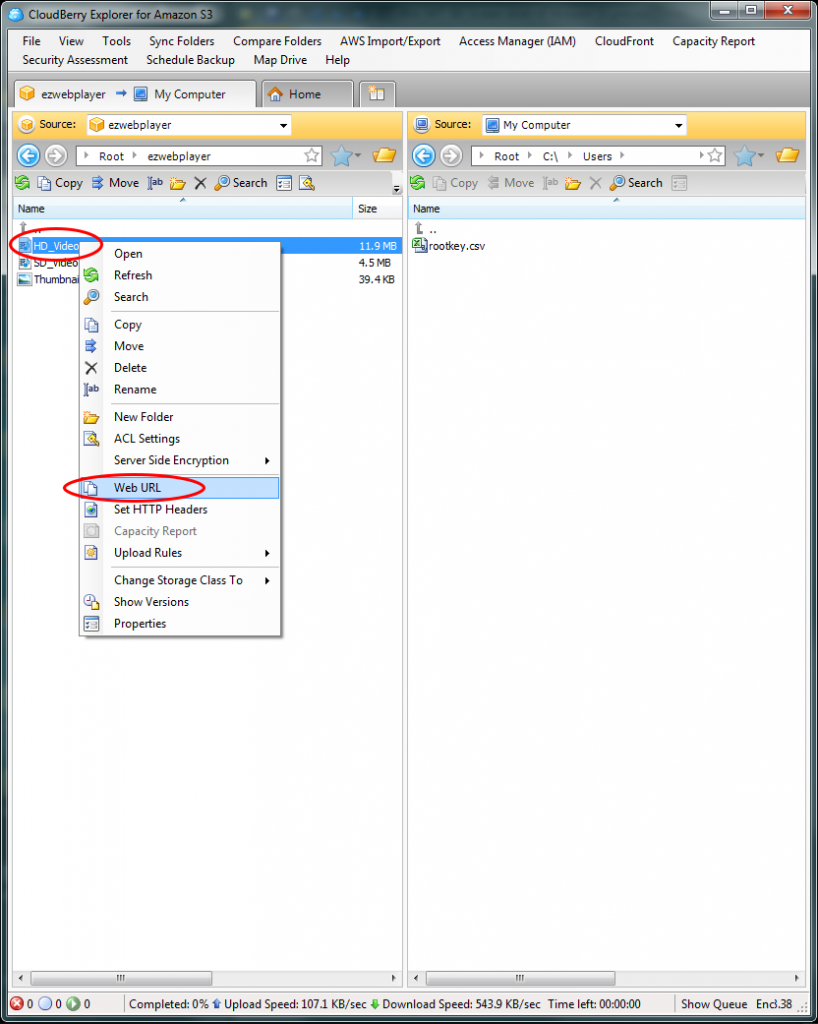
Step 26. With in CloudBerry right click on your HD video and select Properties.
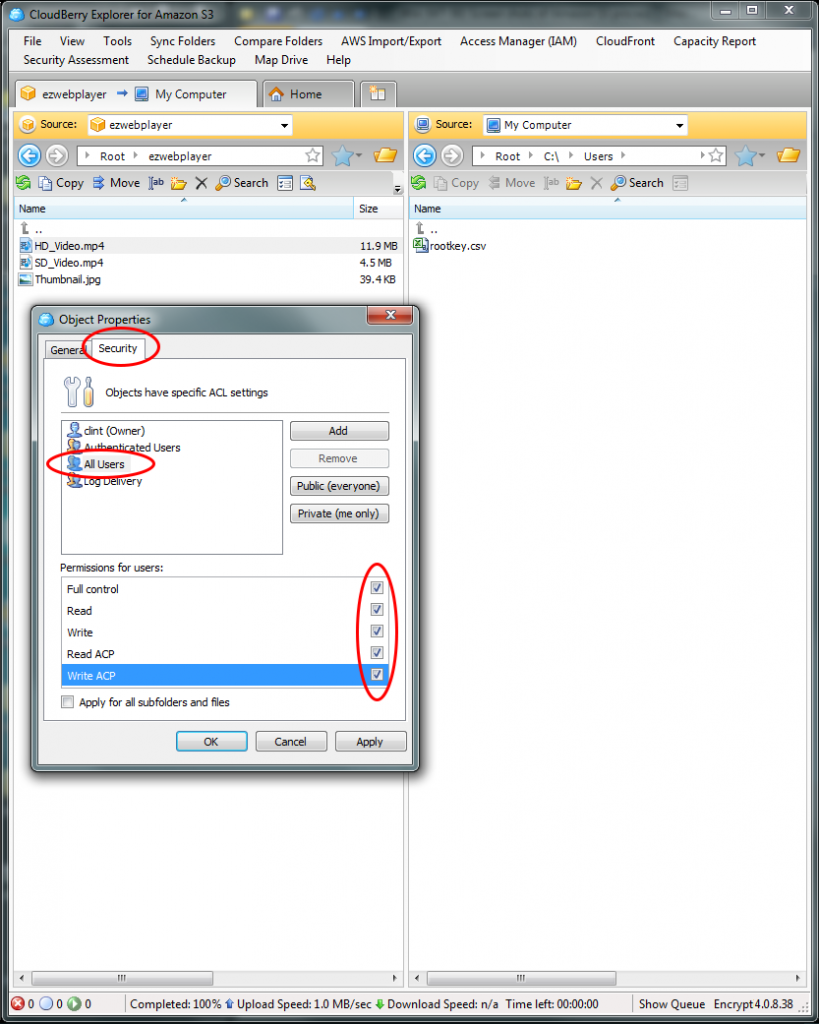
Step 27. Make sure that you allow it permission to be viewed. To do so, click on the Security tab and select the option for All Users and in the example below I placed a check mark for all of the options. Depending on your scenarios you might want to only have Read and Read ACP selected. This will allow our player permission to load and playback the video/media. *You will need to do this for all media in your S3 Bucket. Going forward this will have already been done for the SD video and the thumbnail. Once your media has the required permissions, click Apply to save the changes.
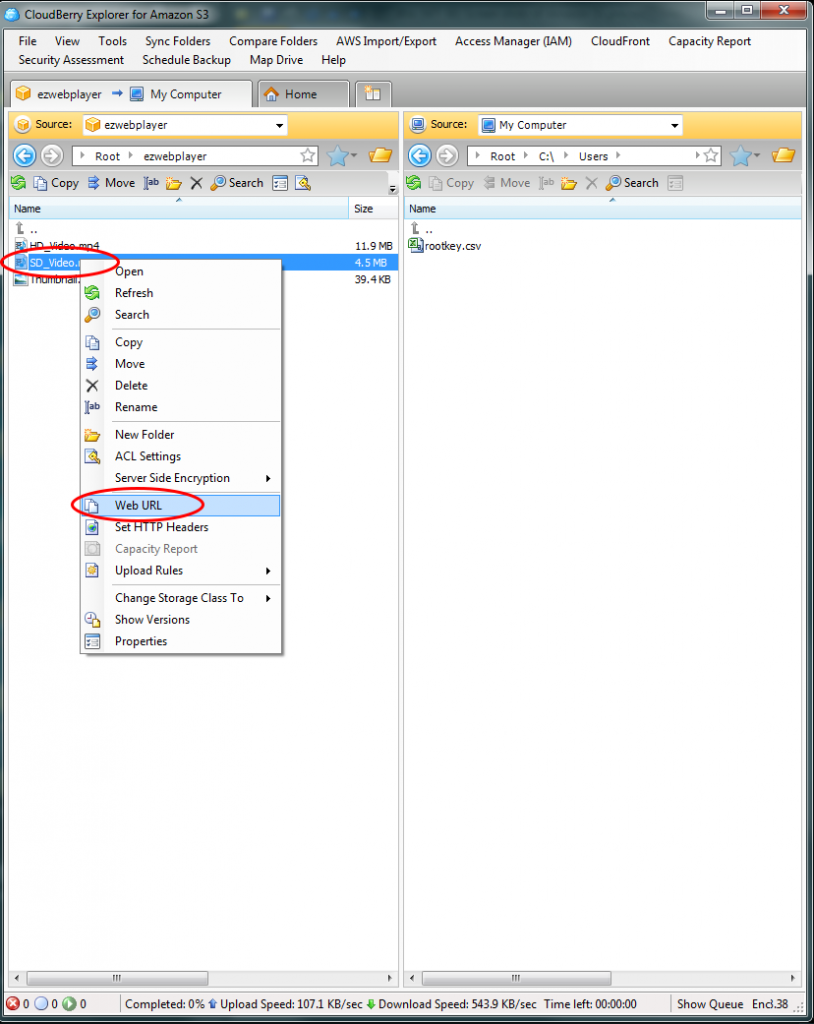
Step 28. Now you are ready to add it to your EZWebPlayer account. RClick on the HD video and select the Web URL option to get its http URL.
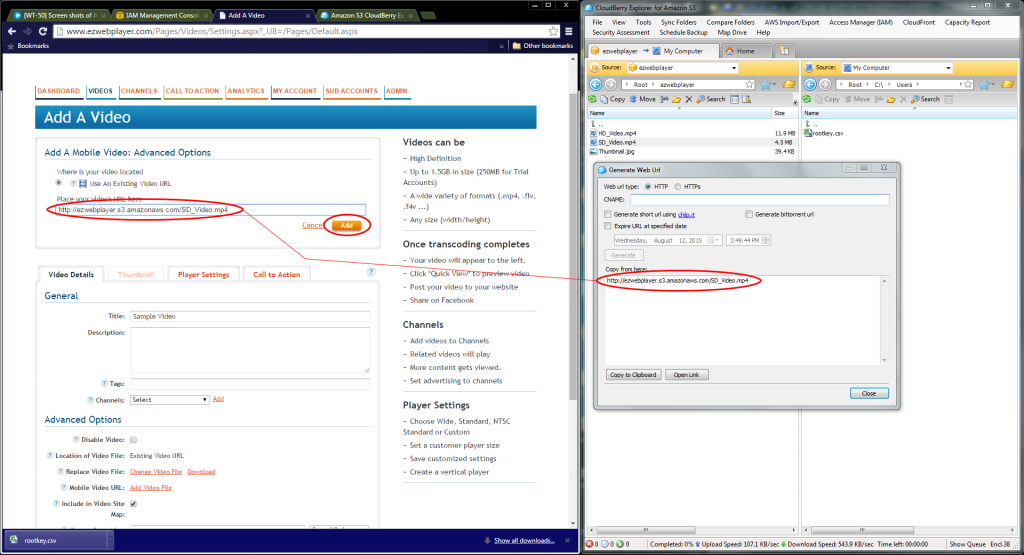
Step 29. Copy over the HD videos HTTP URL into the text input box for option 1 on your “Add A Video” page on EZWebPlayer. Then click the Add option. *HTTPS is not currently supported in this way. The URL must be in HTTP format.
Step 30. Give your player a name.
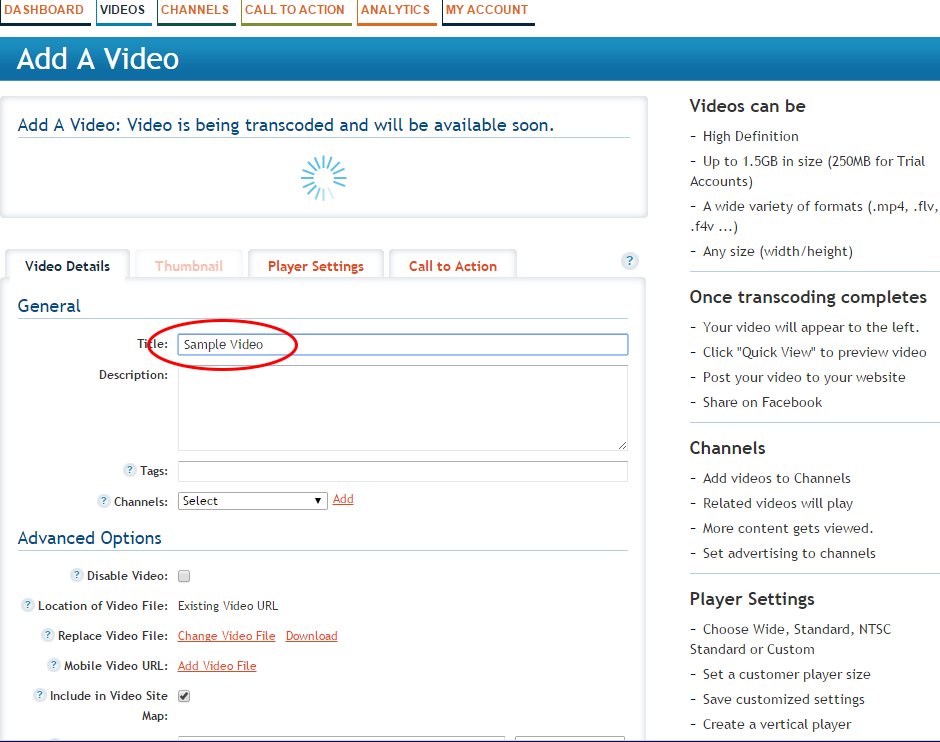
Step 31. You are given the option to add a mobile version of your video within the Advanced options of your player. Click on Add Video File for the Mobile Video URL option. The player will change to a Add A Mobile Video window allowing you to add your media. Click on the Advanced text link.
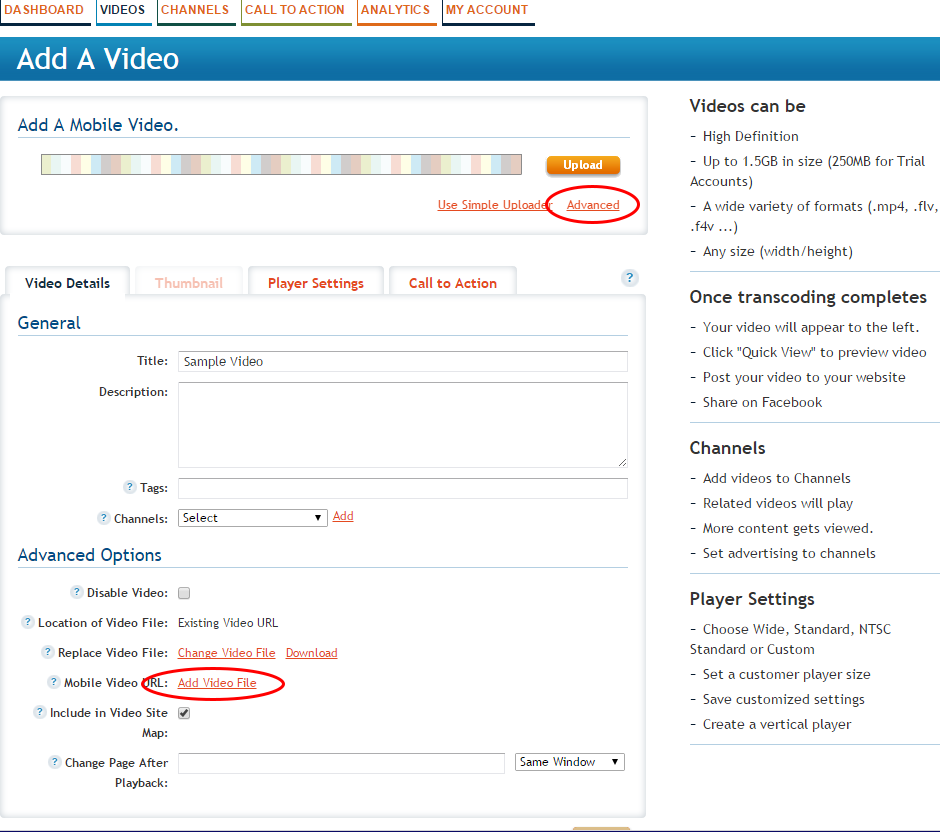
Step 32. In CloudBerry RClick on your SD video / Mobile version and select the Web URL option.
Step 33. Copy over its HTTP URL and click on the Add button.
Saving and Update
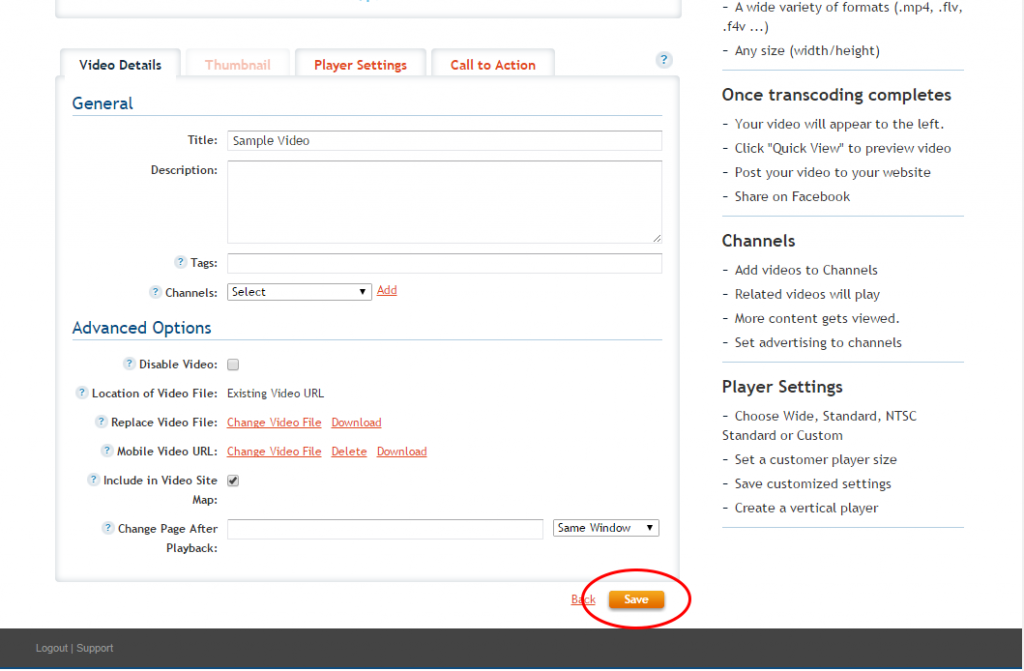
Step 34. Save your progress.
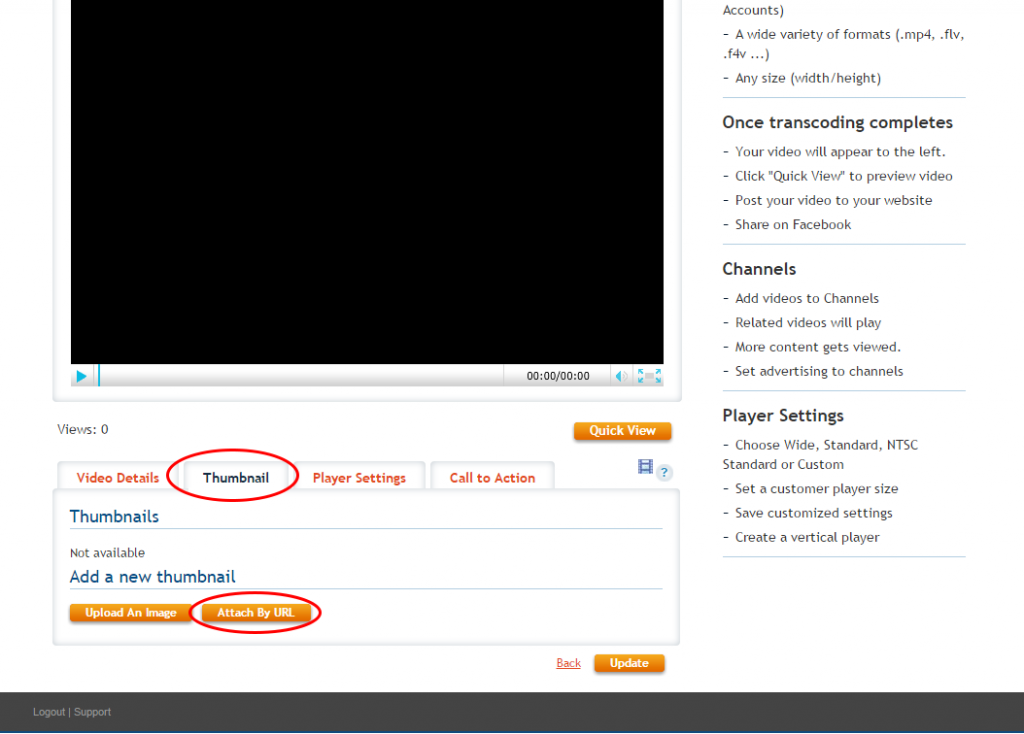
Step 35. *Once your player is saved this opens up the ability to give it a thumbnail. You can also add a thumbnail to your player. Click on the Thumbnail tab and Click Attach By URL.
Step 36. In CloudBerry RClick on your thumbnail image and select the Web URL option to copy over the HTTP URL of your image.Click the Add text link.
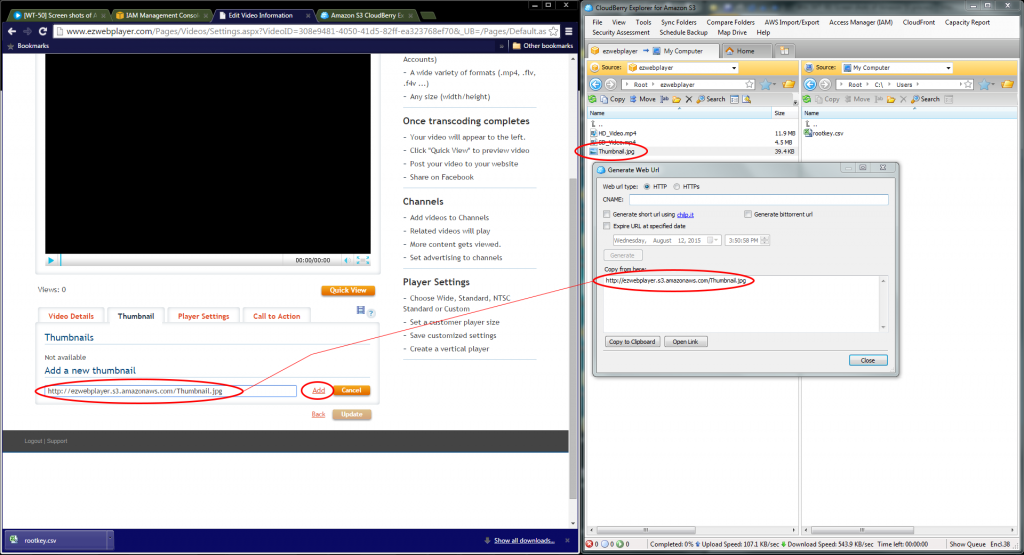
Step 37. If you don’t see the thumbnail added right away, please come back to this player within the next 5 minutes, allowing our web services to cache the new change. Make sure to press the Update button to save this change. It has turned to an update button instead of a save button because at this point in time the player is now created instead of “being” created.
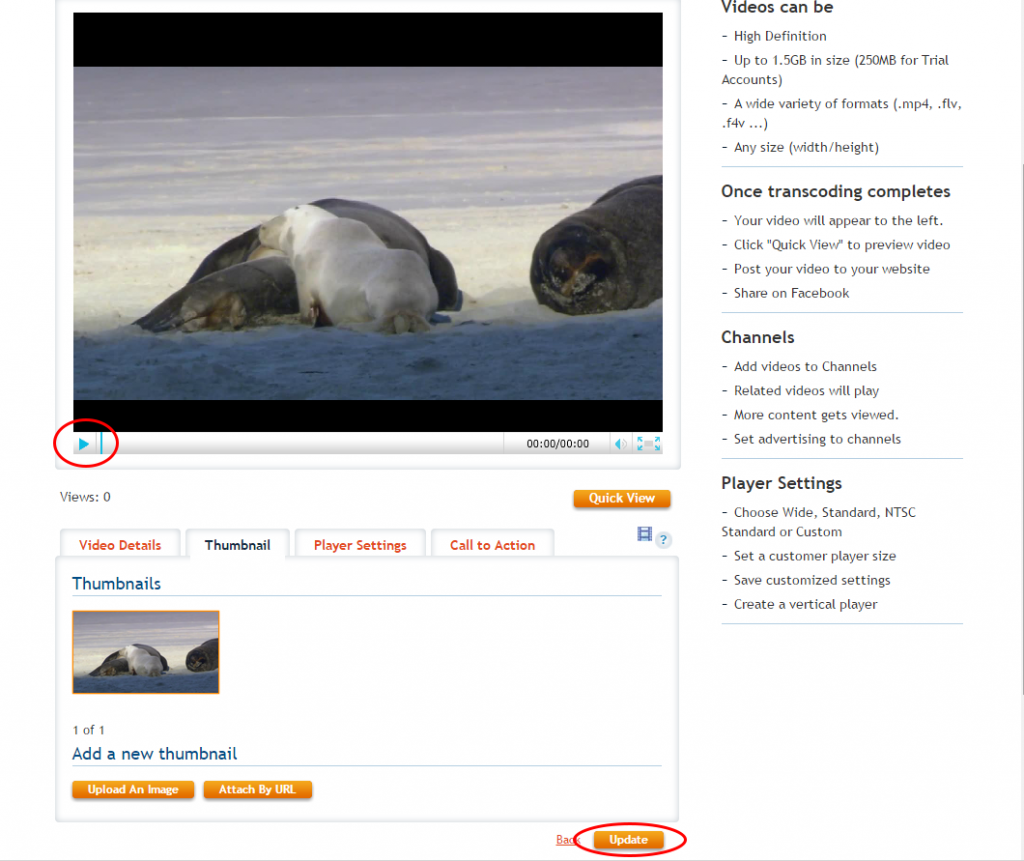
Step 38. Play your video and make sure everything is in order. You are now ready to post/share your player.