Availability Per Account Type
Trial
Lite
Pro
White Label
WL – Custom
Before We Begin
- Make sure you are a White Label or White Label Custom account holder. Upgrade Today.
- Have a video or videos already uploaded to your EZWebPlayer account. Learn More.
- Have an account set up on https://www.instanttvchannel.com/
- Have an account set up on https://www.roku.com/
Getting Started
EZWebPlayer offers support for streaming your uploaded videos (VOD – Video On Demand) to your Roku device through “Instant TV Channel for Roku”s Direct Publisher Feed URL”. You will be able to attach your videos to Instant TC Channel For Roku and group them into a channel, then attach that channel using the Direct Publisher Feed URL to your Roku developer account, allowing your custom channel to show up on your Roku device. You can then share out your channel‘s subscription link to others, allowing them to watch your videos on their Roku devices.
No cast button.
At this time, EZWebPlayer does not support registering a smart TV device to your account. What this means is that there is no way to add a button somewhere to cast a video to ROKU or other such devices. There is no way to add EZWebPlayer to a dropdown menu in ROKU and other devices.
Grabbing Your EZWebPlayer Video Information
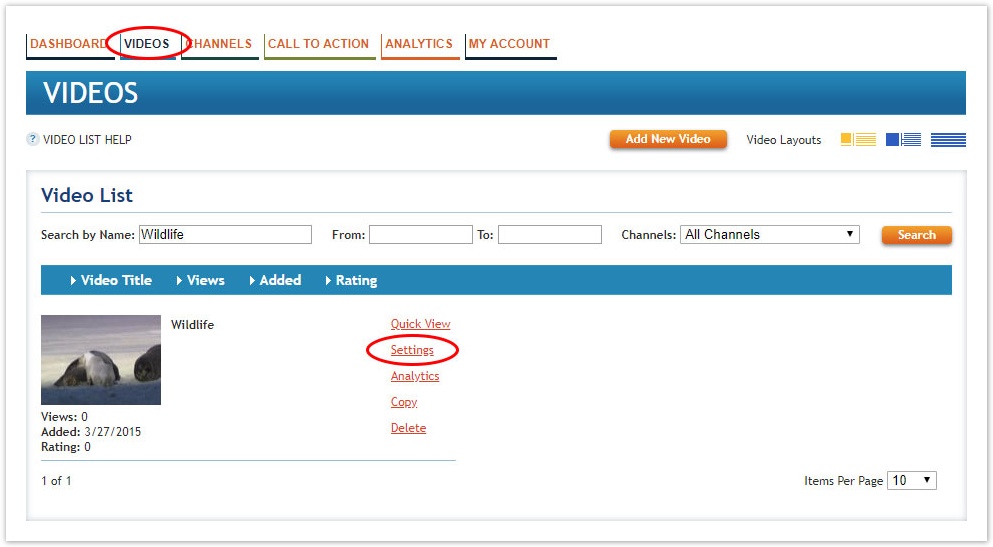
Step 1. Navigate to your video’s Settings option.
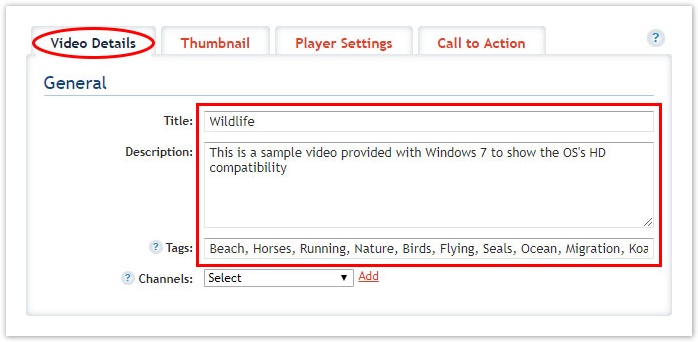
Step 2. Make sure you are on the Video Details tab and copy/paste the video’s information into Notepad or Word pad. You will need;
- General Section
- Title
- Description
- Tags
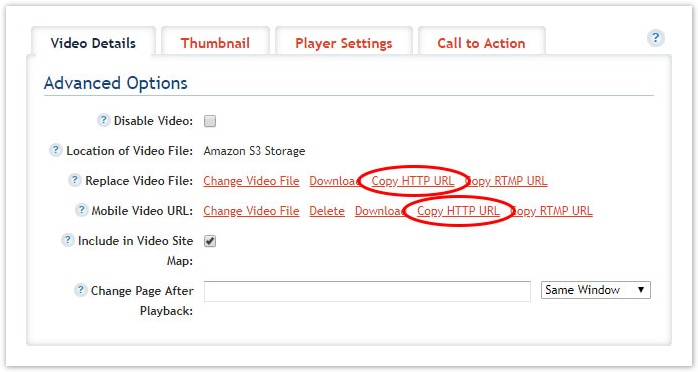
- Advanced Options Section
- If the video is a VOD (Video On Demand)
- Replace Video File: Copy HTTP URL
- Mobile Video URL: Copy HTTP URL
- If the video is a VOD (Video On Demand)
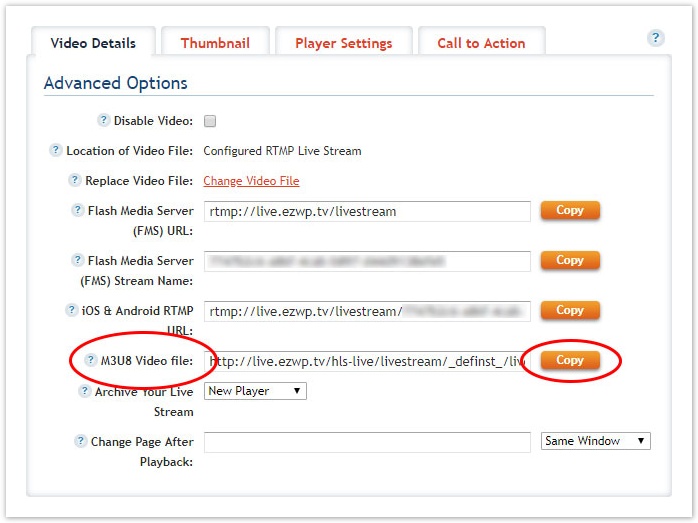
- If the video is a Livestream
- M3U8 Video file. This is your livestreams HLS URL.
- NOTES:
- You will need to convert the M3U8 URL from (https://) to (http://), otherwise when you try to validate your Roku channel’s Feed Status, it wont fully validate.
- Also your livestream will need to be running for it to validate.
- When running your livestream, in your streaming application like OBS or XSplit, please make sure that your video codec is set to “x264” and your video Mode is set to “VBR”. Otherwise in the Roku channel your livestream will show a black/blank video feed.
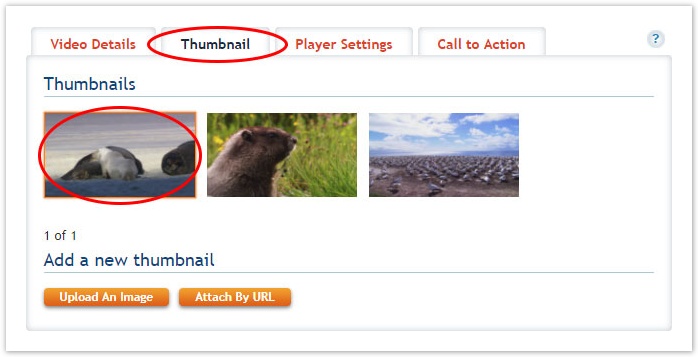
Step 3. Make sure you are on the Thumbnail tab. Then right click on the thumbnail you would like to use for this video and select Copy image address
Adding Your EZWebPlayer Videos To Your InstantTVChannel Account
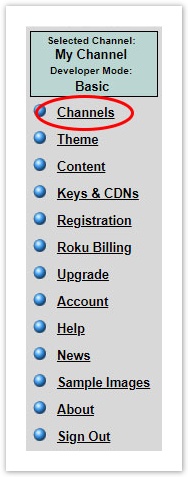
Step 1. Login to your https://www.instanttvchannel.com/logout account and navigate to Channels
Step 2. Click Create New Channel. The top center menu will change. Make sure you have Channel type set to Classic. Then click Confirm. Your new channel is created.
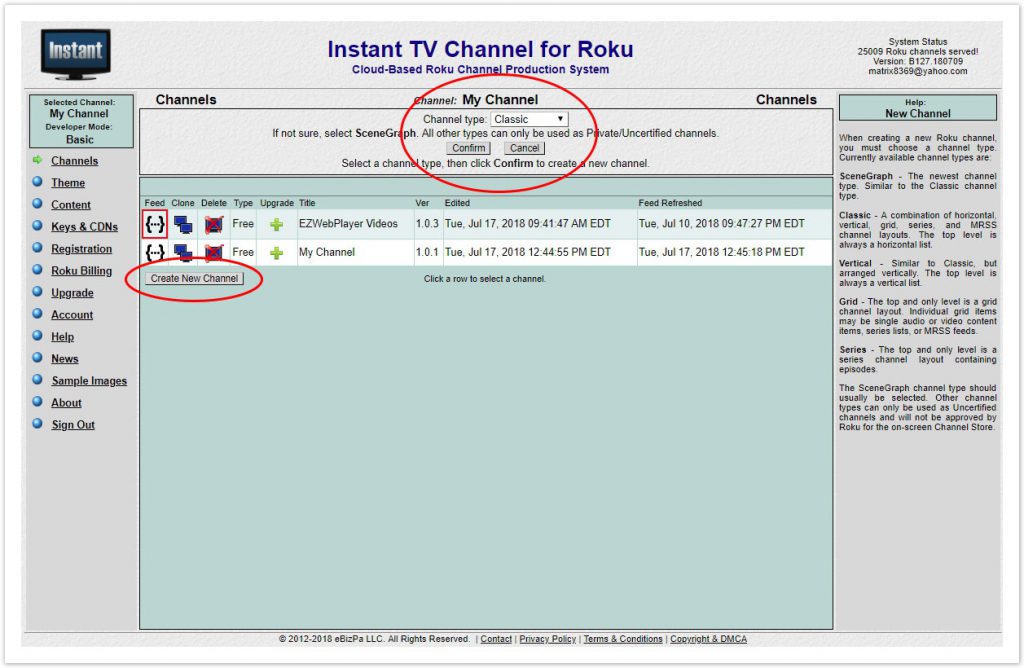
If you have additional channels already created, make sure to click on your channel title to select that channel. The channel you wish to work on should now be a light yellow. Telling the other pages you wish to edit / add to the selected channel.
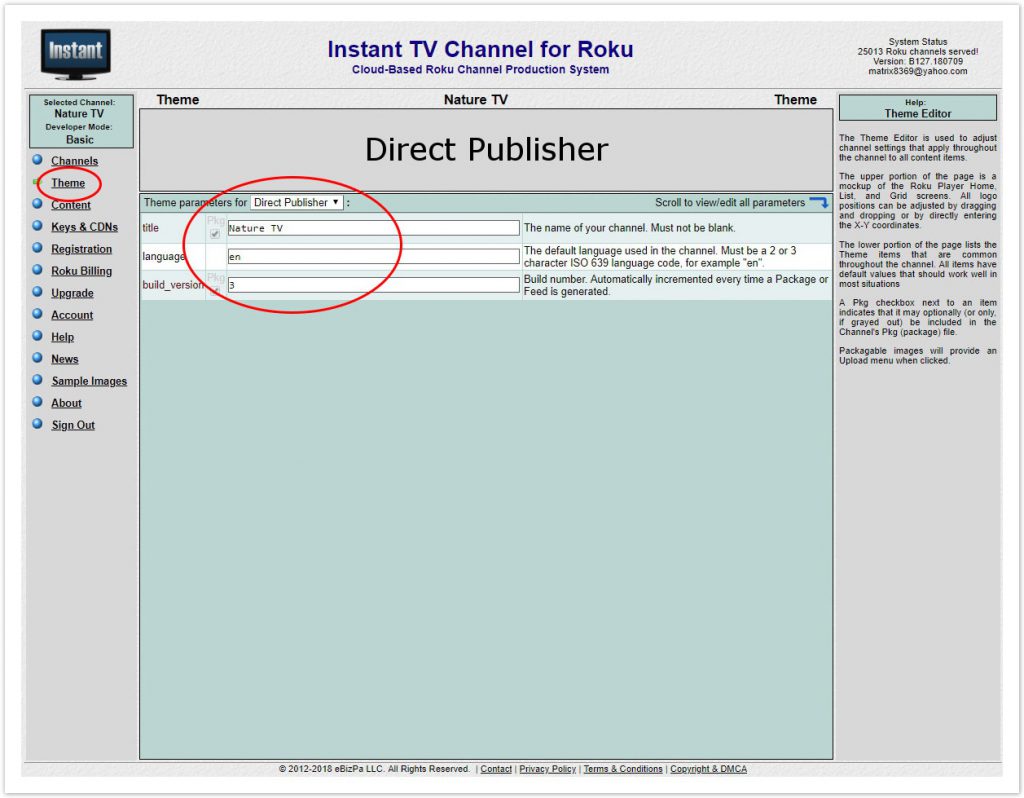
Step 3. Now lets edit this new channel. In the left menu select Theme. Make sure you have Theme parameters for set to Direct Publish. You can change your channel’s title. You can also set the language of your channel. For English this should be set to en.
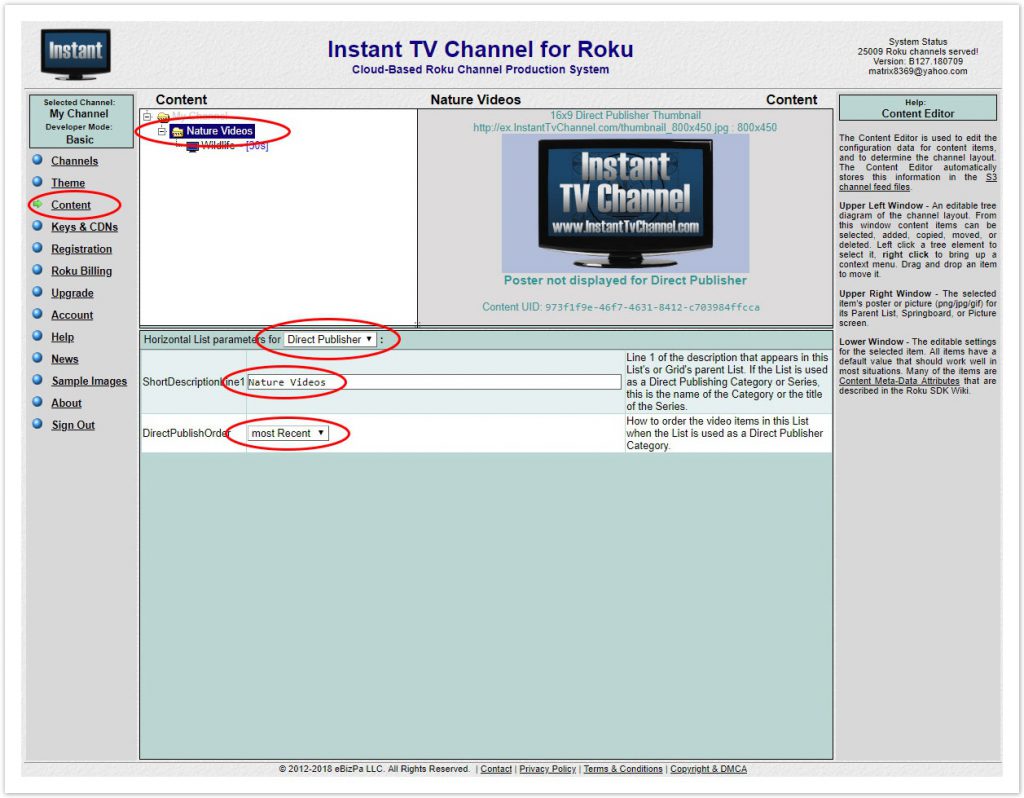
Step 4. With your channel created, lets add EZWebPlayer videos to it. In the left menu navigate to Content. In the top left section of this page you will be able to organize your videos into folders. This will be how they look in the Roku environment. Take a minute to play around with this. For now lets right click on the main folder and select New horizontal list of videos. With your new folder selected, Make sure Horizontal List parameters for is set to Direct Publish. In ShortDescriptionLine1 type in your folder’s title. Then set DirectPublishOrder to most Recent.
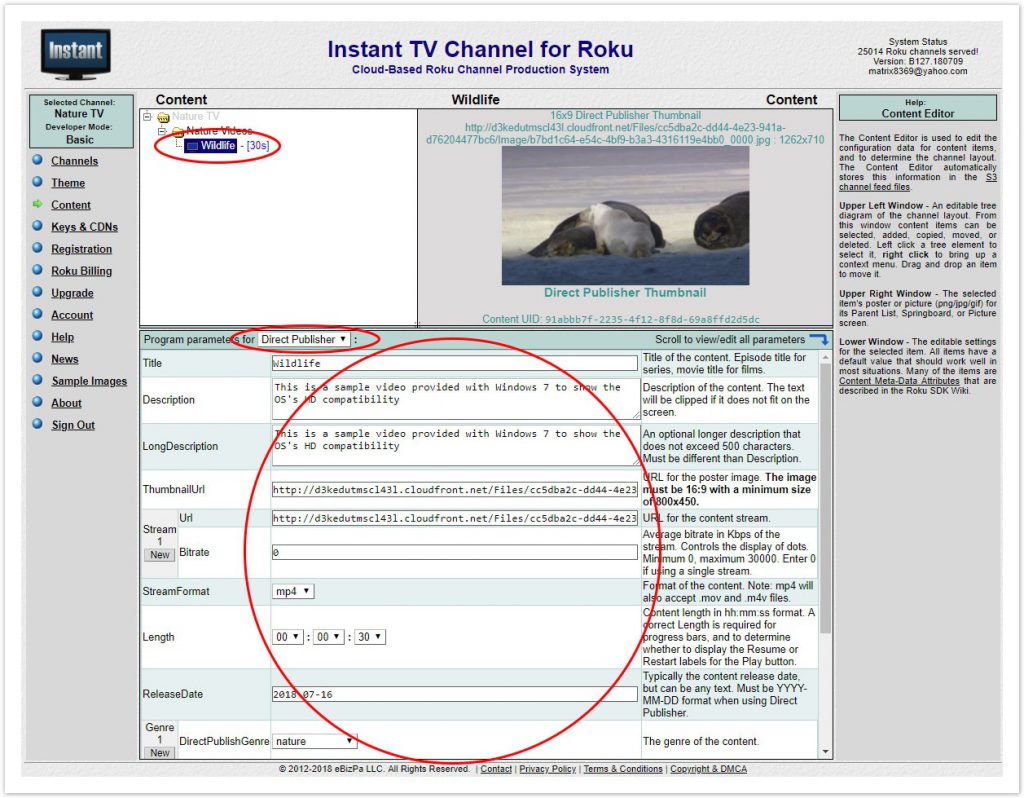
Step 5. Now we can start to add videos to your folder. Right click your folder and select New Video or Audio. This will create a new video element in your folder. You can then select this new video and edit it. Make sure that Program parameters for are set to Direct Publisher.
You should have most of your video’s information from Grabbing Your EZWebPlayer Video Information: Step 2 and Step 3. Go ahead and fill out your video’s information now.
When you get to adding the URL location for your videos
For your VOD (Video on Demand) videos
If you only want to have the HD version of your video then add Replace Video File: Copy HTTP URL to Steam 1 URL, then you can leave Stream 1 Bitrate set to 0.
If you want to add your EZWebPlayer’s mobile version then you will press the New button for Stream 1 to add a second stream. Copy over your video’s Mobile Video URL: Copy HTTP URL into Stream 2 URL. Set Stream 2 Bitrate to 850. Steam 1 Bitrate should then be set to the bitrate of your original upload.
Make sure StreamFormat is set to mp4.
For your Livestream videos
Copy over your video’s M3U8 Video file to Steam 1 URL, then set Stream 1 Bitrate to your livestream’s bitrate.
- NOTES:
- You will need to convert the M3U8 URL from (https://) to (http://), otherwise when you try to validate your Roku channel’s Feed Status, it wont fully validate.
- Also your livestream will need to be running for it to validate.
- When running your livestream, in your streaming application like OBS or XSplit, please make sure that your video codec is set to “x264” and your video Mode is set to “VBR”. Otherwise in the Roku channel your livestream will show a black/blank video feed.
Make sure StreamFormat is set to HLS.
Use the drop down menus to set the Length of your video (for livestream videos, estimate so that the Roku player progress bar can function correctly). Quickest way to figure this out is play your EZWebPlayer video and look at the time stamp in the player’s control bar.
You can set the video’s ReleaseDate to the same date you uploaded your video to EZWebPlayer. You can find this on your MyAccount page.
Repeat this step for each video you wish to add to your Roku channel.
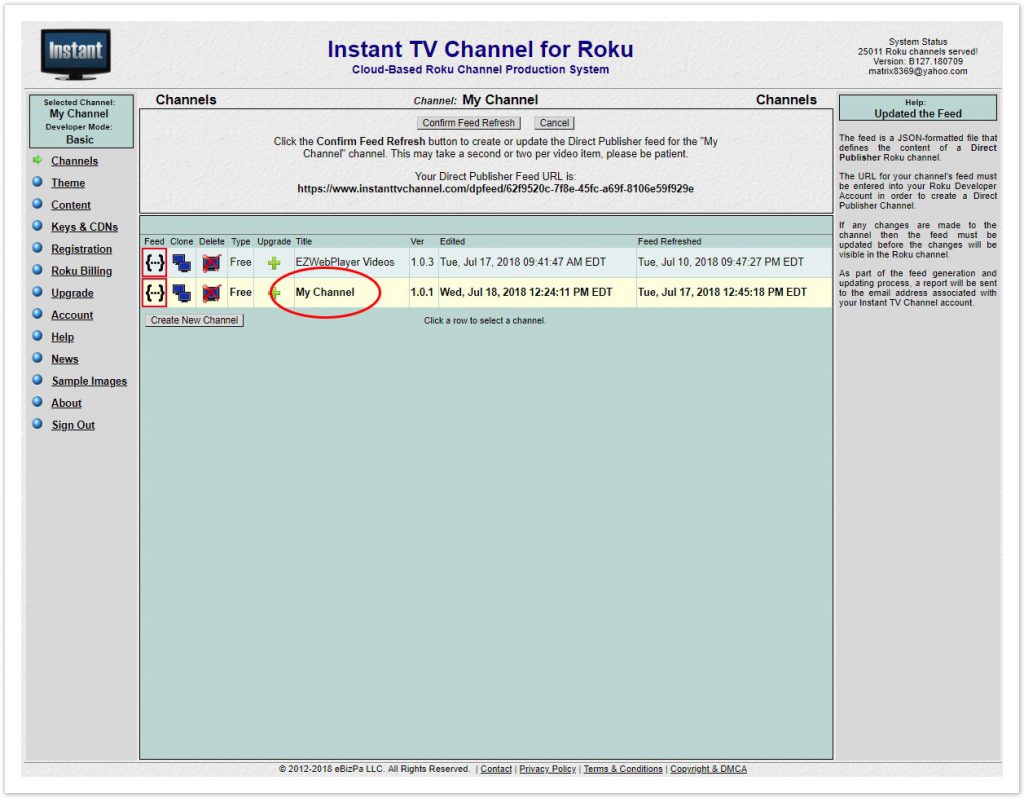
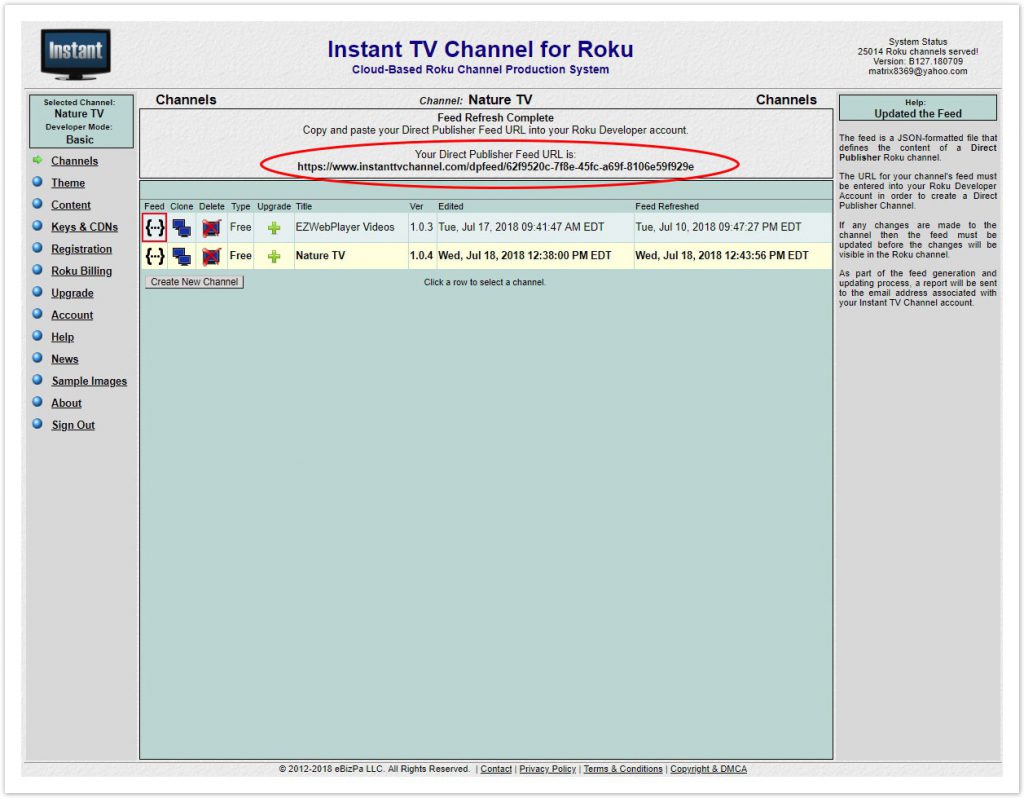
Step 6. When you are done adding videos to your channel, using the left menu navigate back to the Channels page. Make sure you have your new channel selected. It should be yellow when selected. Select your channel’s Feed icon. The top center section should then update. You can now select Confirm Feed Refresh to for your channel’s feed to update in Instant TV Channel For Roku’s system.
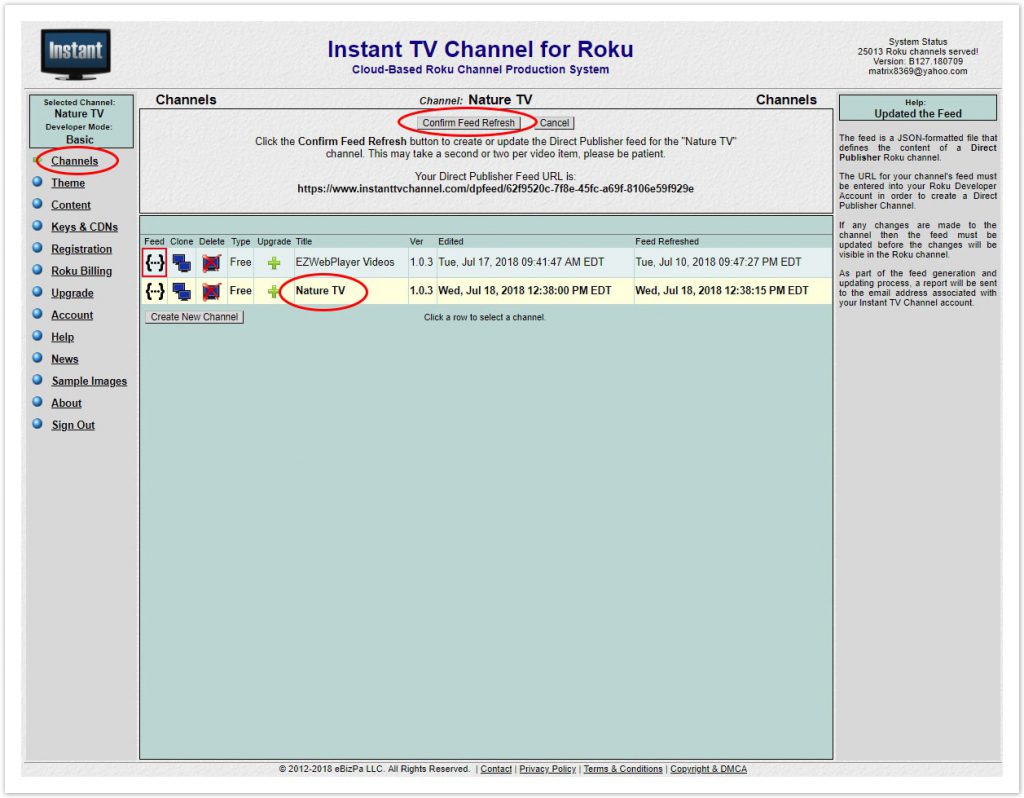
Step 7. In the top center information section look for and copy your Your Direct Publisher Feed URL. It should be in this type of format.
We will need this when adding your channel to your Roku account.
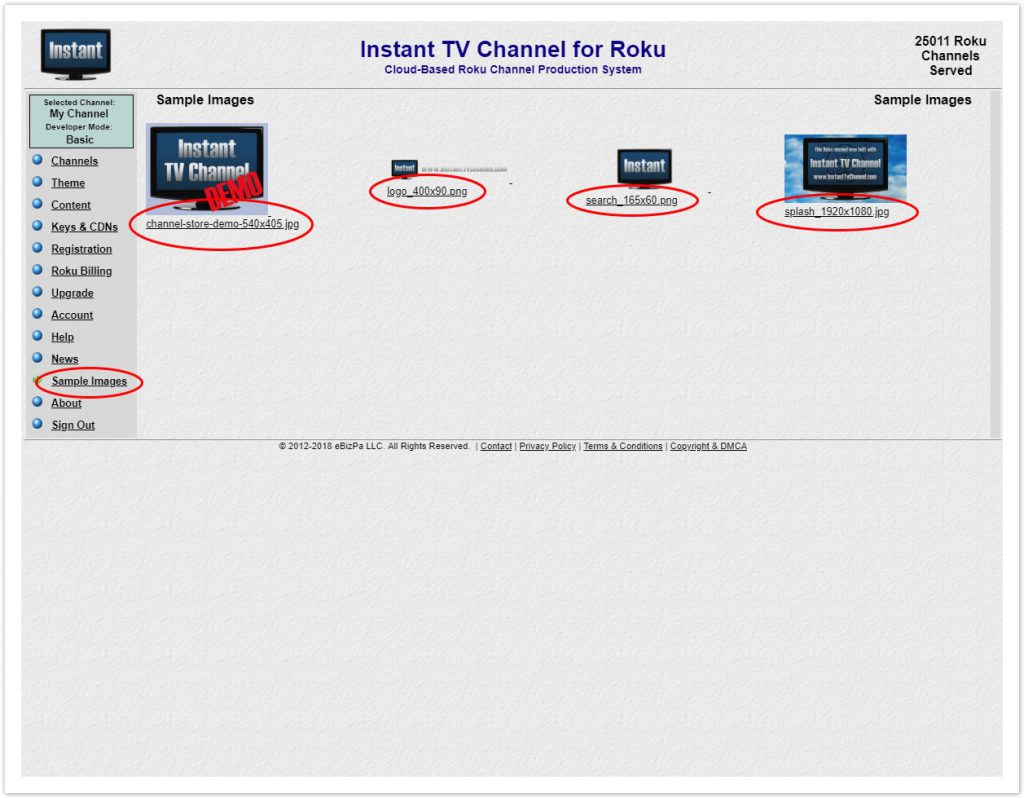
Step 8. We will need a few more things before we are done with your Instant TV Channel For Roku account. In the left menu navigate to the Sample Images page. Lets download a few sample / place holder images for your Roku channel. Locate
- channel-store-demo-540×405.jpg
- logo_400x90.png
- search_165x60.png
- splash_1920x1080.jpg
and right click on the image and select Save Image As and save them to your computer. Then will be used later when making your Roku channel. We are now done with your Instant TV Channel For Roku account.
Publish Your Instant TV Channel To Your Roku Channel
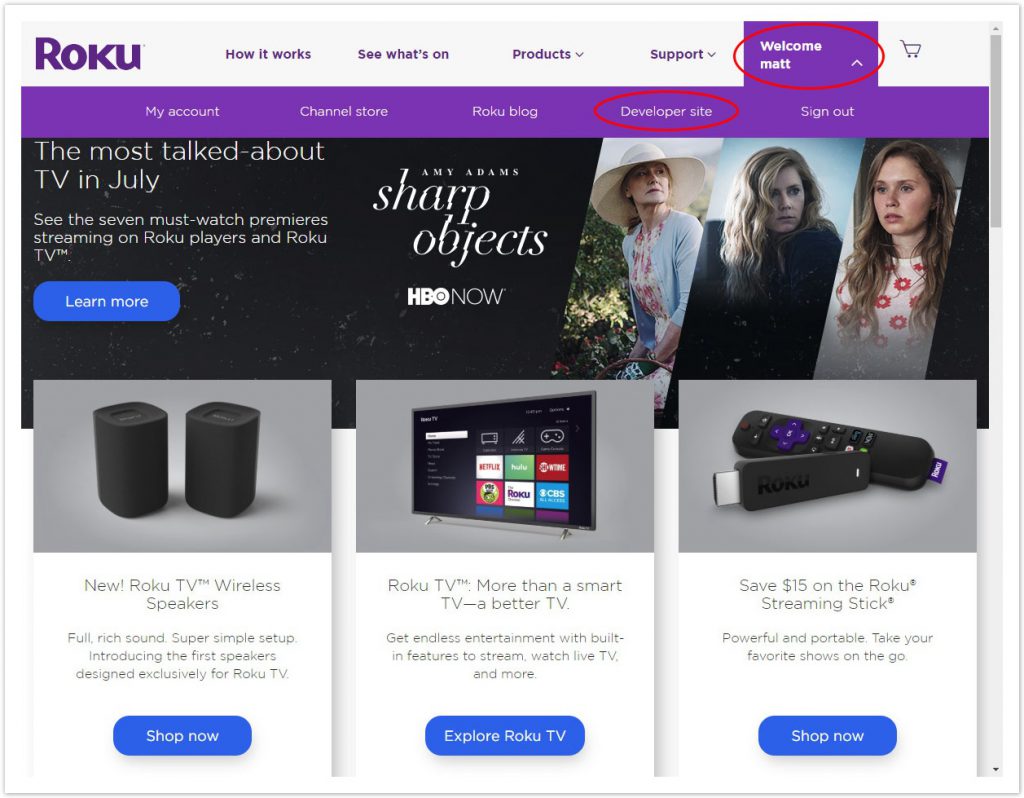
Step 1. Login to your Roku account at https://www.roku.com/. In the header navigation click on the Welcome Your Name Here link and select Developer Site.
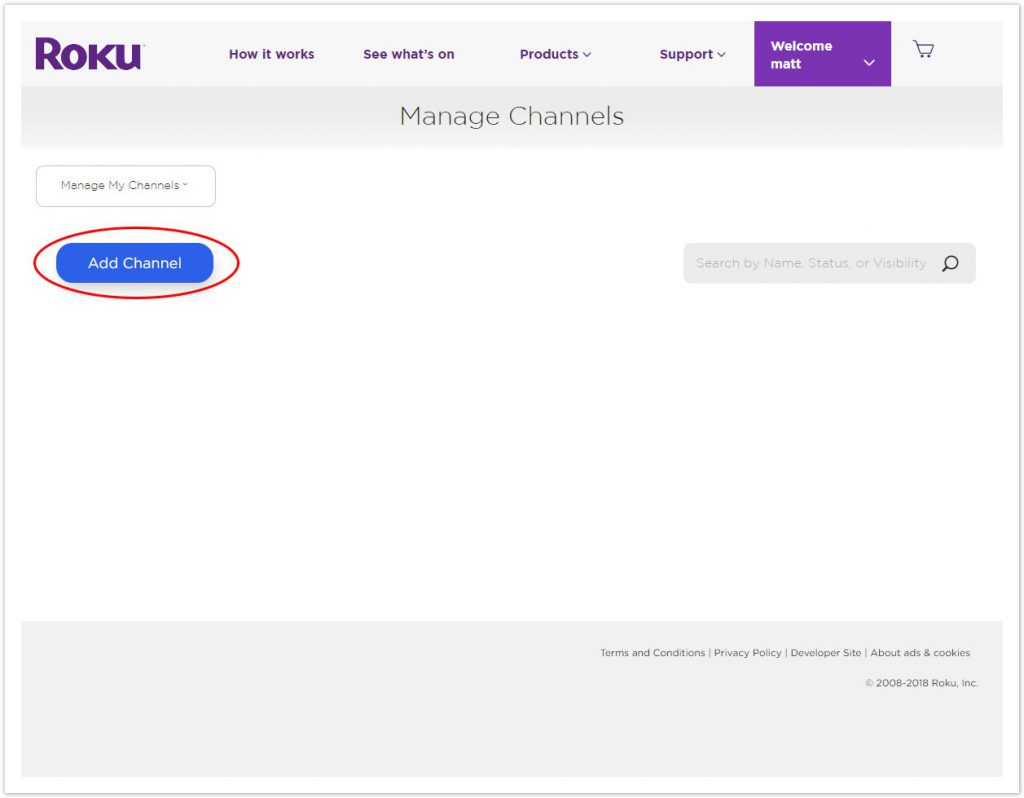
Step 2. In the right column Look for the section My Channels and click on Manage My Channels.

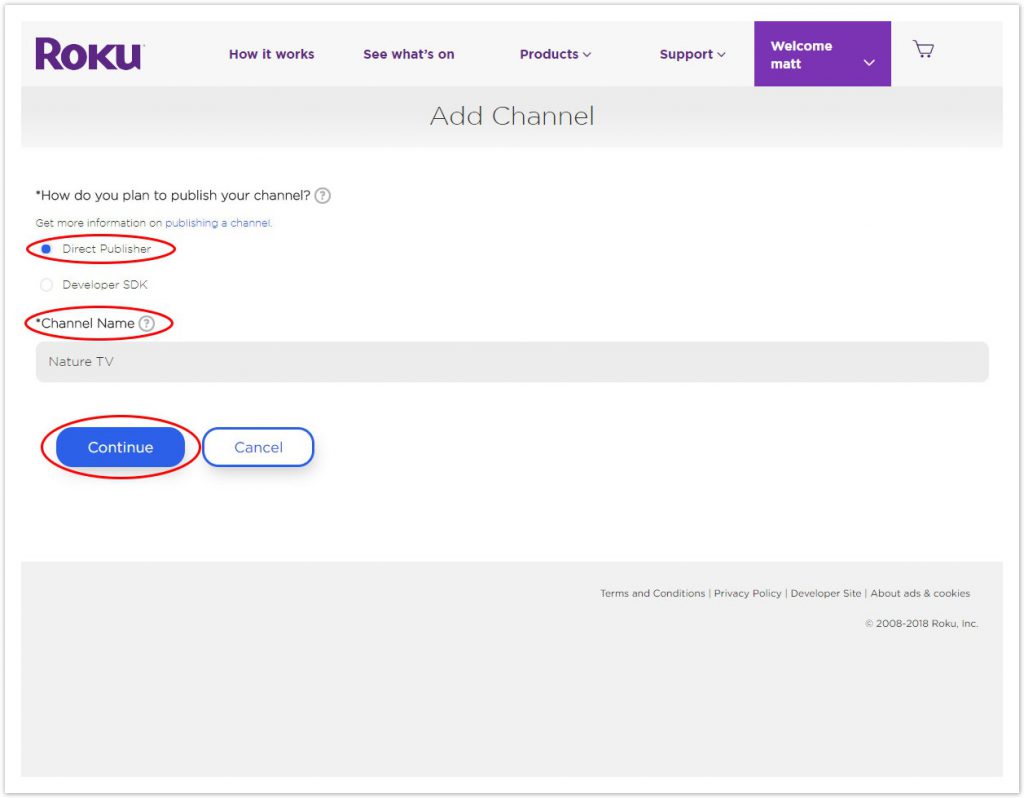
Step 3. Click Add Channel.
Step 4. Make sure that Direct Publisher is selected. Then give your channel a name using the Channel Name text box and click Continue.
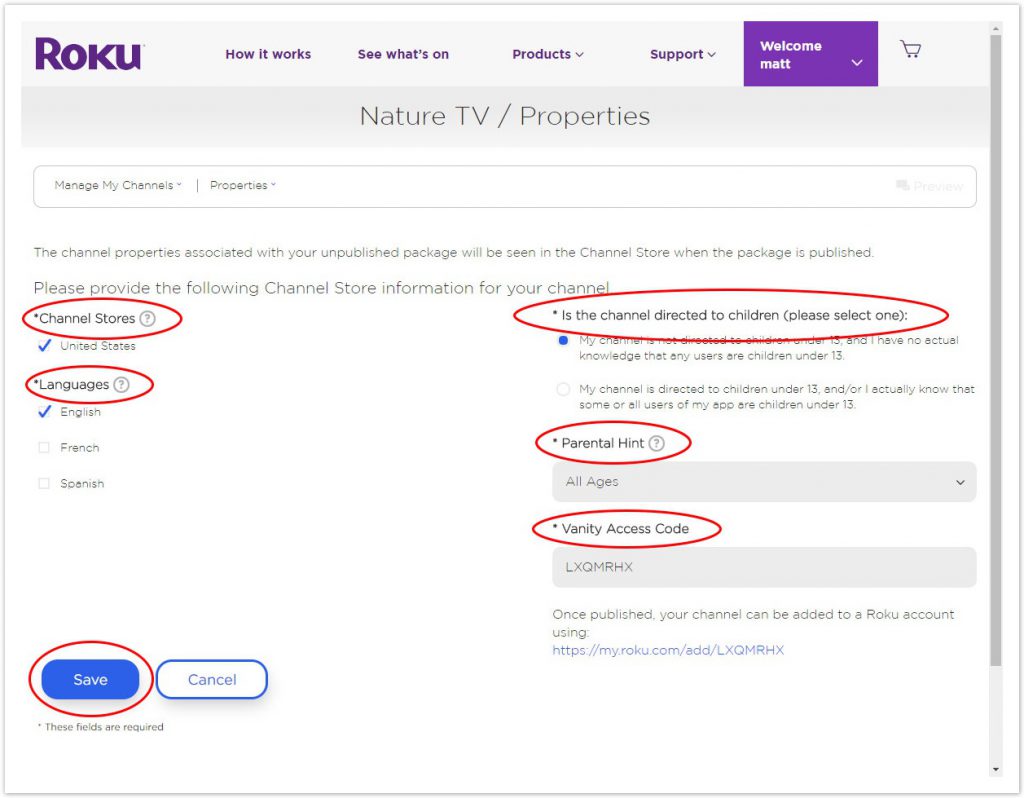
Step 5. Using Channel Stores, select the regions your channel will be available for viewing. Using Languages, select the available languages for your channel. Using Is the channel directed to children (please select one), select if your channel is directed to children or not. Using Parental Hint, set how Roku will rate your video content. Overall or individual based on each video’s rating. When you get to Vanity Access Code, copy the URL link it gives you to someplace. You will need to direct your customers to this URL to subscribe to your channel, allowing them to see your channel on their Roku device.
Sample URL: https://my.roku.com/add/0000000
Once you are all set, scroll to the bottom of the page and click Save.
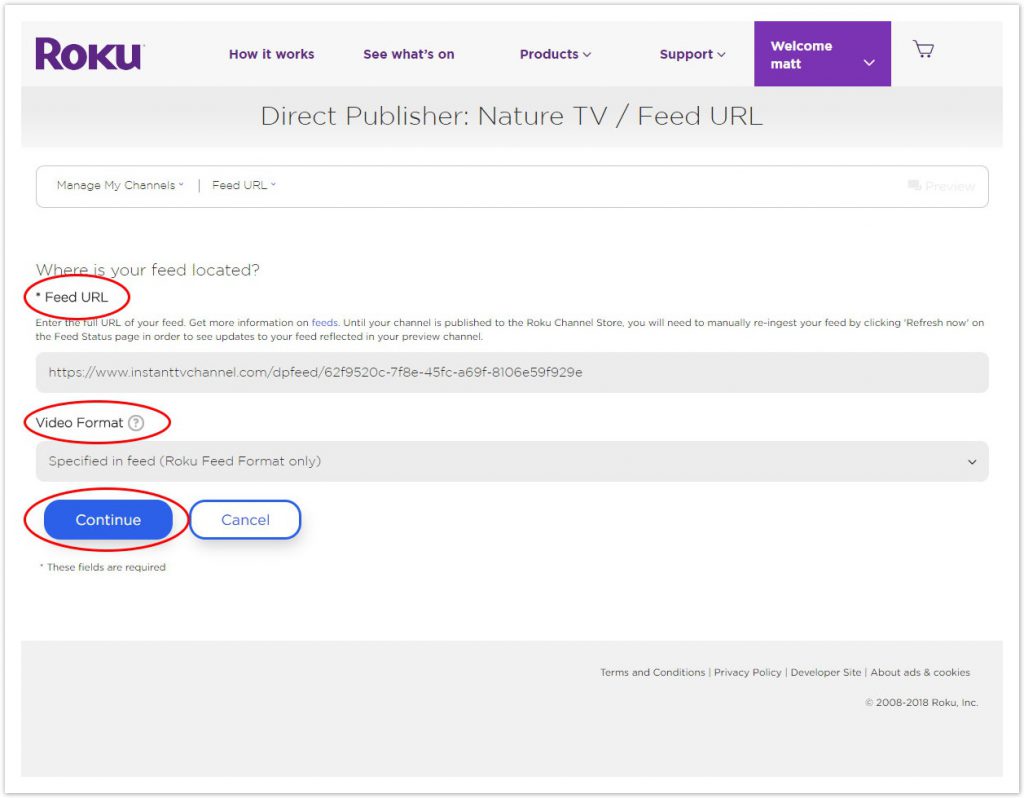
Step 6. Paste in your Feed URL copied from Adding Your EZWebPlayer Videos To Your InstantTVChannel Account: Step 25. Set Video Format to Specified in feed (Roku Feed Format only), because we set each video’s format in Adding Your EZWebPlayer Videos To Your InstantTVChannel Account: Step 25. Click Continue, if you are unable to continue please go back to your channel list on https://www.instanttvchannel.com/list and click your channel’s Feed icon. Then in the top center section click the Confirm Feed Refresh button and try to continue again on your Roku page. This will force your channel feed URL to refresh / update.
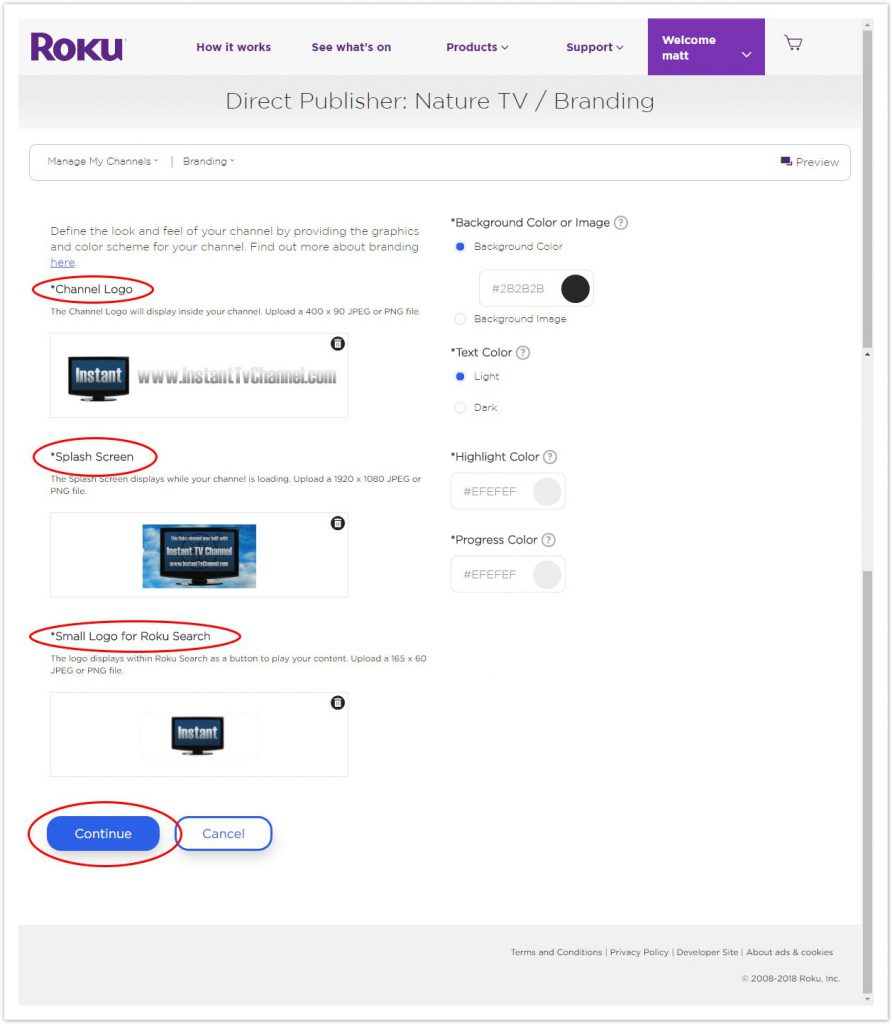
Step 7. Next, give your channel a Channel Logo, Splash Screen, and a Small Logo for Roku Search then press the Continue button.
Roku will let you know the dimensions your images should be. You will be able to find sample images on your instanttvchannel.com account at https://www.instanttvchannel.com/samples. These images should already be saved to your computer from Adding Your EZWebPlayer Videos To Your InstantTVChannel Account Step 8. Search for;
- channel-store-demo-540×405.jpg
- logo_400x90.png
- search_165x60.png
- splash_1920x1080.jpg
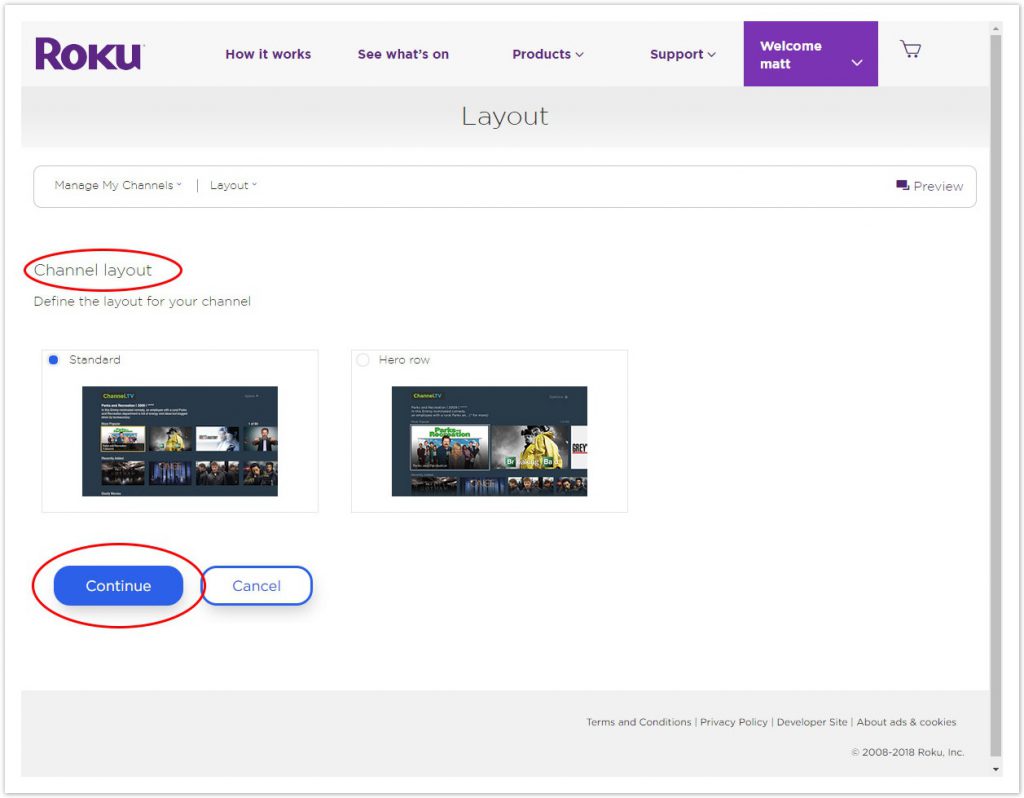
Step 8. Select your Channel layout then click Continue.
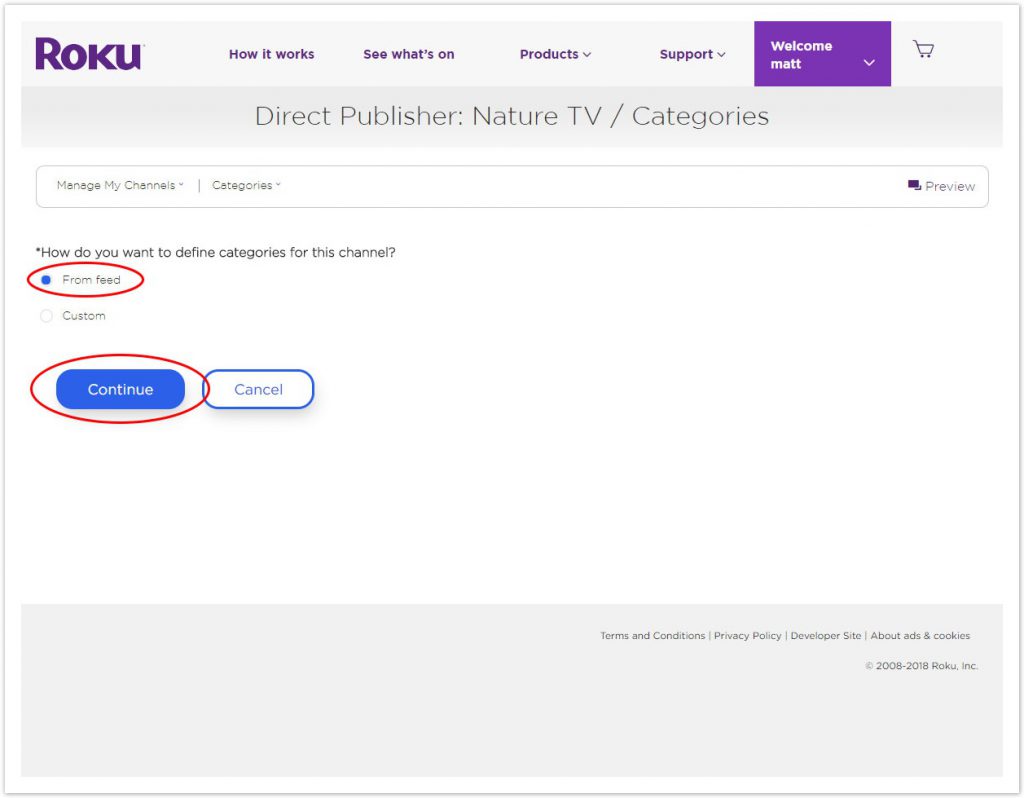
Step 9. Next, you will need to setup your channel’s Categories. Make sure that Form feed is selected. This way your channel’s categories are determine by your folder structure that you set up in Adding Your EZWebPlayer Videos To Your InstantTVChannel Account Step 4.Once this is done, click Continue.
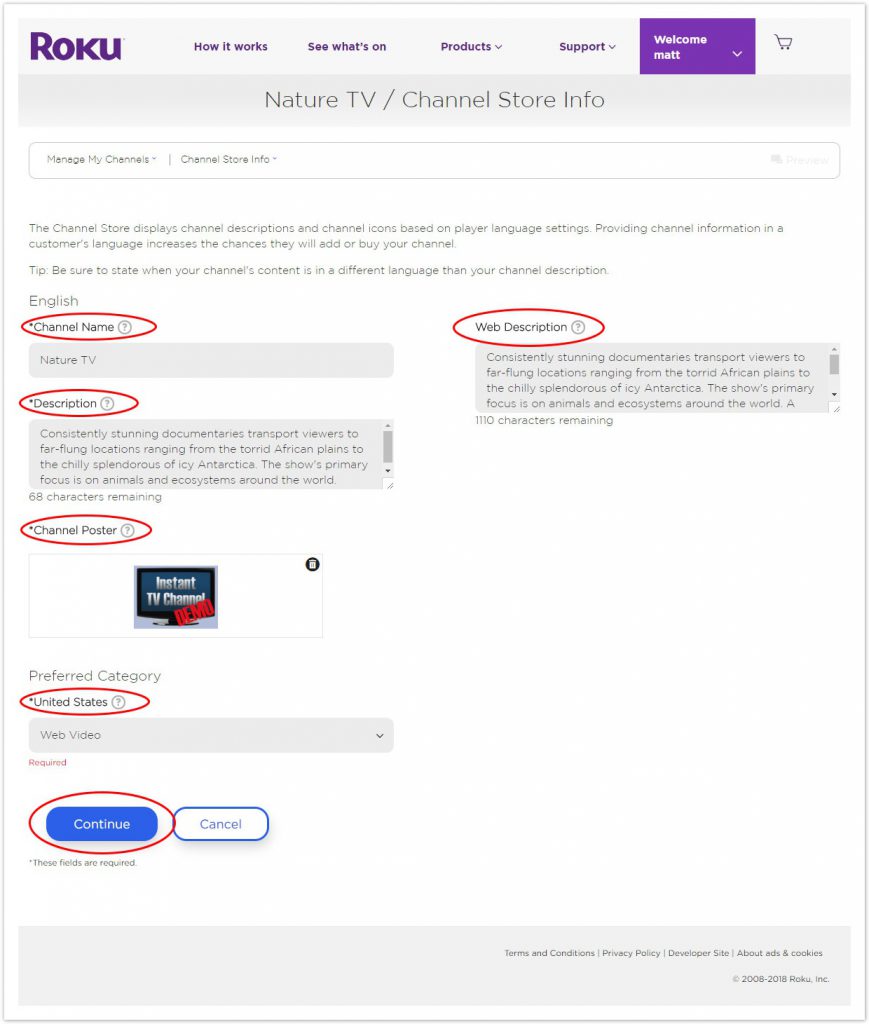
Step 10. Now go ahead and fill out your overall Channel Name, Description, Web Description. In Web Description type in the description of your channel. This will be used for web based marketing for your channel. The description should be very short and to the point, keeping in mind standard descriptive Web search optimization form using relevant keywords within the content.
Then add a Channel Poster. If you don’t have one yet, you can use the sample image from Step 4 titled channel-store-demo-540×405.jpg.
Set your Preferred Category you want your channel to show up in Roku’s category list. This will be the overall theme of your channel.
Sample: Web Video.
Then click Continue.
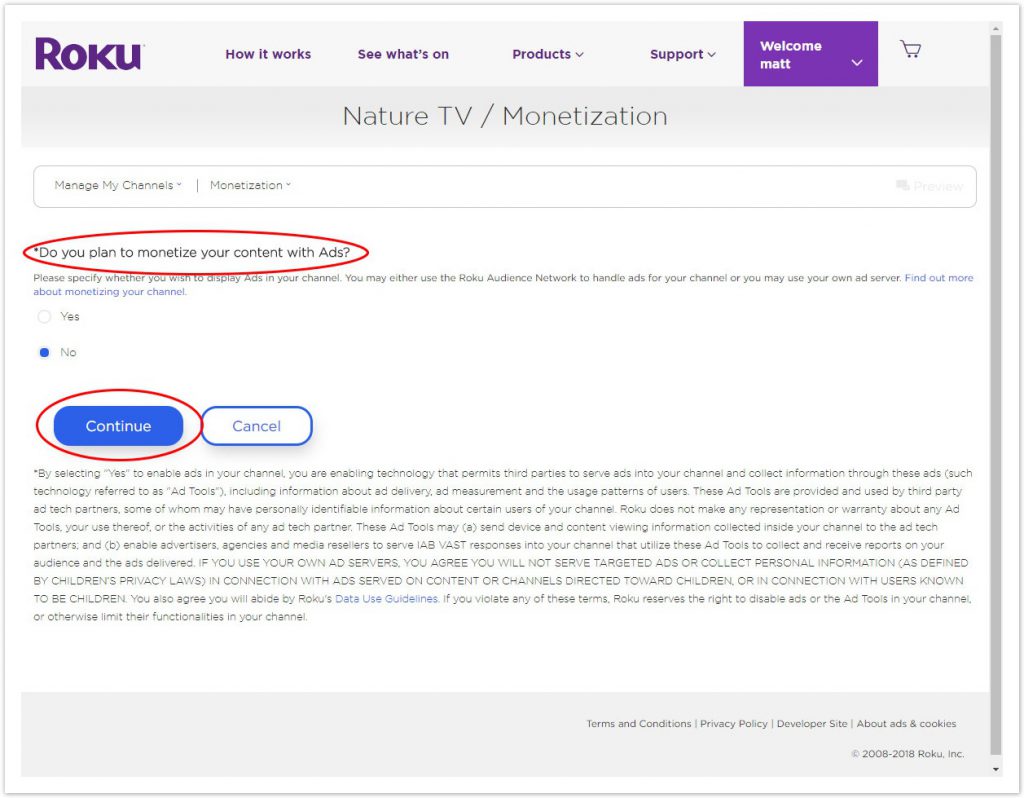
Step 11. Select if you want your channel monetized by Roku and click Continue.
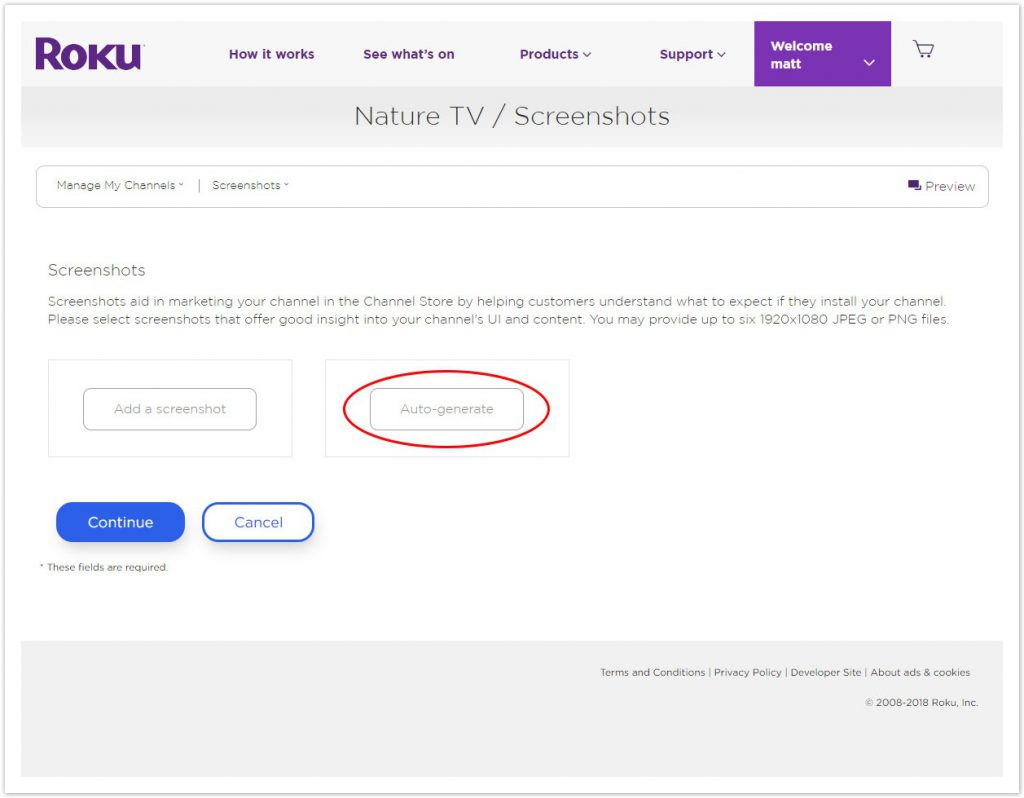
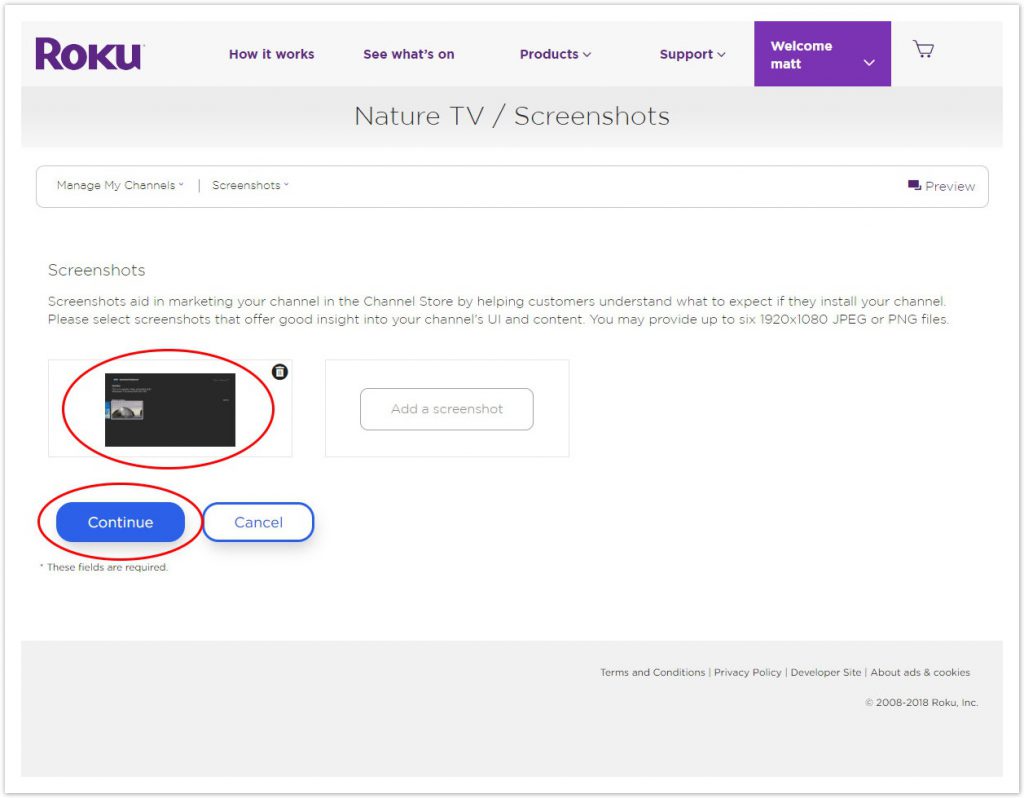
Step 12. Next lets get a placeholder image of your overall channel layout. Click Add a screenshot then a sample screenshot should be created for you. This can be changed at a later date once your channel is more full of content. Then click Continue.
Step 13. Almost done, go ahead and will out your channel’s contact information. This will tell Roku customer support and your viewers who to contact if an issue arises. Then click Continue.

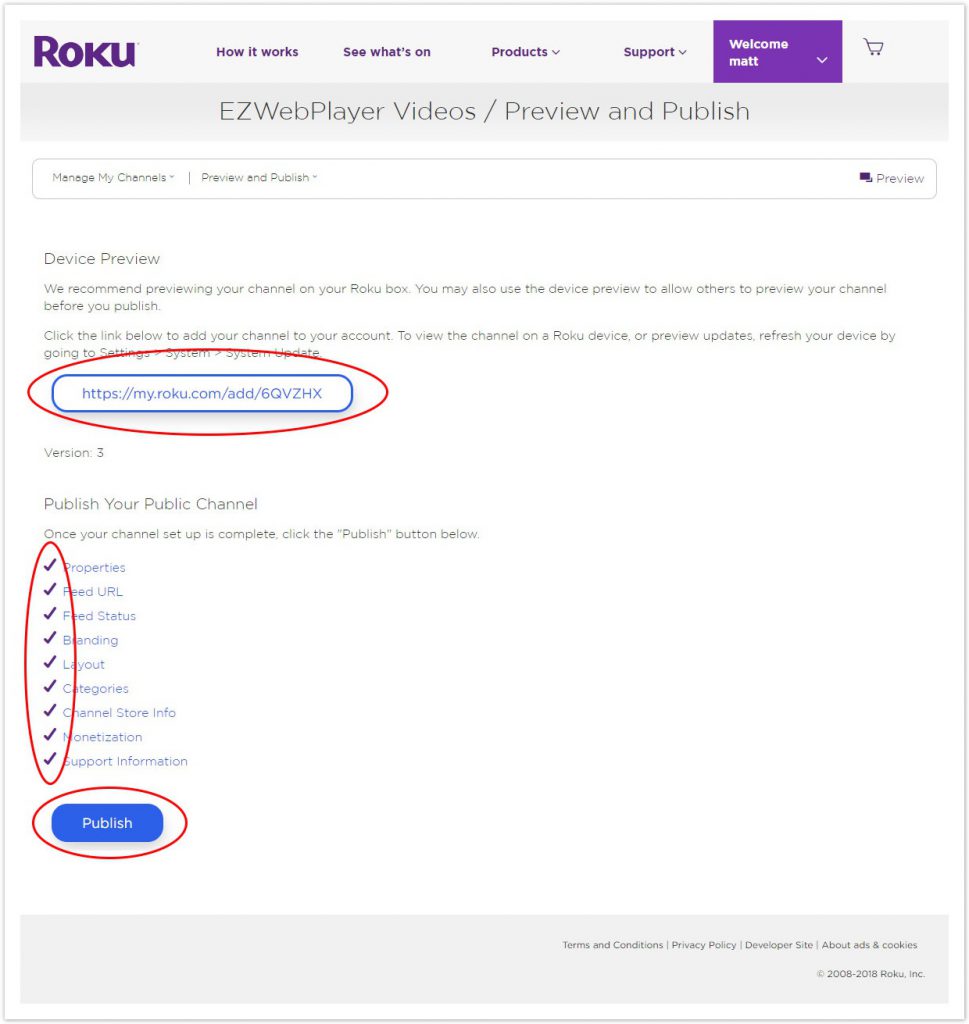
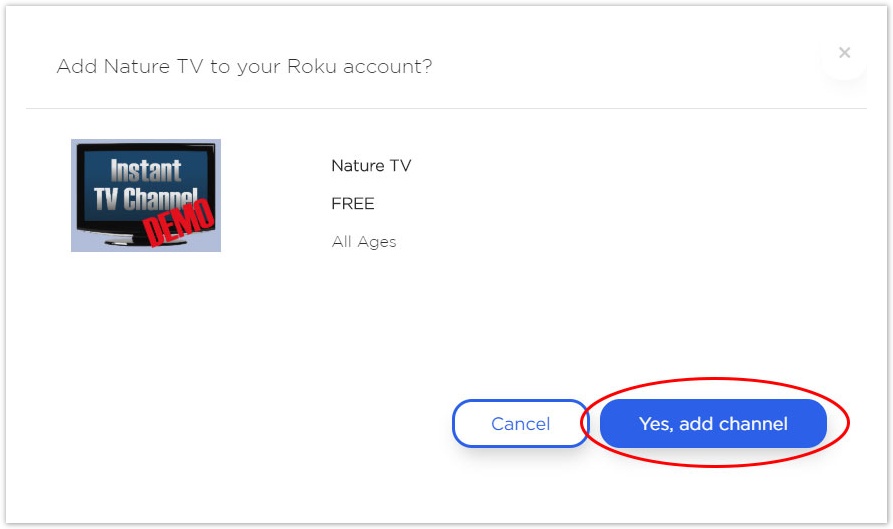
Step 14. Review your channel before you publish it. You will be able to click on the Add url Roku provides for your new channel to add it to your account. You can also copy this to the web so others can subscribe to your Roku channel. If you are ready and have check marks across the board, go ahead and publish your newly created Roku channel.
View Your Roku Channel On Your Roku Device
Step 1. Load up your Roku device and go to your Settings options.
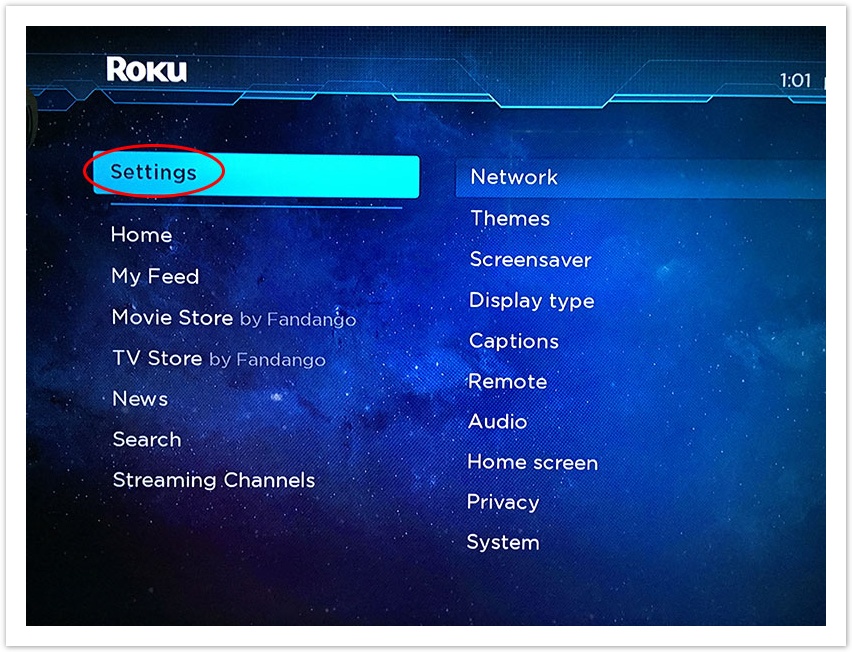
Step 2. Select System.

Step 3. Then select System Update.

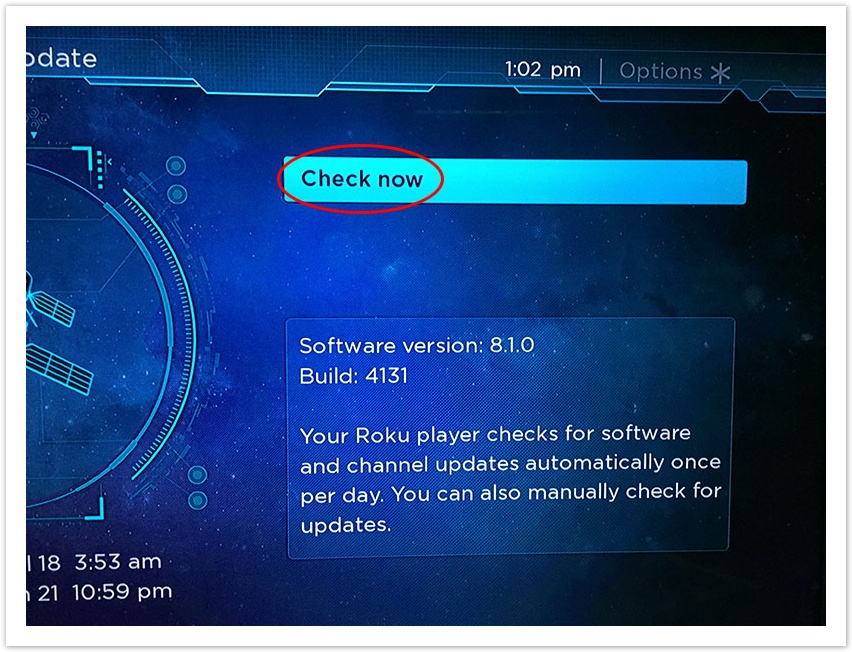
Step 4. Select Check Now. This should look and see that you have a new channel attached to your Roku account and force an update to add it to your Roku device.
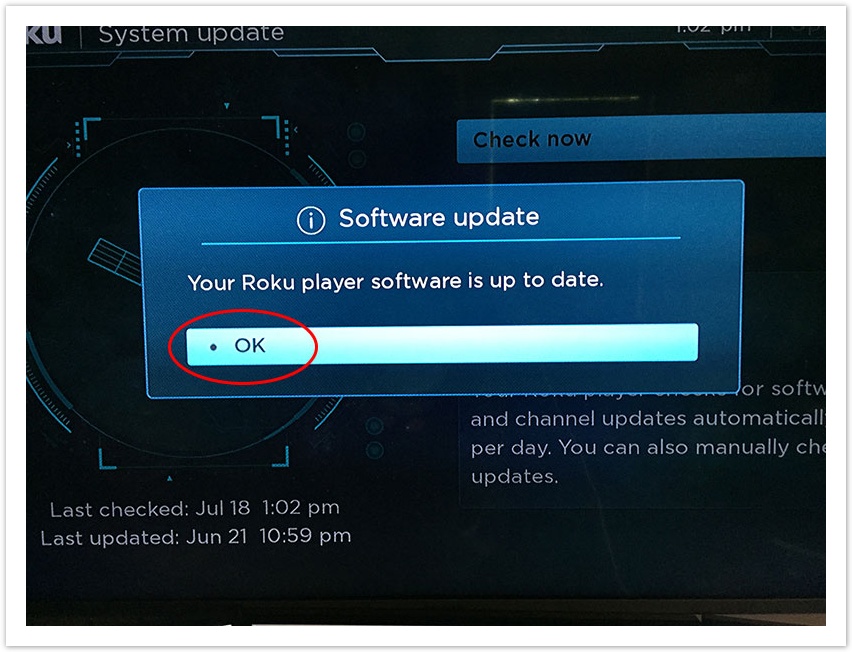
Step 5. Select OK.
Step 6. Go ahead and navigate back to your Home options.
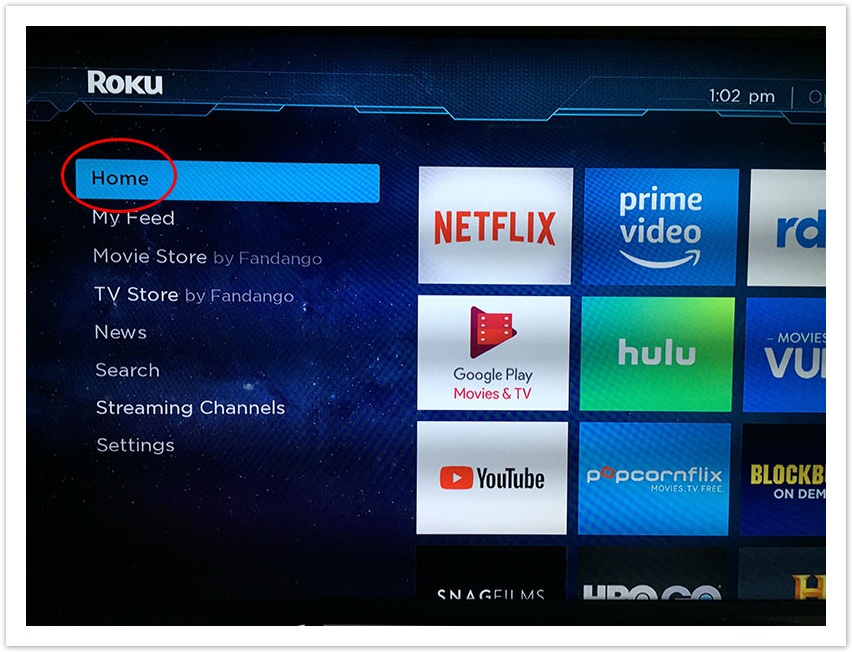
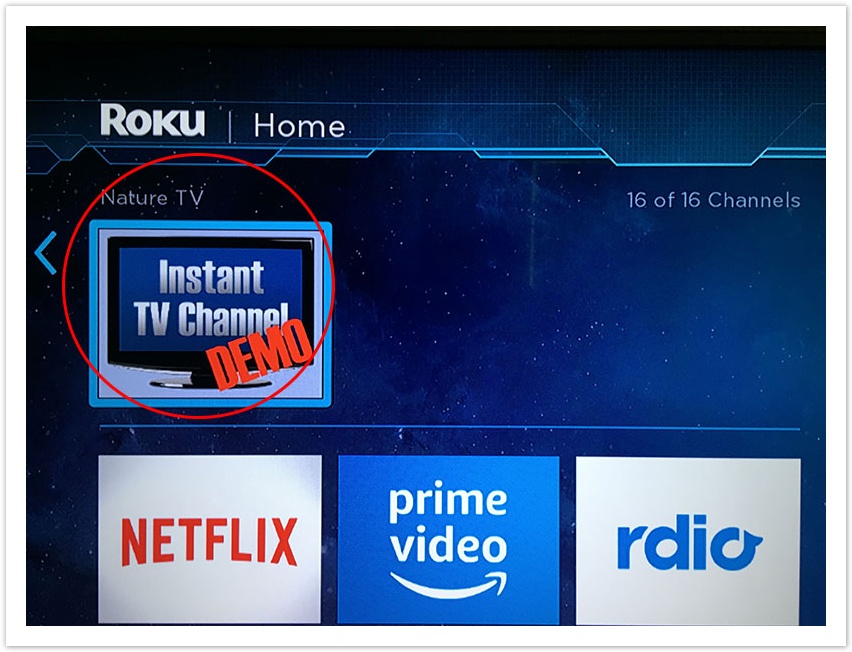
Step 7. You will now be able to locate your new channel. Go ahead and select it.
Step 8. Now you will be able to play your EZWebPlayer hosted videos on your Roku device.
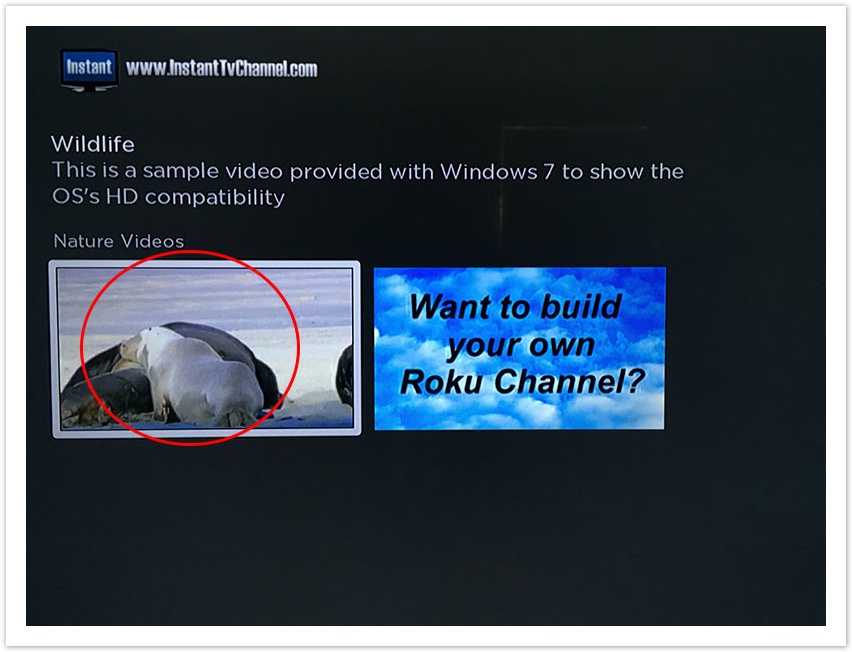
Step 9. Here is your EZWebPlayer video being played on your Roku device.

Updating Or Adding New Videos To Your Roku Device
Step 1. To add new videos or update your existing videos, you can do so in your instanttvchannel.com account. On instanttvchannel.com go to your Channels page and make sure you have your channel you wish to edit selected, then go to your Content page and edit existing or add new videos to your channel.
Step 2. Once your videos are updated go back to your Channels page and click on your channel’s Feed icon. Then make sure to press the Confirm Feed Refresh button in the top center section. This will re-cache your channel feed that Roku uses to build your channel.
Step 3. Updates normally take 24 hours to re-cache in your Roku device. To see the updates right away, repeat the steps in View Your Roku Channel On Your Roku Device.