Exclusive RIGHT FEATURED
Environment for Your Videos
We at EZWebPlayer develop the environment to give you right-featured video hosting and playing services with personal customer service at an affordable price. And we partner with Amazon Web Services to deliver our platform. We chose Amazon Web Services because of their deep and broad infrastructure. Amazon’s S3 and CloudFront service with unlimited storage, cloud-based lightning-fast speeds, and reliable 24/7 deployment are unique in the web video hosting industry.
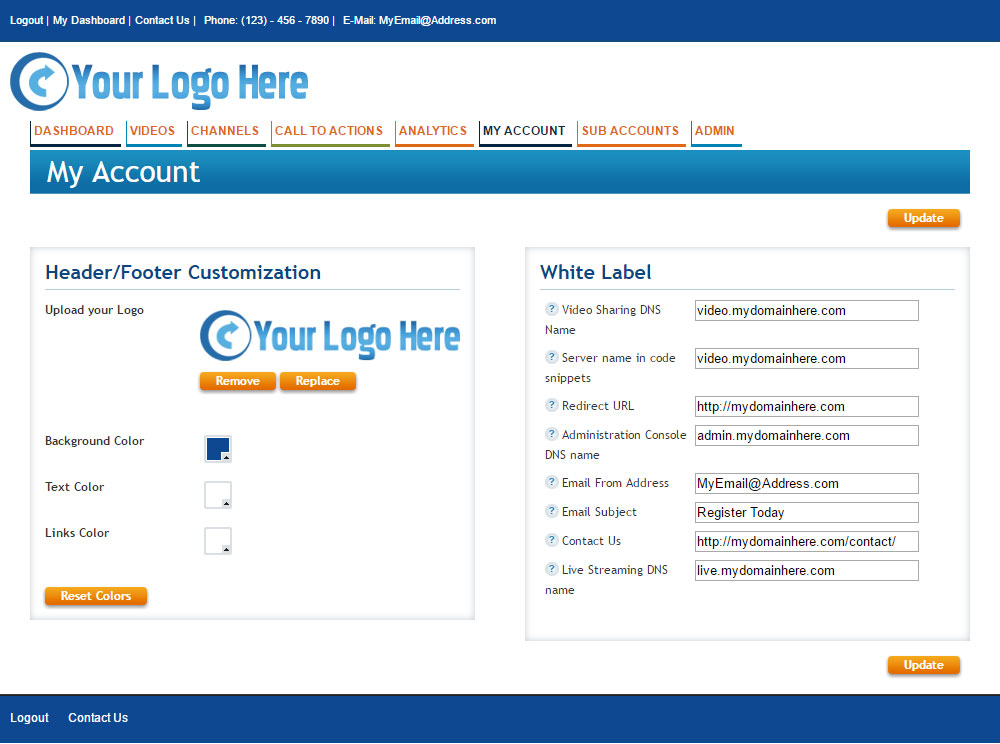
Subscribe to our White Label CUSTOM Plan and you get all this: -Complete administration console branding, -Sub Account logins, -Custom domain-branded players, -Domain-branded video sitemap, -Domain-branded video landing pages, -Reselling and much more!
EZWebPlayer’s White Label CUSTOM allows you to avoid the enormous cost of platform development— you simply “skin” (customize) our site to look like yours. You can use our technology for your own needs while you resell it.

Video On Demand & Livestreaming
Archived, On-Demand videos are the mainstay of the web video industry. But, EZWebPlayer makes even standard on-demand video come alive and over the top with complete control of the Player like no other web video host. Every control and nuance of the Player is under your control. And, the same is true for livestreaming with EZWebPlayer. Every level of our environment offers something more than the humdrum load and play.
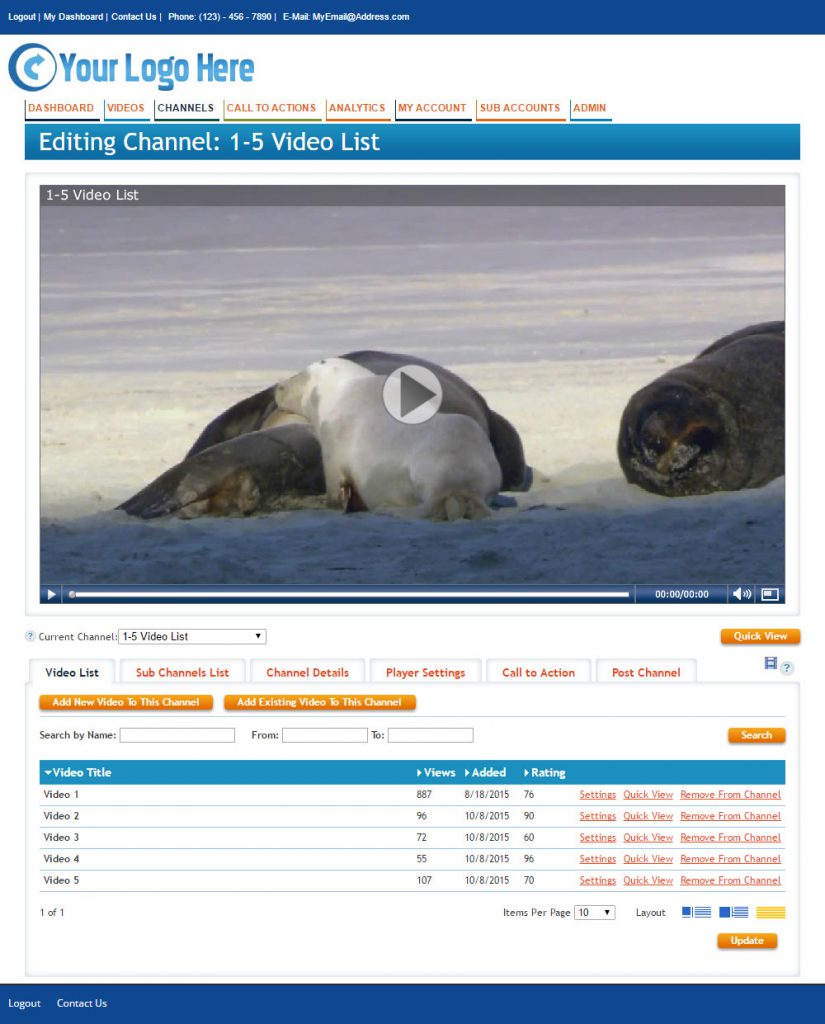
Channels
EZ organization for you and your staff— Increased views from your audience.
EZWebPlayer’s powerful and deep organization structure is called Channels. Planning ahead and organizing once saves huge blocks of time. But the best part is, Channels allows your viewers to easily access your library and choose the videos they want to view, or you want them to watch. When getting your story out is mission critical, branded Channels is the way to go.
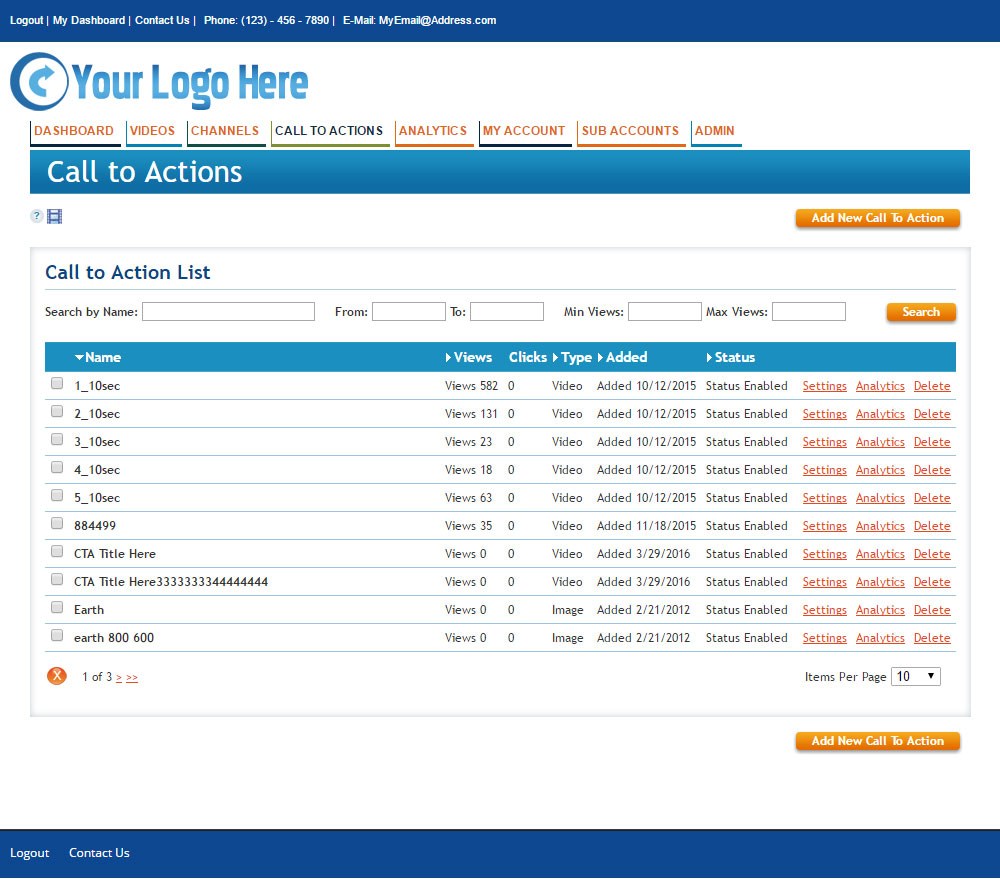
Calls to Action (CtA’s)
Add serious traction with pre-roll, post-roll, and popup advertising CtA’s.
Adding Calls to Action to videos can boost your income. Advertise your own product or service, or sell advertising space to others. EZWebPlayer gives you several EZ ways to cash in on advertising.
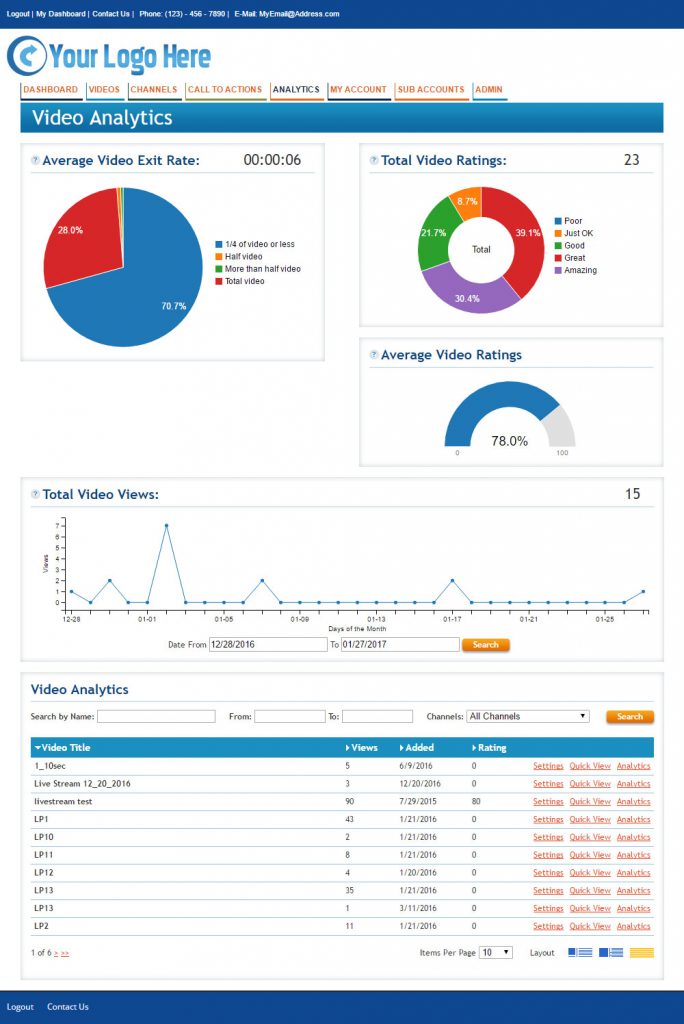
Analytics
Track your viewer stats in at-a-glance and detailed displays.
Whether you’re sharing videos to entertain, to sell products and services or to educate and inspire, the videos can’t just “look good”– they MUST perform. EZWebPlayer’s analytic tools give you precise metrics to determine a wide range of performance aspects so that you can make the most of your web video assets. Keep your videos climbing towards that sweet spot where they are gaining the most real traction possible.
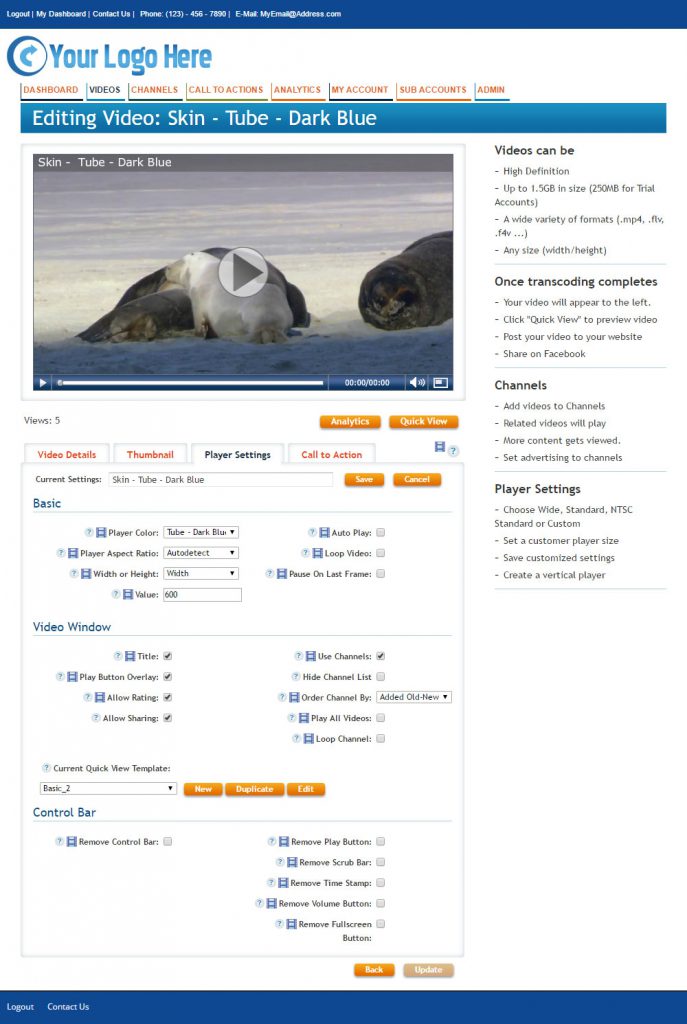
Player Customization
Player controls and interaction devices— turn them on and off as needed.
These are YOUR players and you want them to operate YOUR way, so we allow you to make them appropriately unique but still uniform for a truly top level appearance and user experience. There is no limit to the number of unique Players you can create and save.
Make my Account White Label
Reach more and do more with custom domain branding.
Make the Player truly yours as well as making it fit seamlessly into your web site if you want. Allow your videos to reach out to your viewers with your own custom logos and messaging with a seamless message of professional stature. Every video, every view, with your identity.